
In this article, we will show you step by step how to set up Google Tag Manager with Borlabs Cookie 3.0 and what you need to keep in mind during the process.
- The event used to signal consent is now predefined by us.
- GTM can now be integrated locally, bringing it more in line with GDPR principles.
- If you are using the "Borlabs Cookie Consent Variable" GTM template and GTM suggests an update, please install it.
The update is also compatible with Borlabs Cookie 2.0 and can therefore be installed at any time without concern.
Configure and Install Google Tag Manager
Please note: If you are currently following our Quick Start Guide and installed the Google Tag Manager package using the Scanner, you can skip Step 1.
Select the Google Tag Manager Package
In Borlabs Cookie, open the Library and search for the Google Tag Manager package.
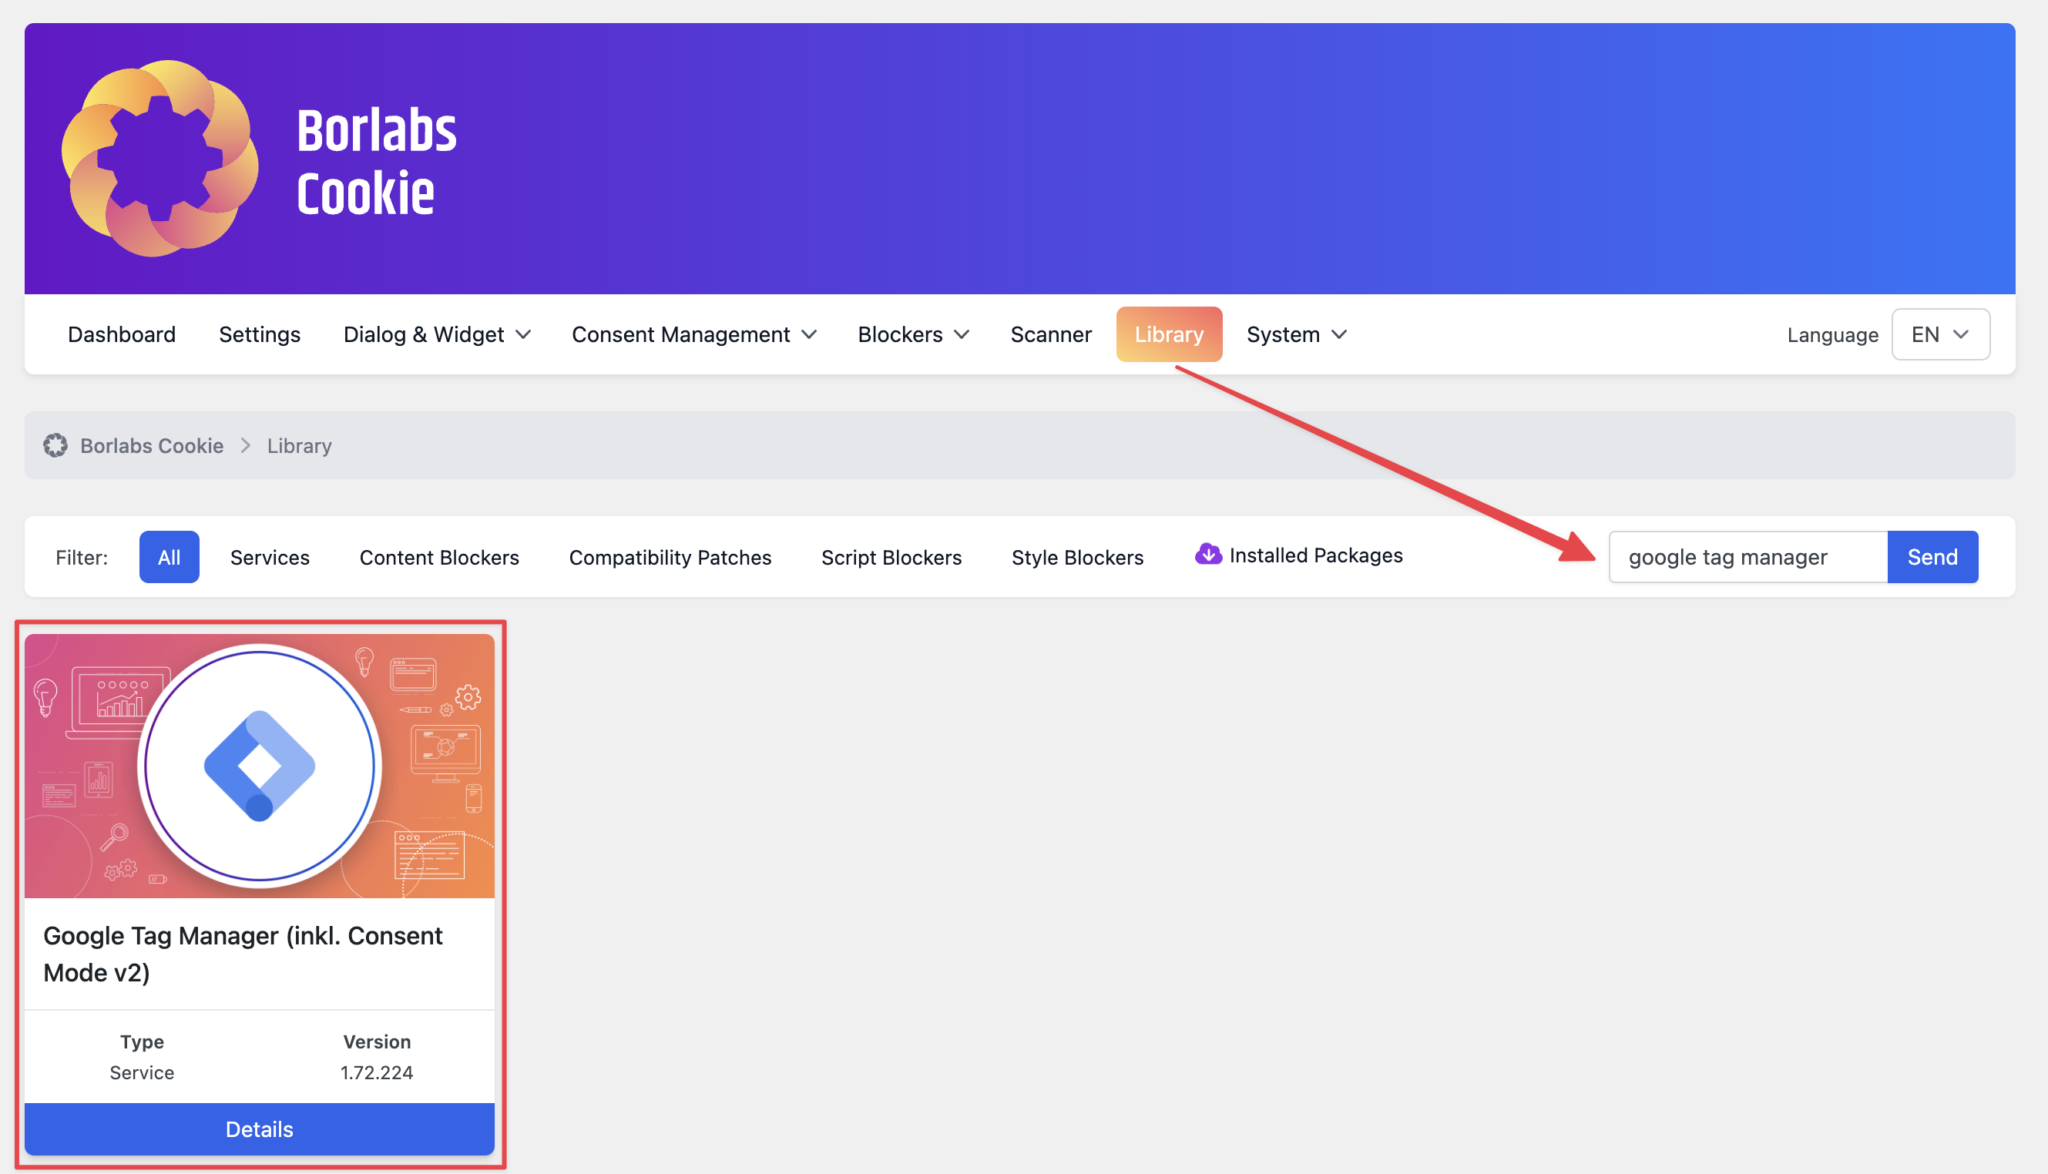
Then click the "Details" button here.
Install Google Tag Manager
You will now be taken to the Google Tag Manager package, which contains all relevant information about Google Tag Manager.
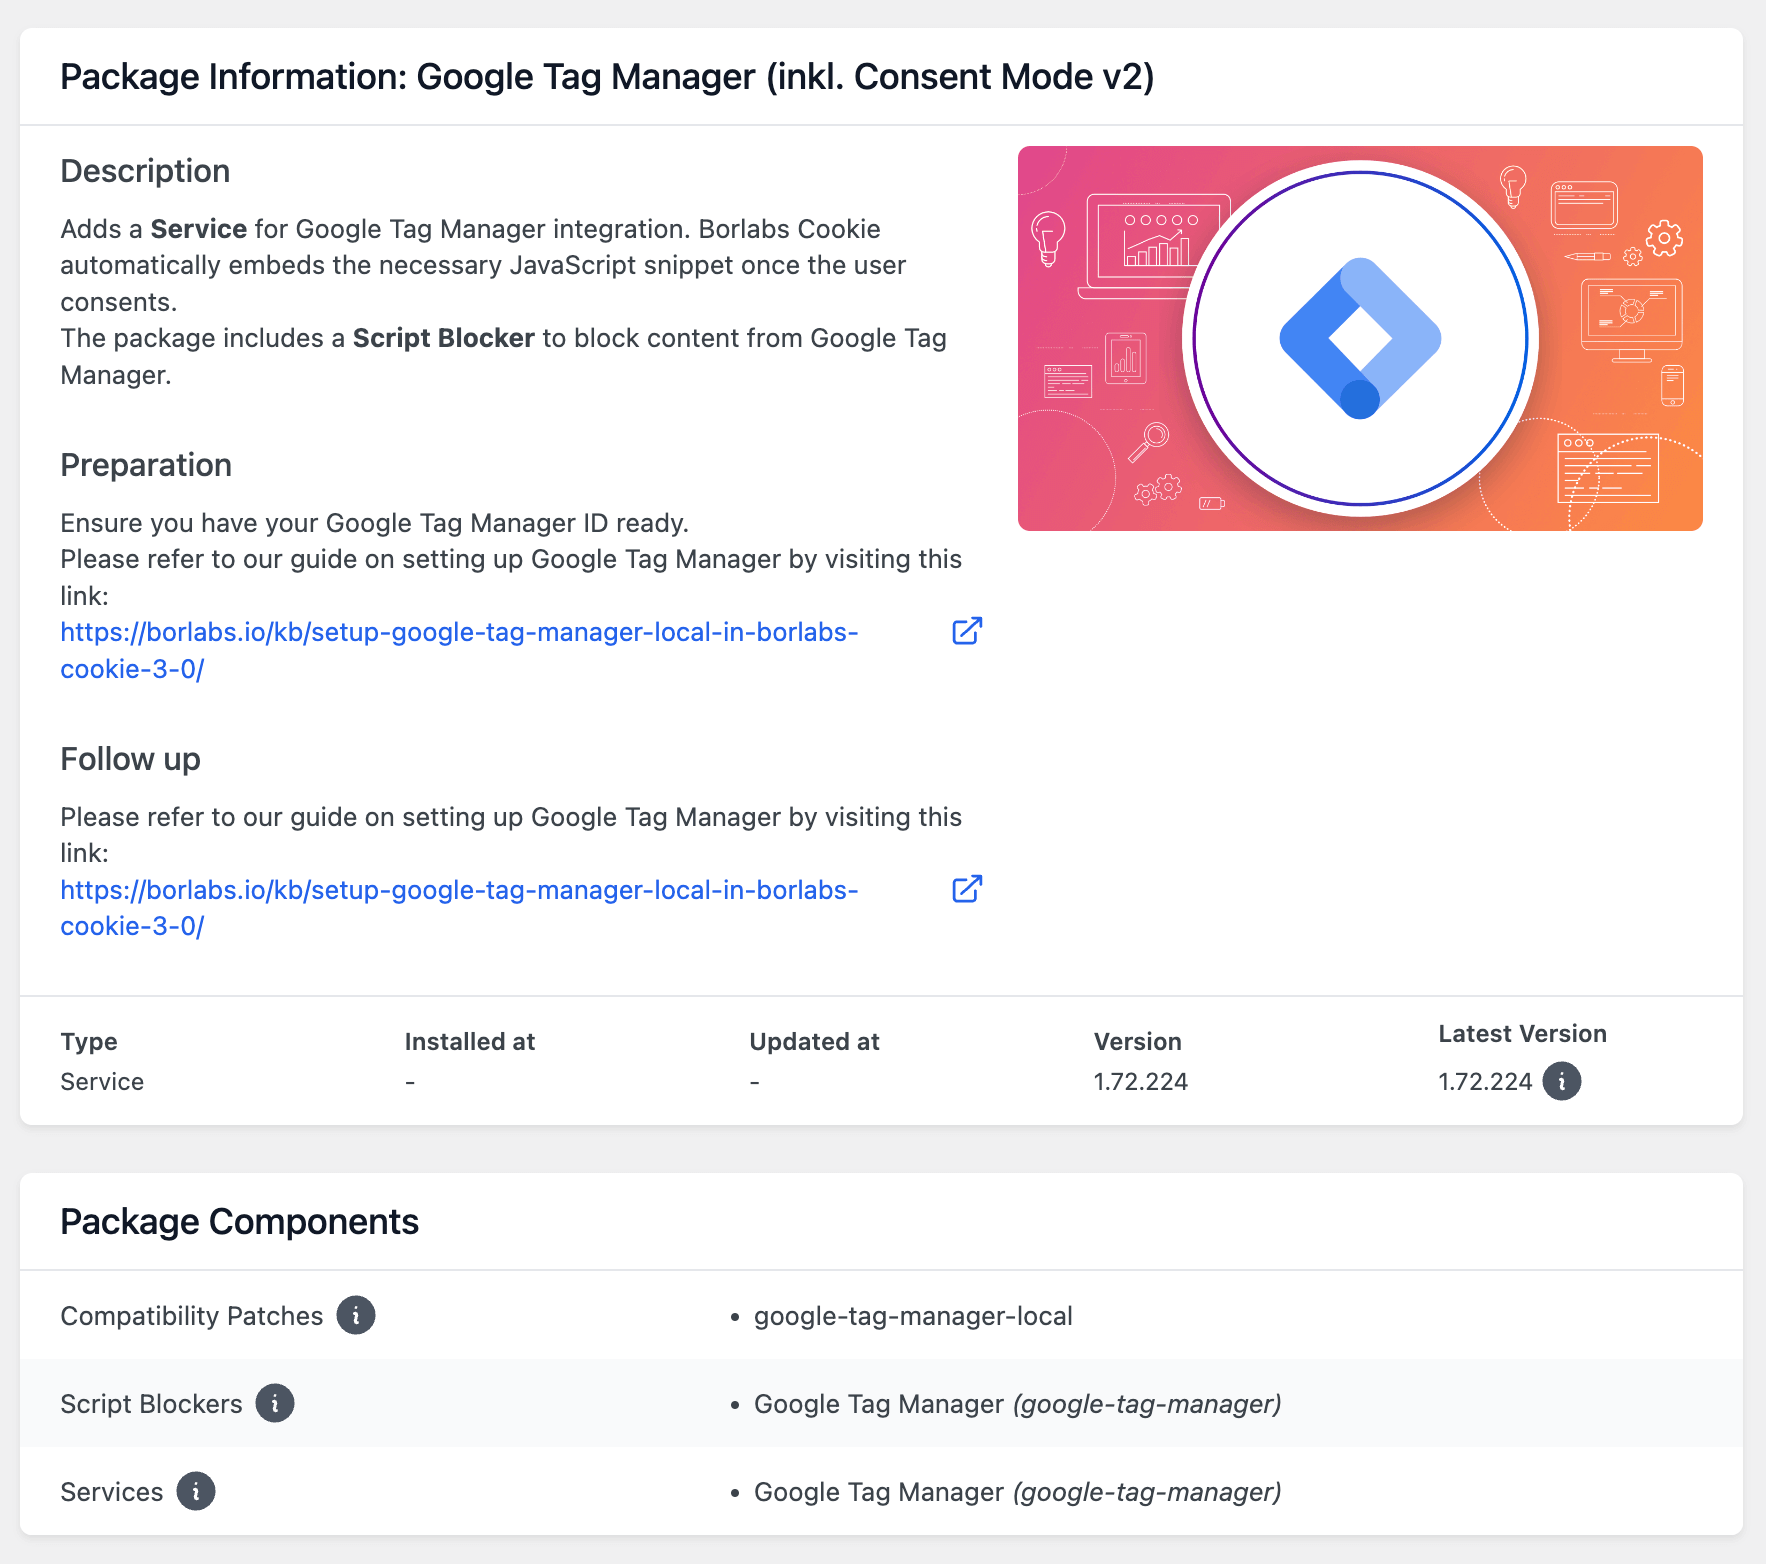
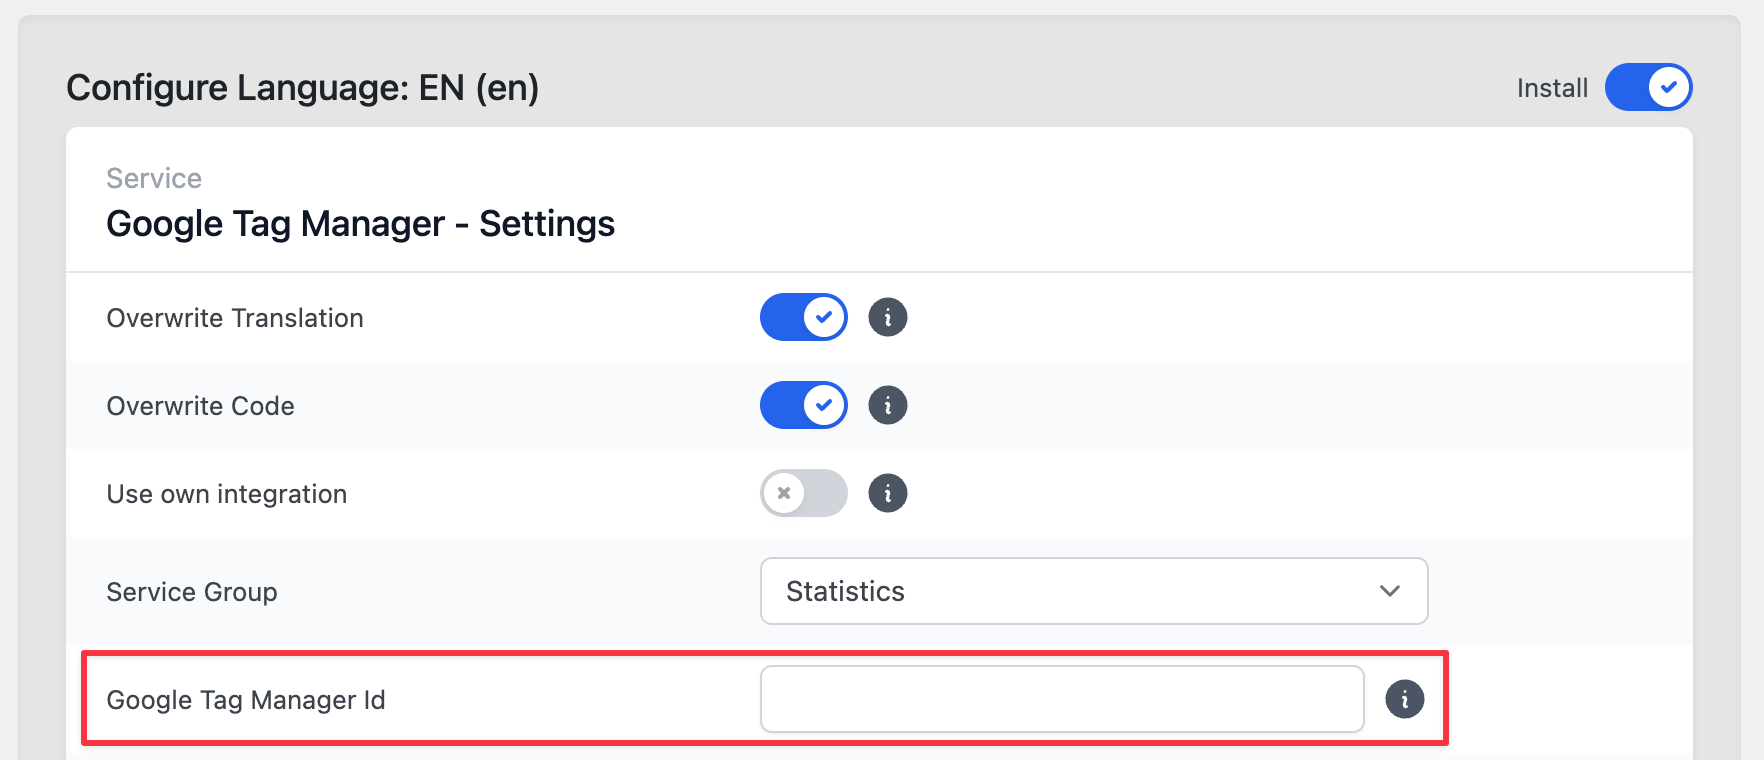
Scroll down to the "Google Tag Manager Settings" section.
Enter your GTM ID and configure any additional settings as needed.
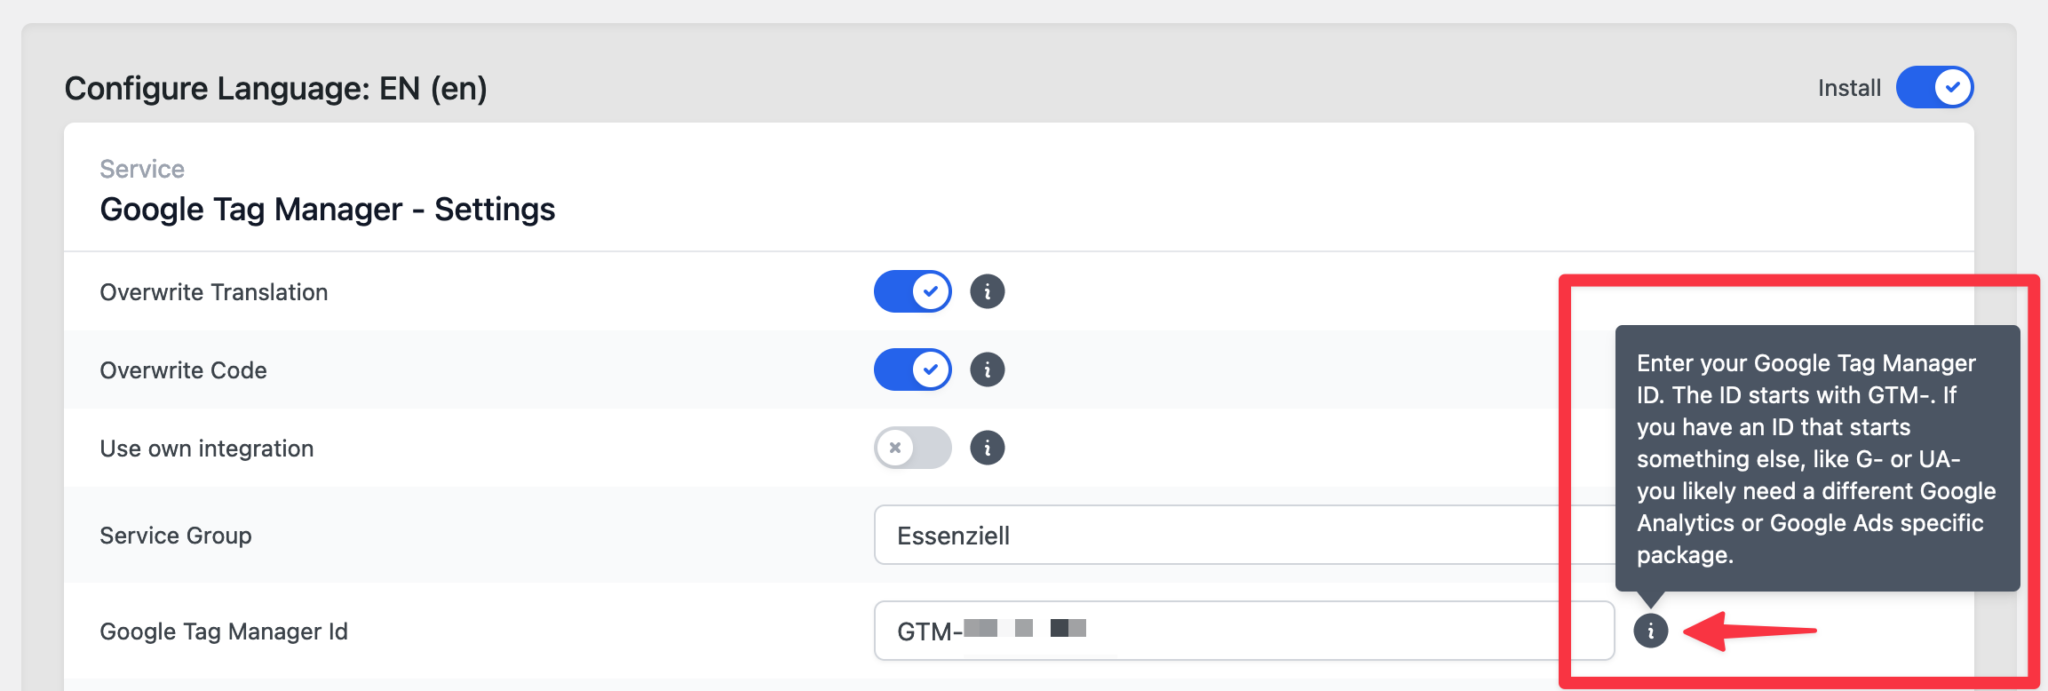
Descriptions for all other settings can be accessed via the corresponding Info icon.
Further down the page, you will find an important new feature of our Google Tag Manager package:
Store Google Tag Manager Locally (Recommended)
Starting with package version 1.39.23, you can store Google Tag Manager locally.
When using this feature, change the Service Group of the Google Tag Manager Service from "Statistics" to "Essential".
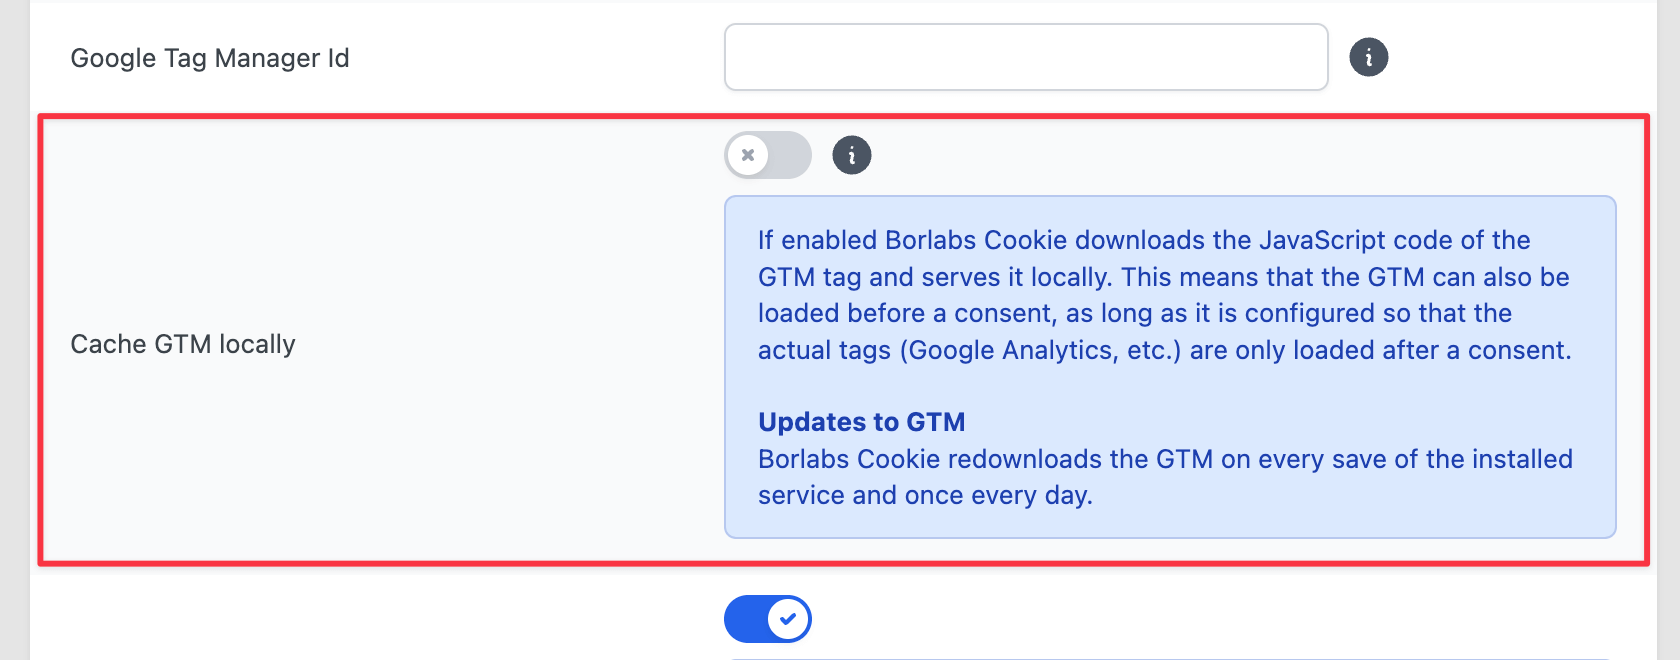
What does this mean for you?
When enabled, Borlabs Cookie downloads the JavaScript code of the GTM container and serves it locally.
This offers a significant advantage: the GTM script can be loaded before consent is obtained, provided that the tags within the GTM container (e.g. Google Analytics) are configured to fire only after the required consent has been granted.
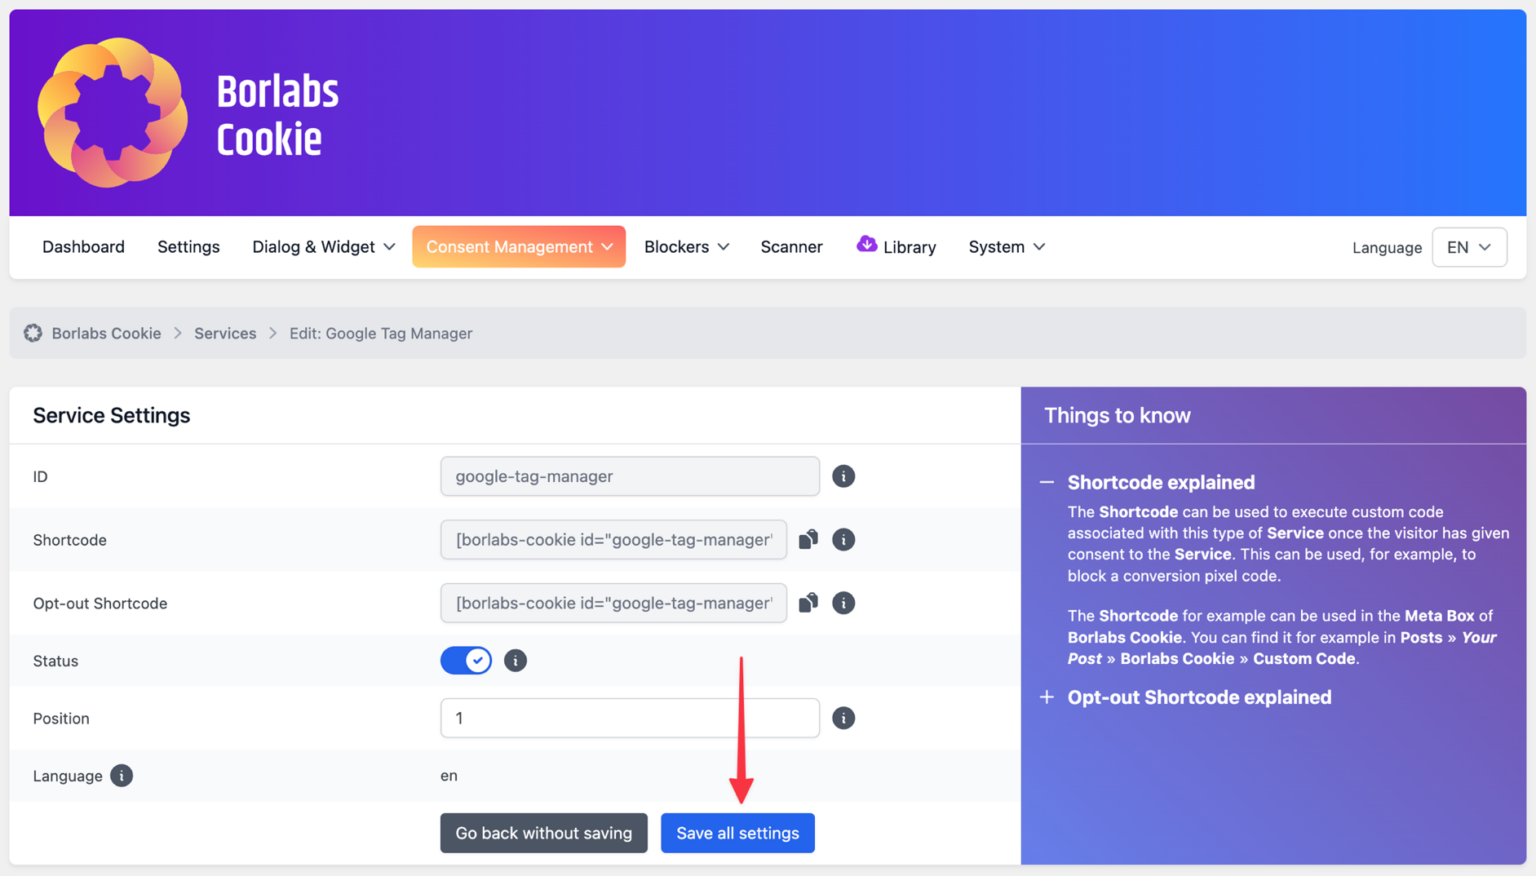
Once you have entered all required information and completed your configuration, click the "Install" button.
Consent Mode
As Google recommends using Consent Mode, you can enable it during the Google Tag Manager setup by activating the "Enable Consent Mode" option.
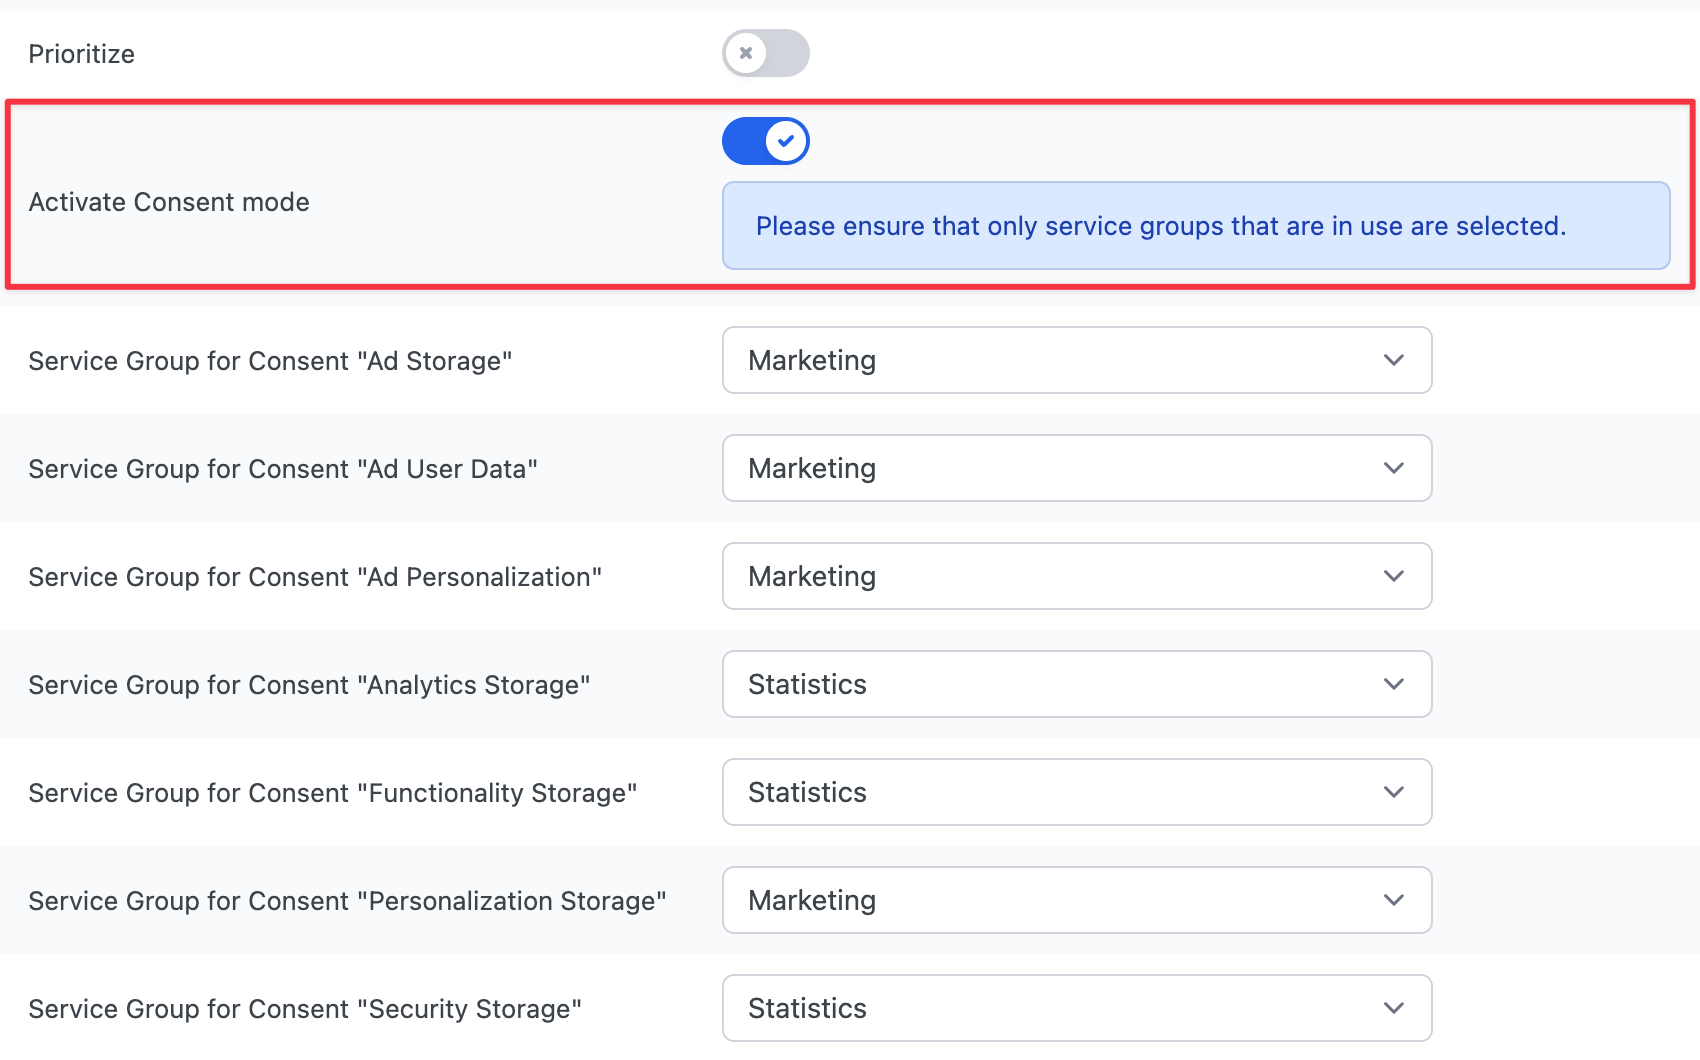
You can then choose which Service Groups should be assigned to the respective consent types.
This is necessary because Consent Mode consents are not based on individual services, such as Google Analytics, but on general data processing.
For example, in the configuration shown in the screenshot, granting consent to the "Marketing" Service Group would send consent for "Ad Storage", "Ad User Data", "Ad Personalization", and "Personalization Storage" to Google.
The new consent mode offers the following pre-defined consent types:
| Ad Storage | Allows the storage of advertising-related data, such as cookies |
| Ad User Data | Defines consent for sending advertising-related user data to Google |
| Ad Personalization | Defines consent for personalized advertising |
| Analytics Storage | Allows the storage of analytics-related data, such as cookies used to measure visit duration |
| Functionality Storage | Allows the storage of data that supports the functionality of the website or app, such as language preferences |
| Personalization Storage | Allows the storage of data related to personalization, such as video recommendations |
| Security Storage | Allows the storage of security-related data, such as data used for authentication, fraud prevention, and other user protection mechanisms |
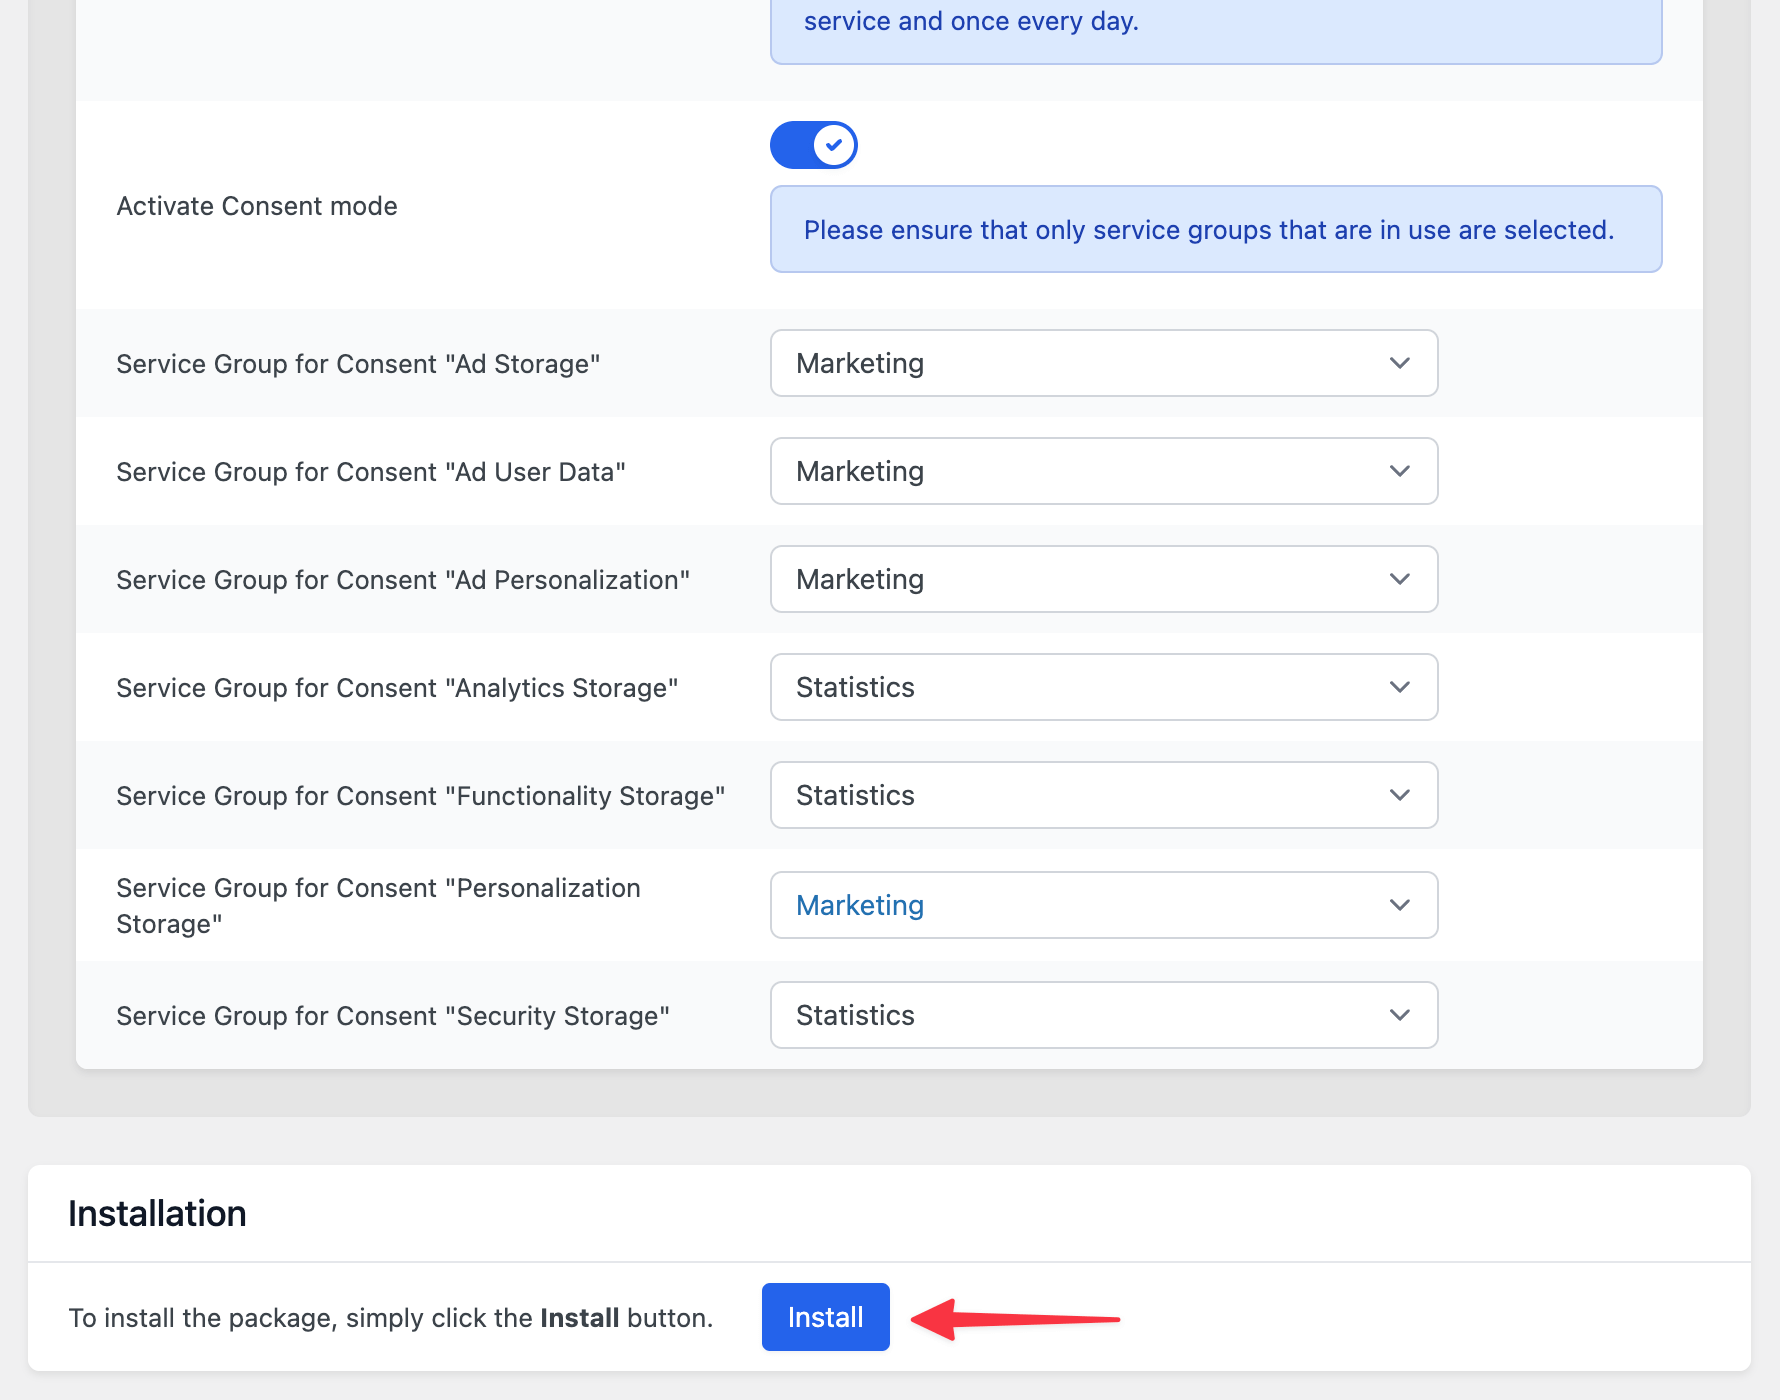
The Google Tag Manager package will now be installed, and all required settings and data will be configured in Borlabs Cookie.
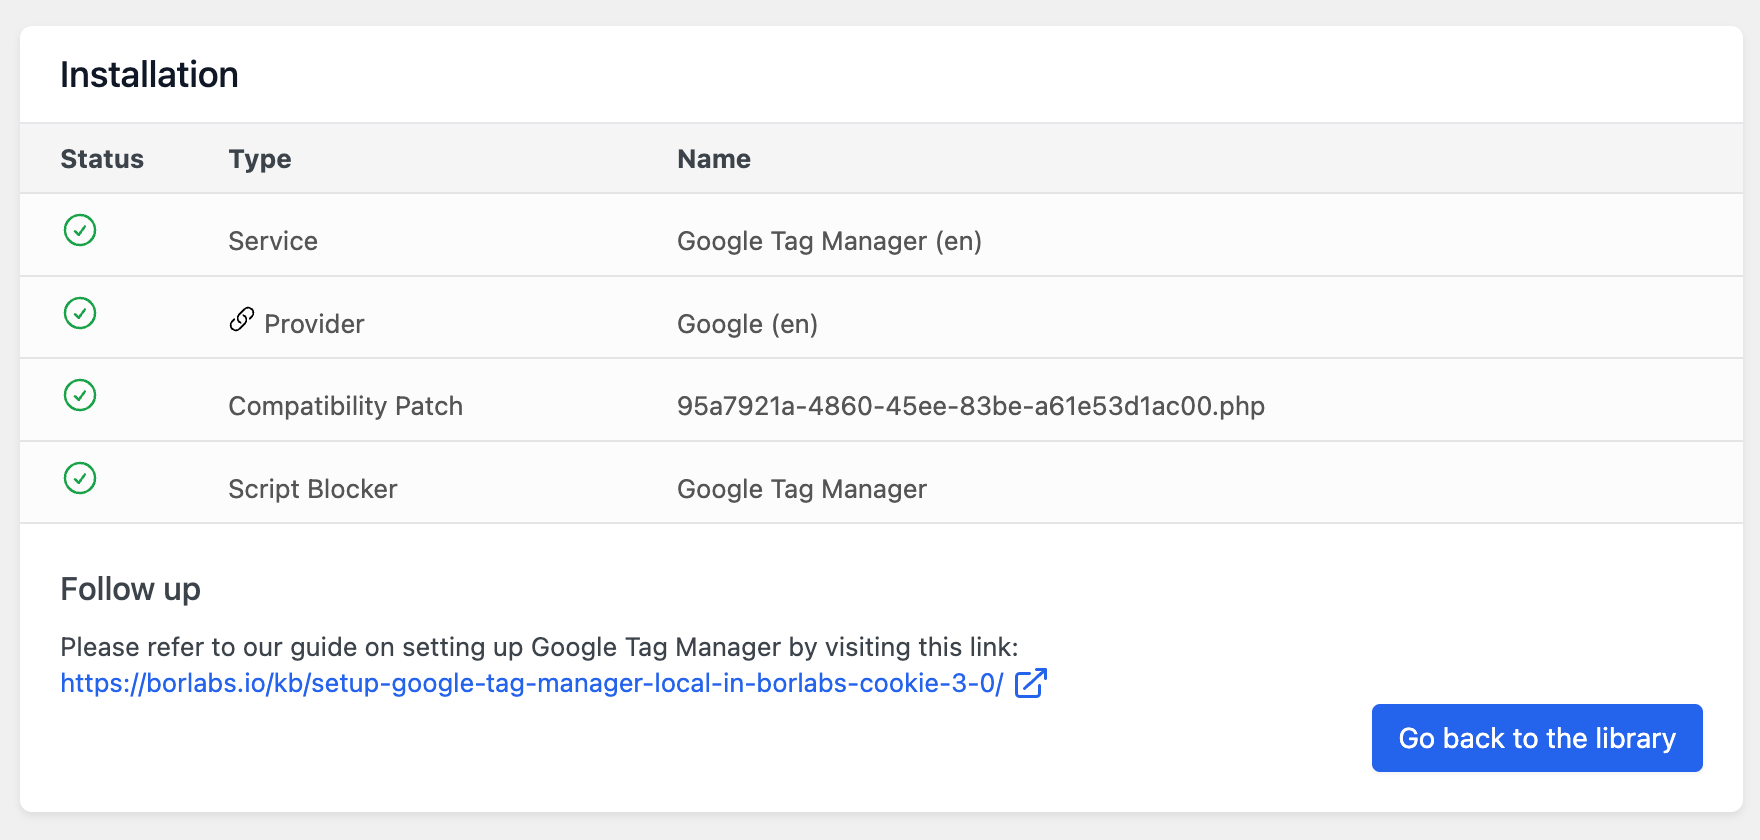
If you now navigate to"Services", where all configured Services are listed, you will also find the Google Tag Manager Service that was installed in the previous step.

Add a Service
In this example, we will show you how to set up Google Analytics with Google Tag Manager in Borlabs Cookie.
Open the Library and search for the Google Analytics package if it has not already been installed.
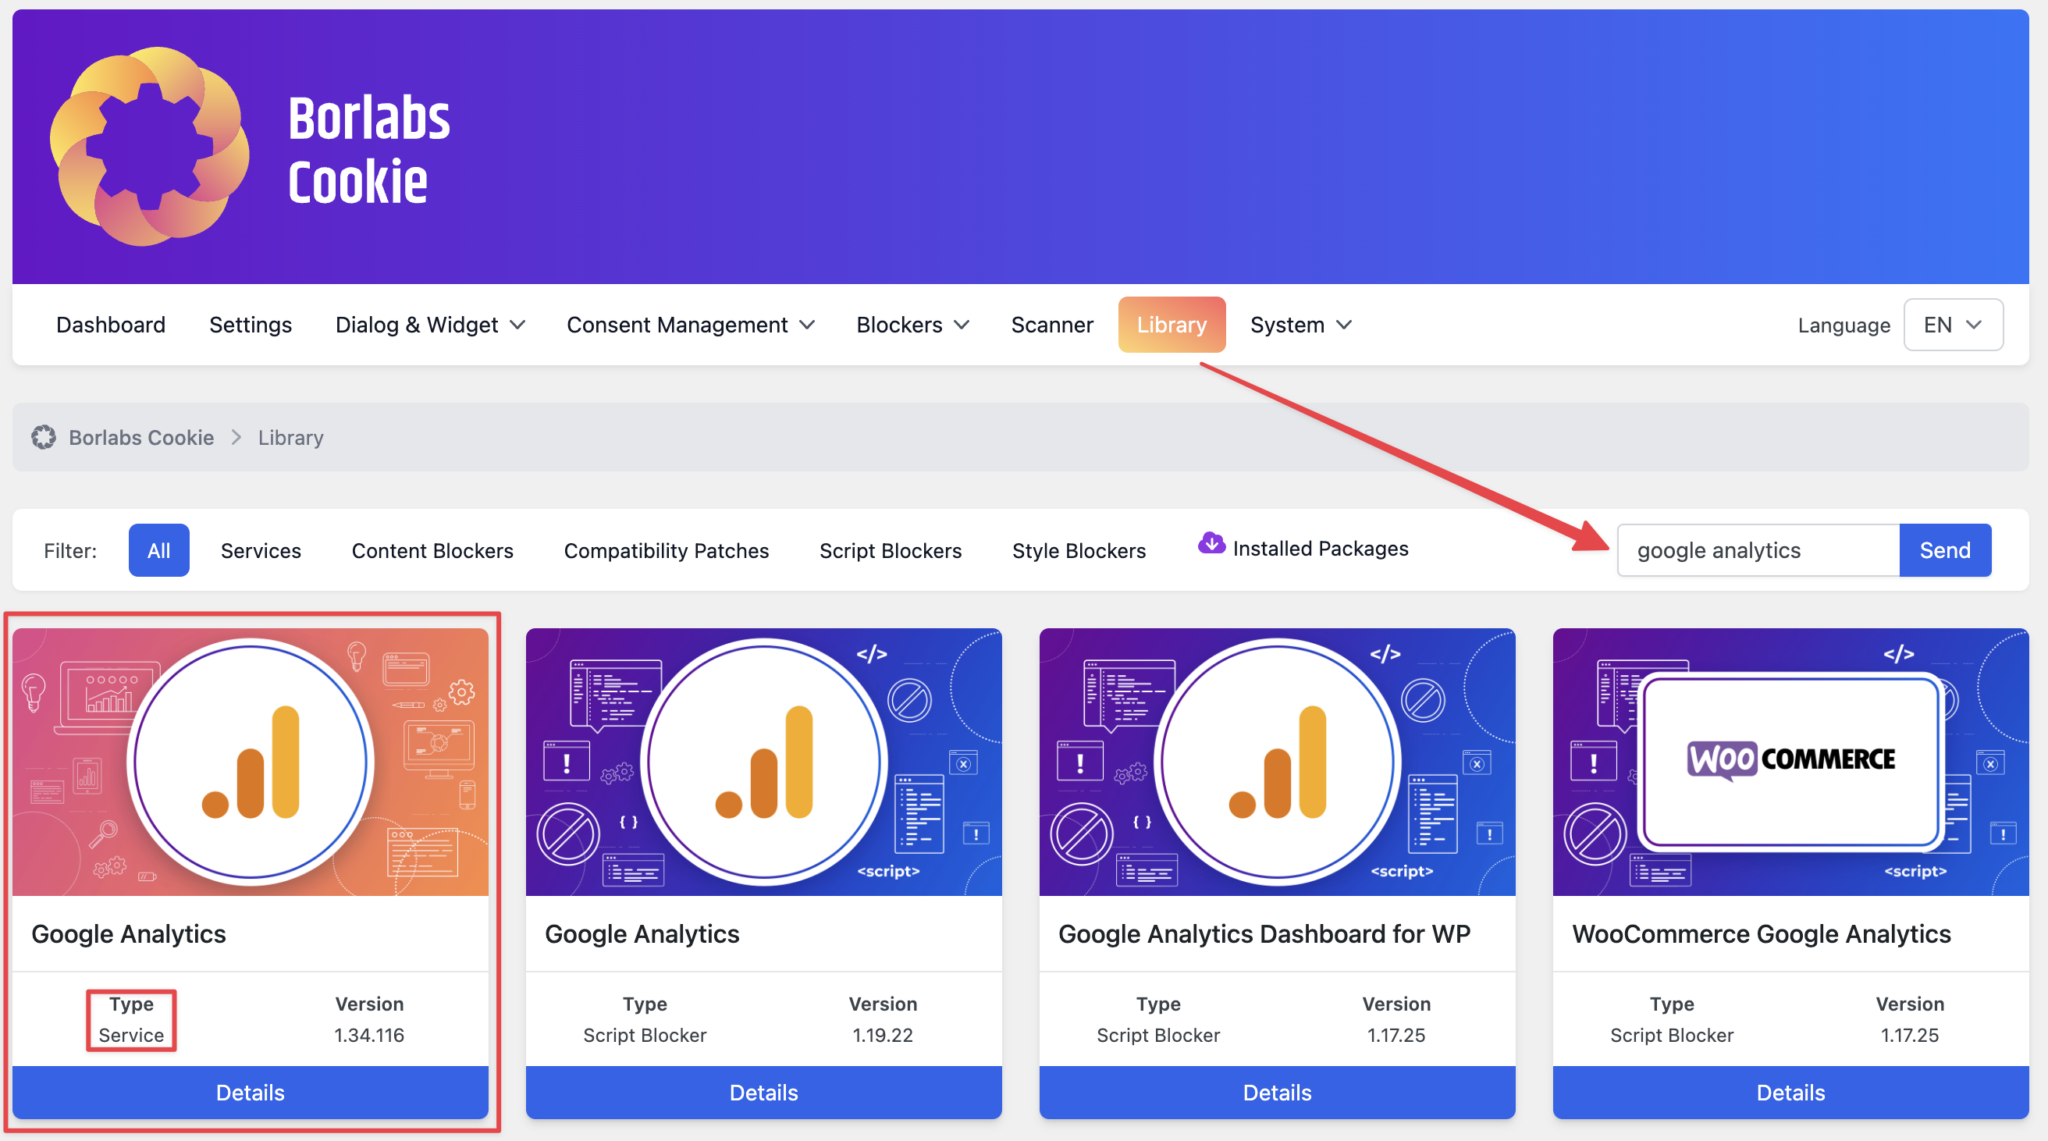
Then click on "Details".
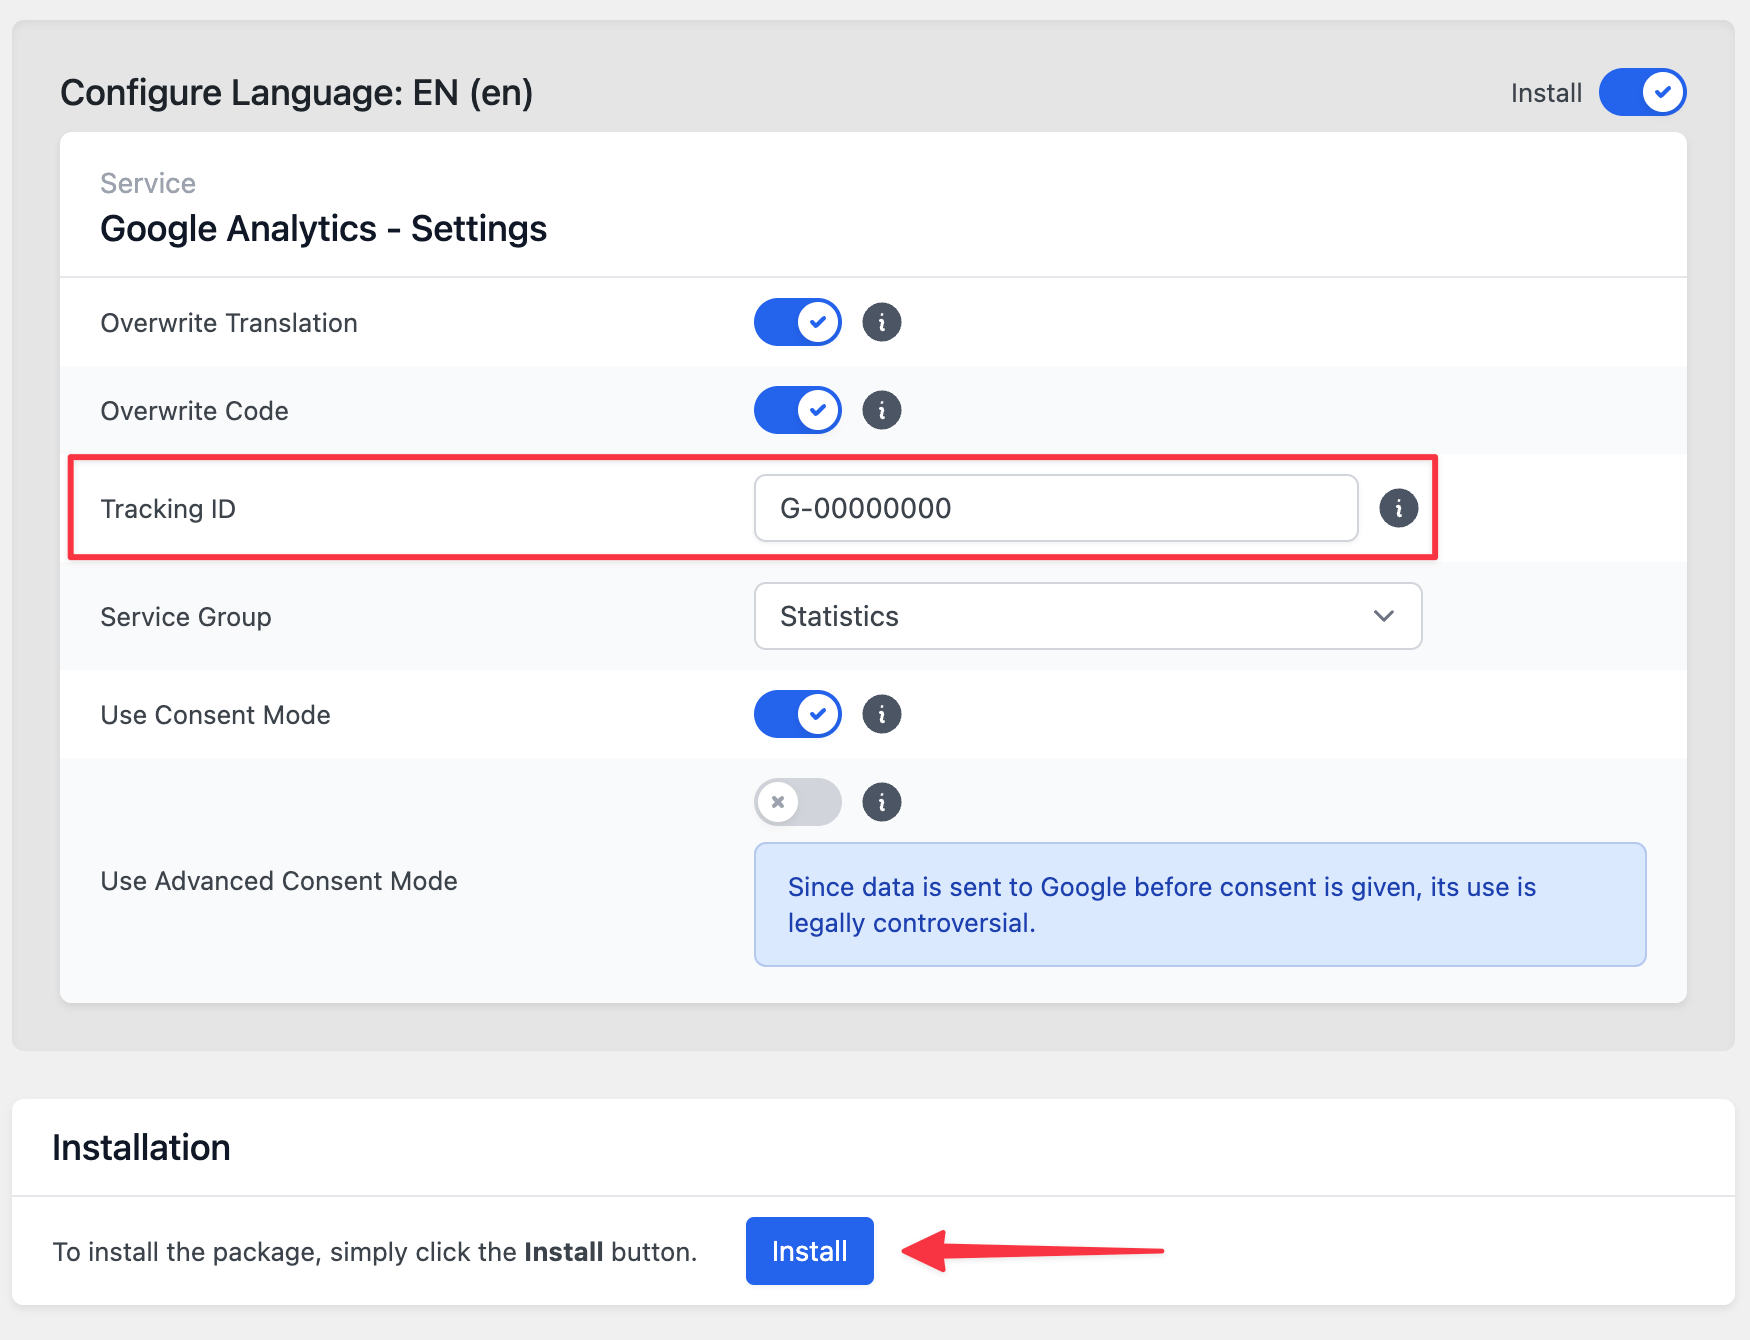
You will now be taken to the Google Analytics package details. Enter your Tracking ID and click the "Install" button.
Prepare the Service for GTM
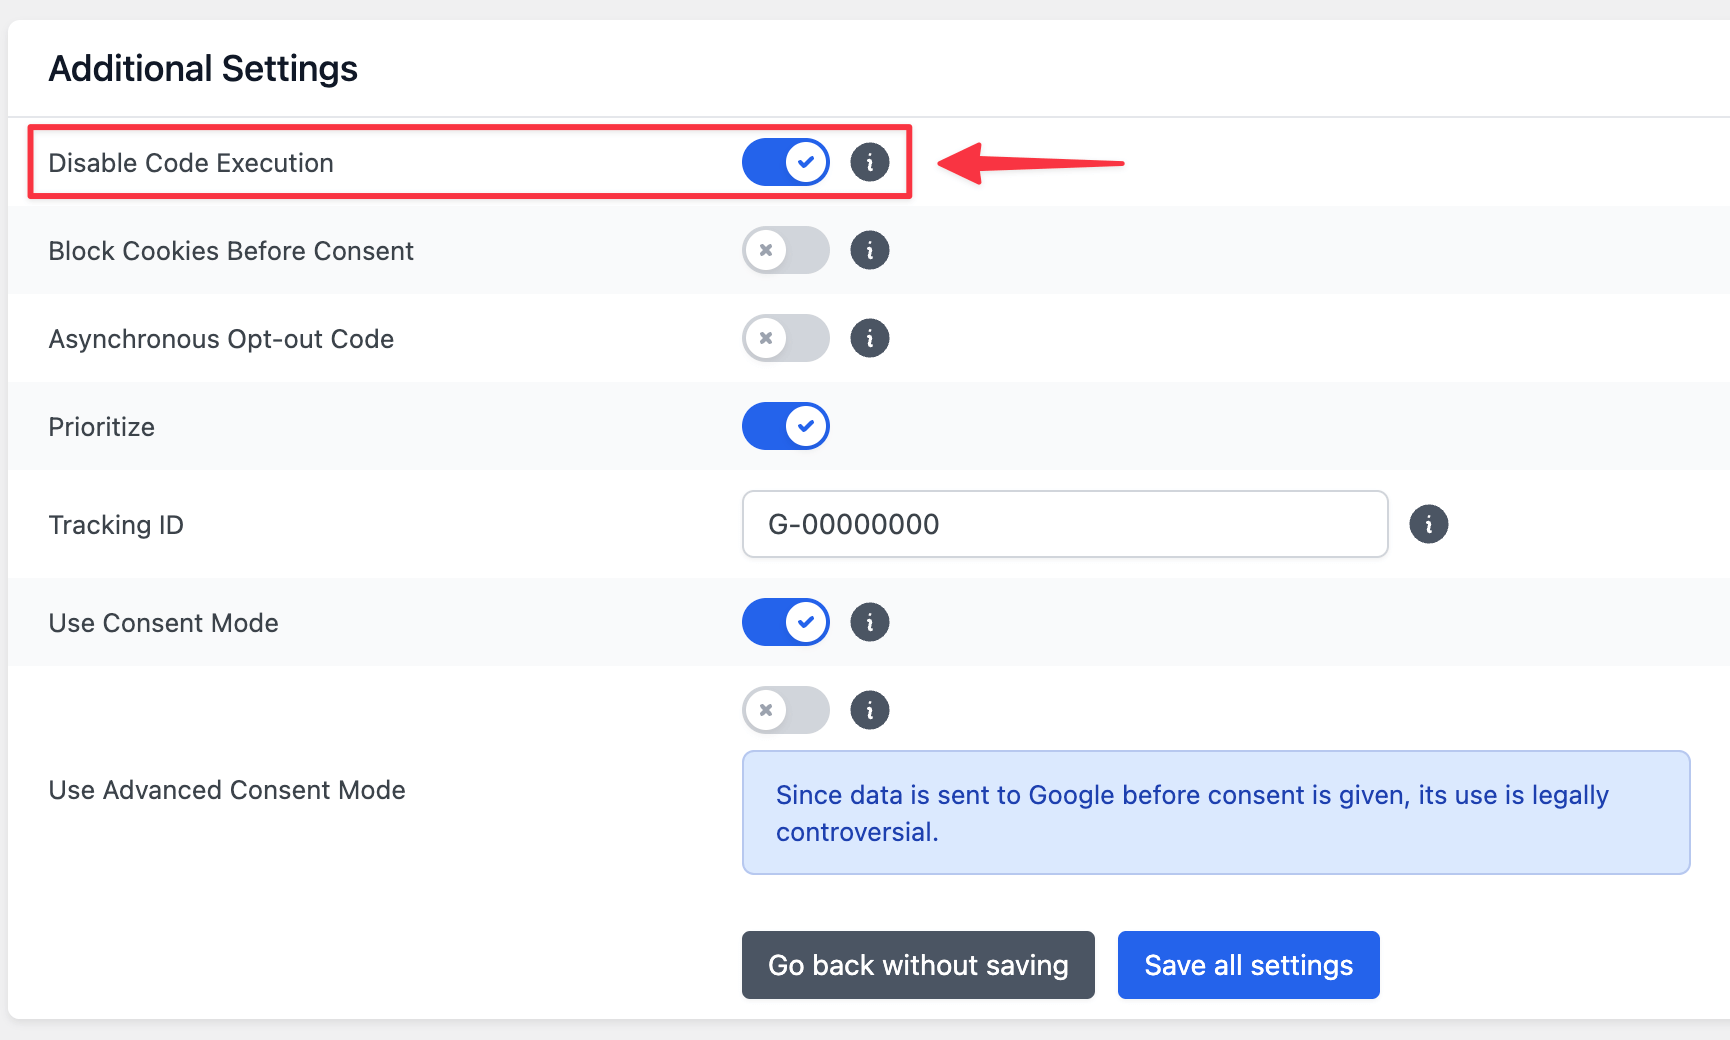
After installing the package, open the Service settings by navigating to "Consent Management" → "Services".

In the Service settings, scroll down to the "Additional Settings" section.
Difference Between Basic Consent Mode and Advanced Consent Mode
When configuring a Service in Google Tag Manager, you have two options: Basic Consent Mode and Advanced Consent Mode.
With Basic Consent Mode, a tag is only loaded after the user has granted consent for the corresponding Service through Borlabs Cookie.
This is the legally safest option and works with all tags.
With Advanced Consent Mode, the tag is loaded even before consent has been granted. However, the tag can detect that consent has not yet been provided and therefore only sends a limited amount of data. Google refers to these limited data transmissions as pings.
Summary of the Differences:
Basic Consent Mode
- Legally safer
- Works with all tags
Advanced Consent Mode
- Only works with supported tags (e.g. Google Analytics and Google Ads)
- Legal status is unclear
- Collects cookieless pings from users who have not granted consent, resulting in more data being available
- Can be set up in less than five minutes (see Section 2.4 b) Advanced Consent Mode)
At present, Google tags such as Google Analytics and Google Ads support Advanced Consent Mode.
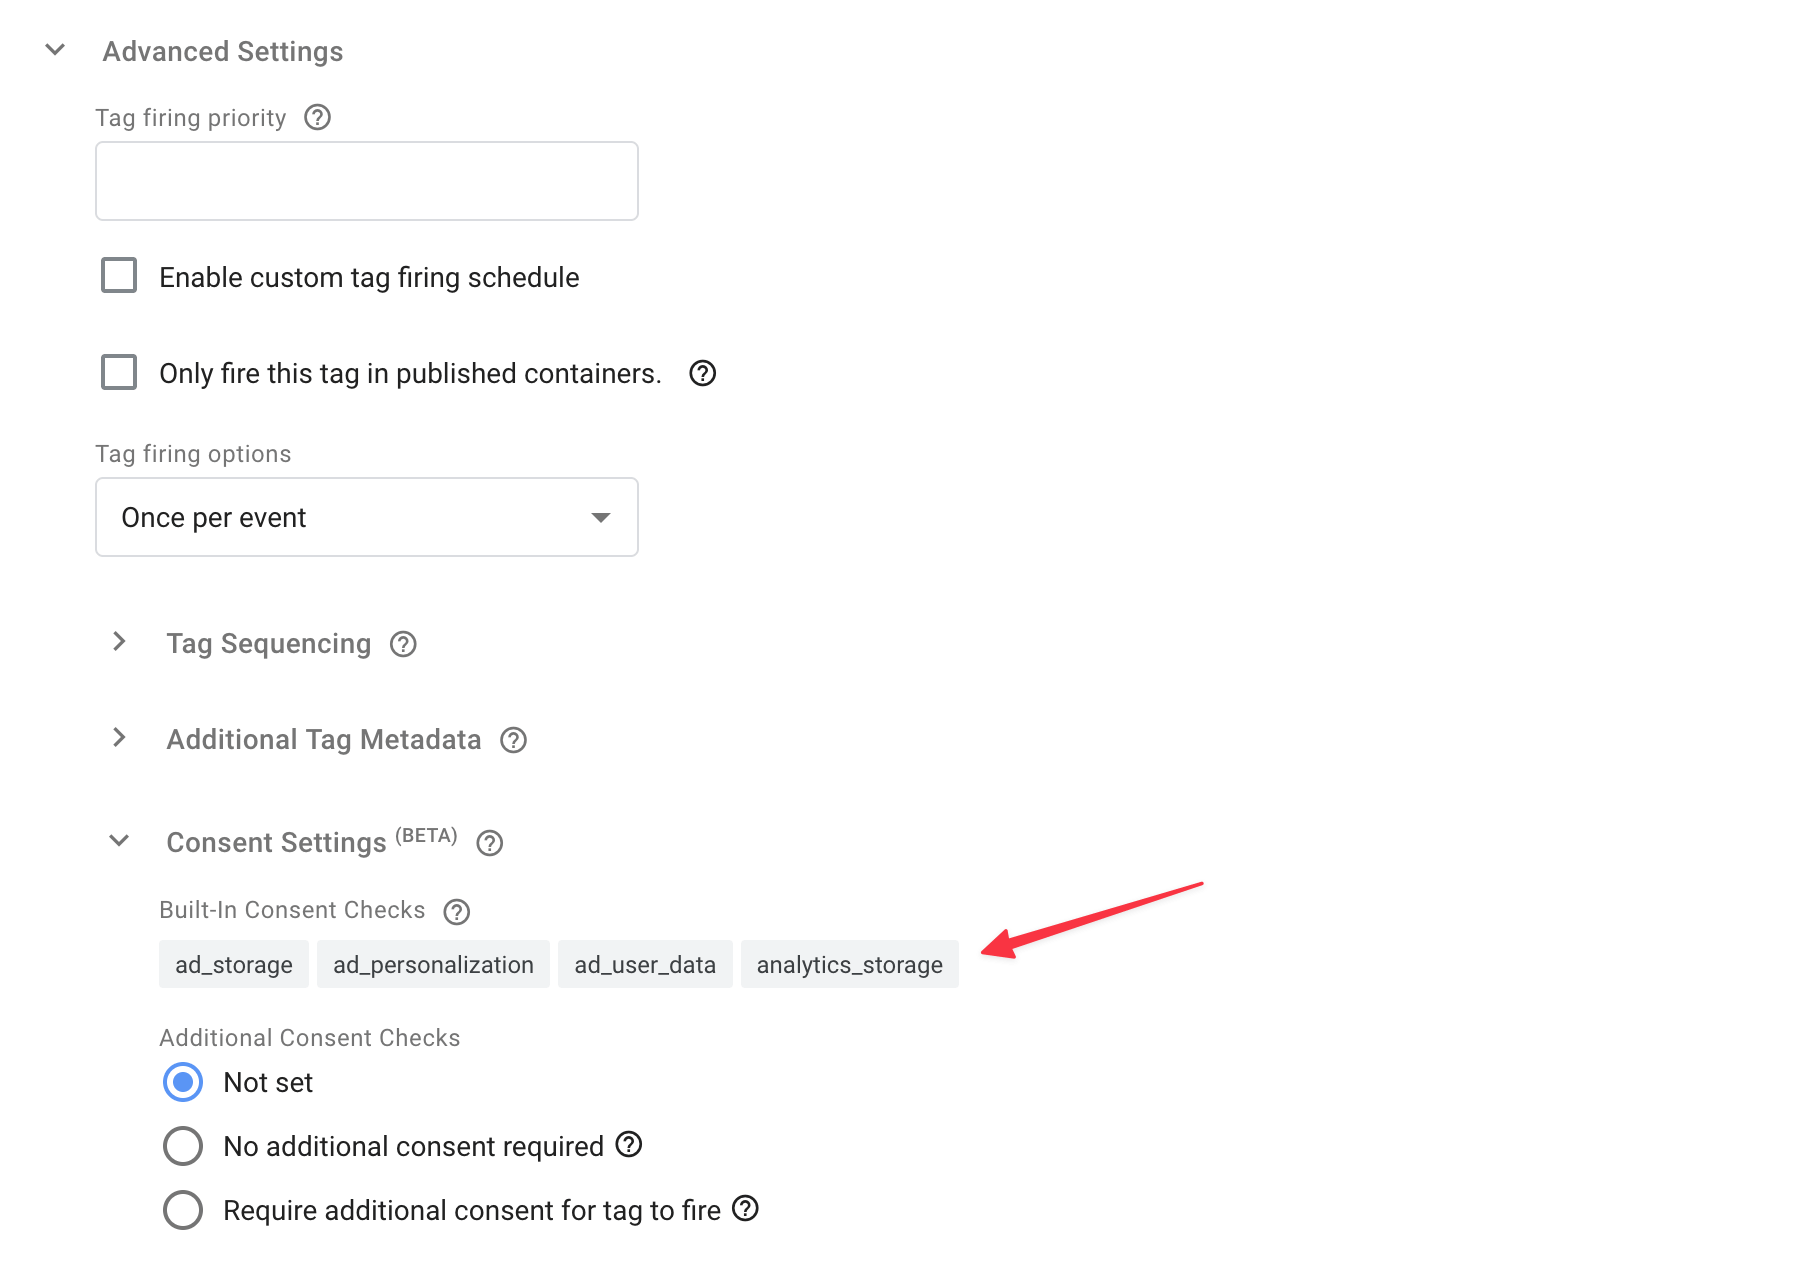
If you would like to use Advanced Consent Mode with a tag and are unsure whether it is supported, you can check the tag settings in GTM under "Advanced Settings" → "Consent Settings" → "Built-in Consent Checks".
If one or more consent types are listed there, it is very likely that the tag supports Advanced Consent Mode.
a) Basic Consent Mode
Open your Google Tag Manager container and create a tag and trigger for Google Analytics.
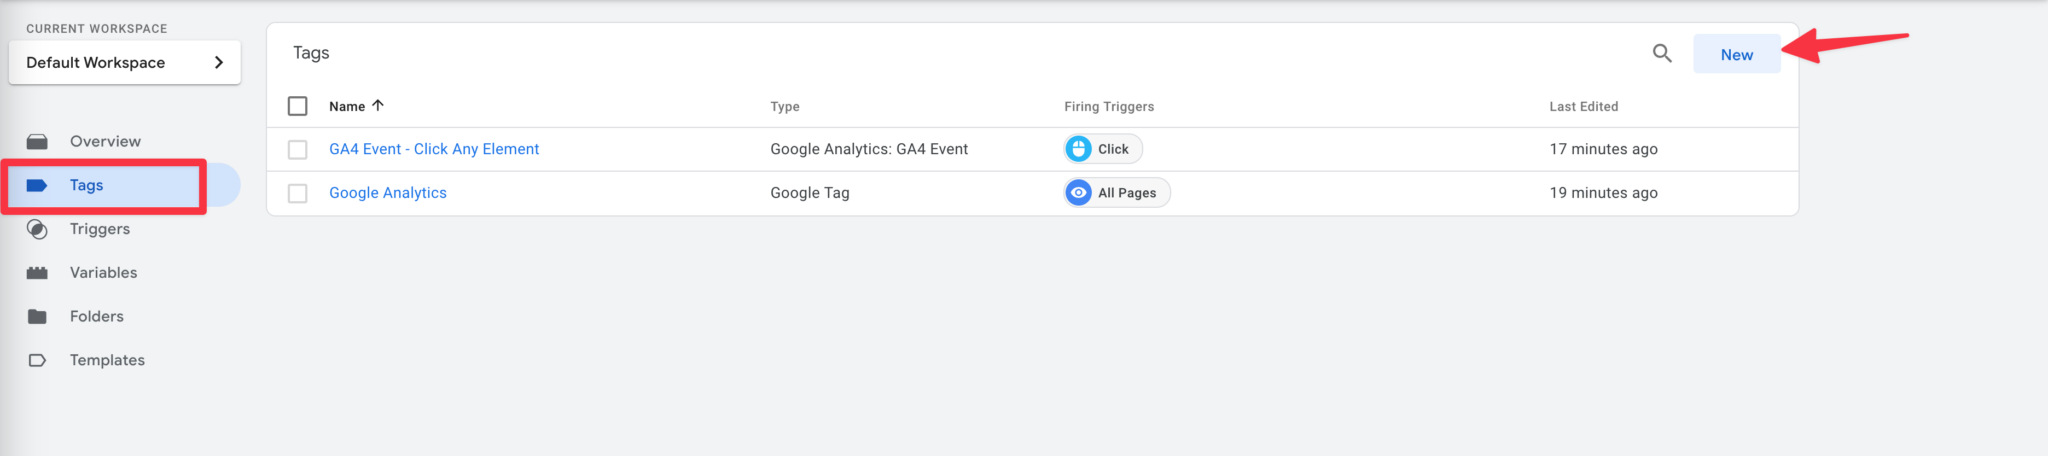
First, navigate to "Tags" and click "New".
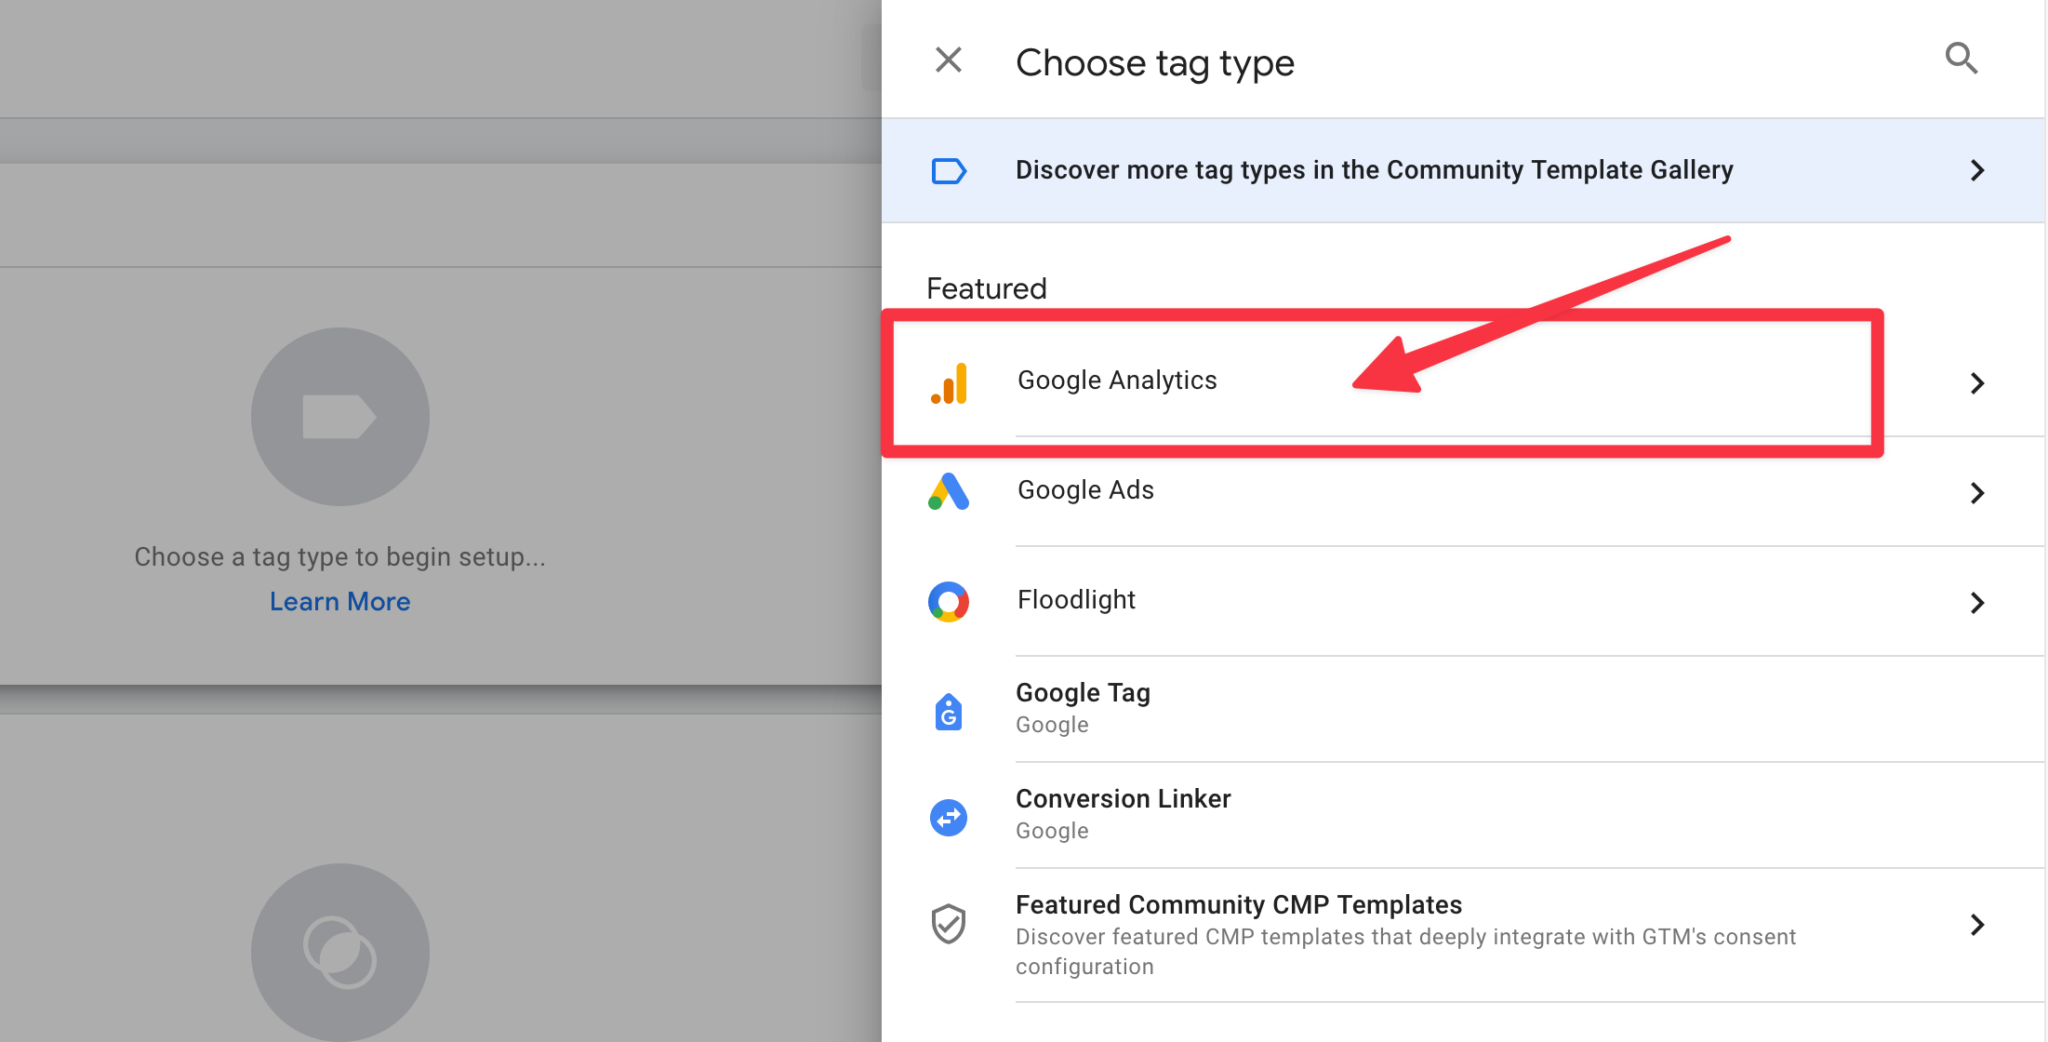
Select "Google Analytics" as the tag type.
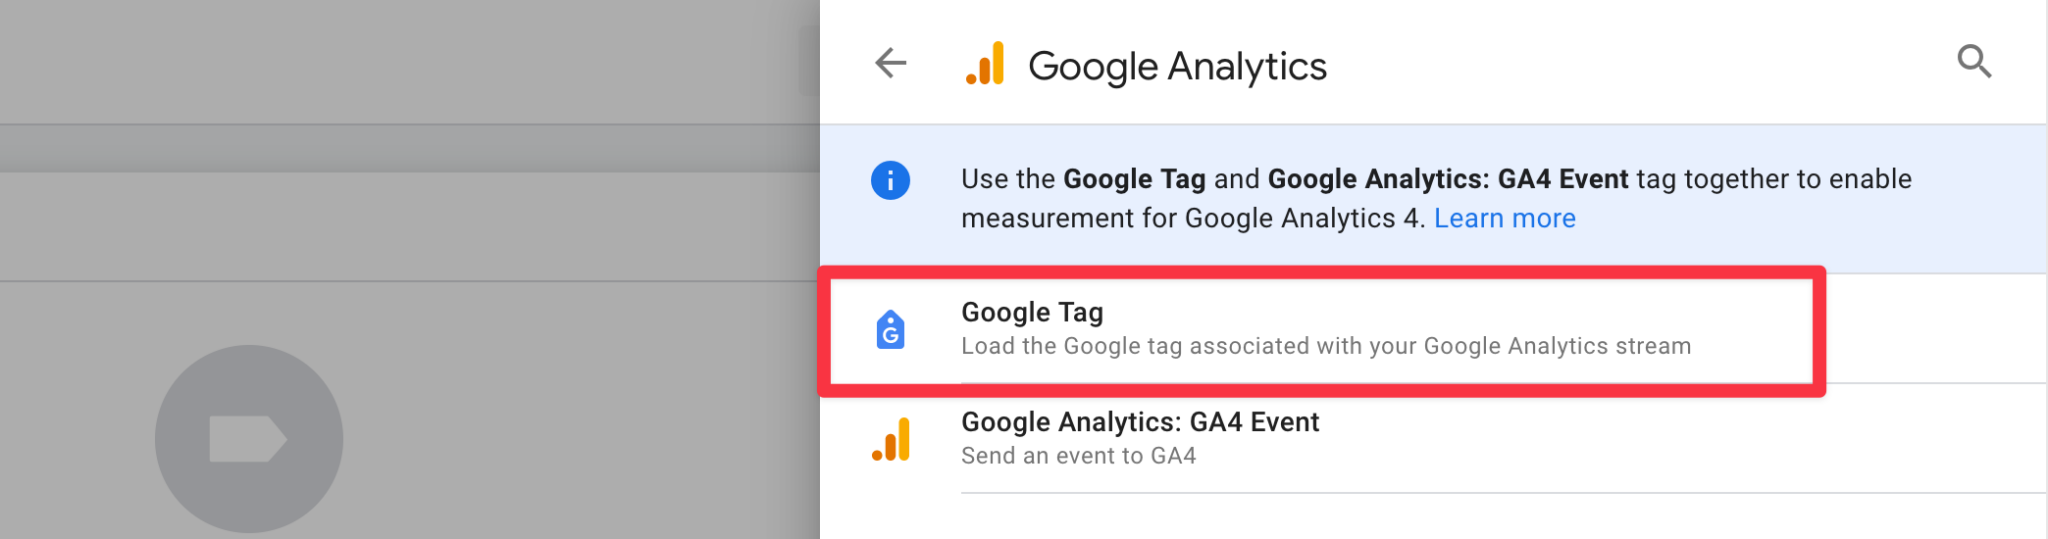
Then select the appropriate event(s) or tag(s) for your setup.
Enter either your Google Tag ID or Google Analytics ID in the corresponding field and save the tag.
Add a Trigger in GTM
Click "Trigger Configuration" to create a new trigger.
Select "Custom Event " as the trigger type.
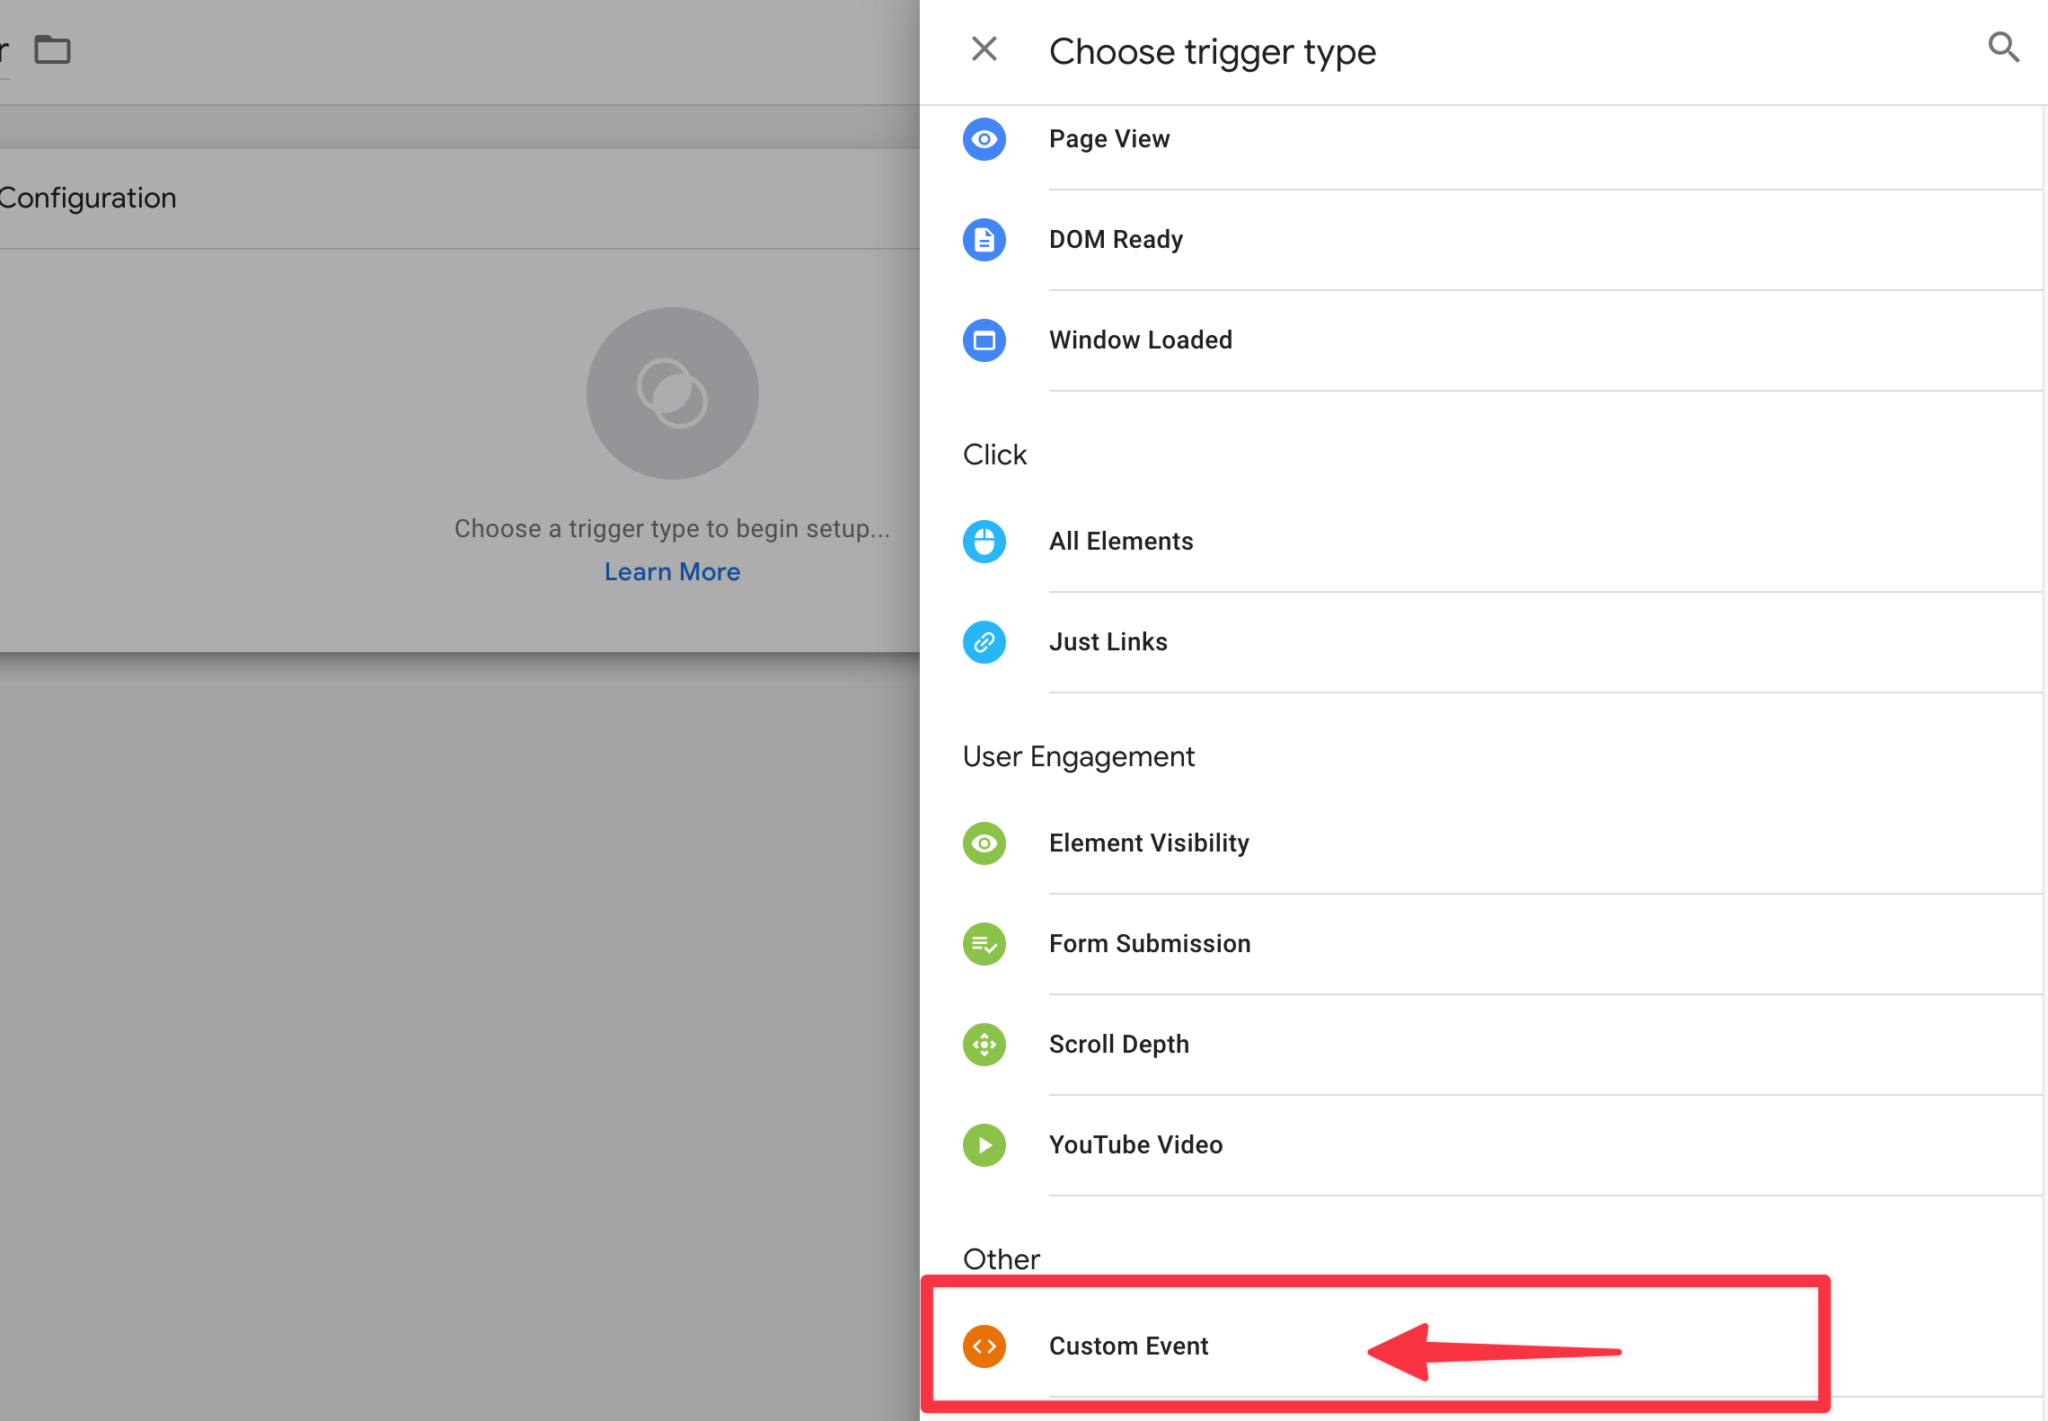
Enter the event provided by us into the corresponding field.
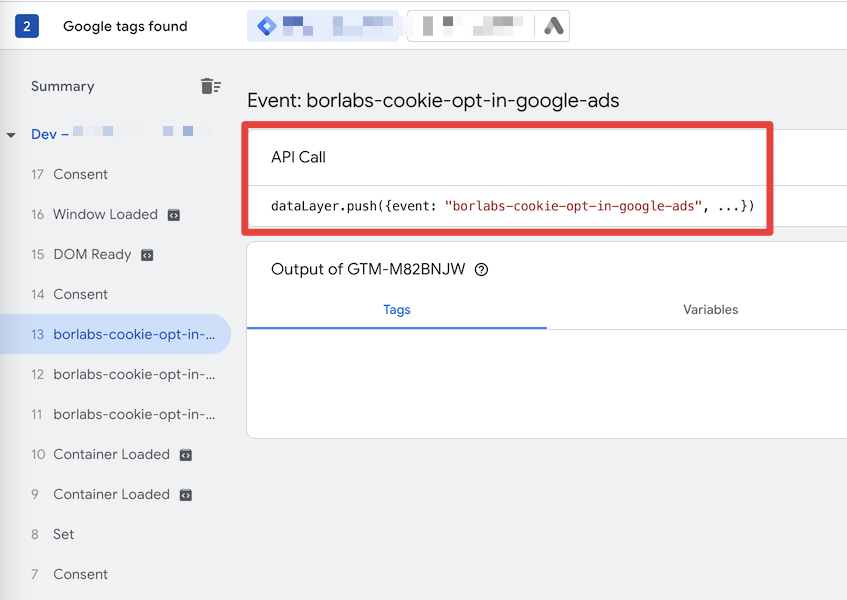
The Google Tag Manager package automatically sends a dedicated GTM event for each Service using the following naming convention: borlabs-cookie-opt-in- + Service ID
For example:
Google Analytics: borlabs-cookie-opt-in-google-analytics
Meta-Pixel: borlabs-cookie-opt-in-meta-pixel
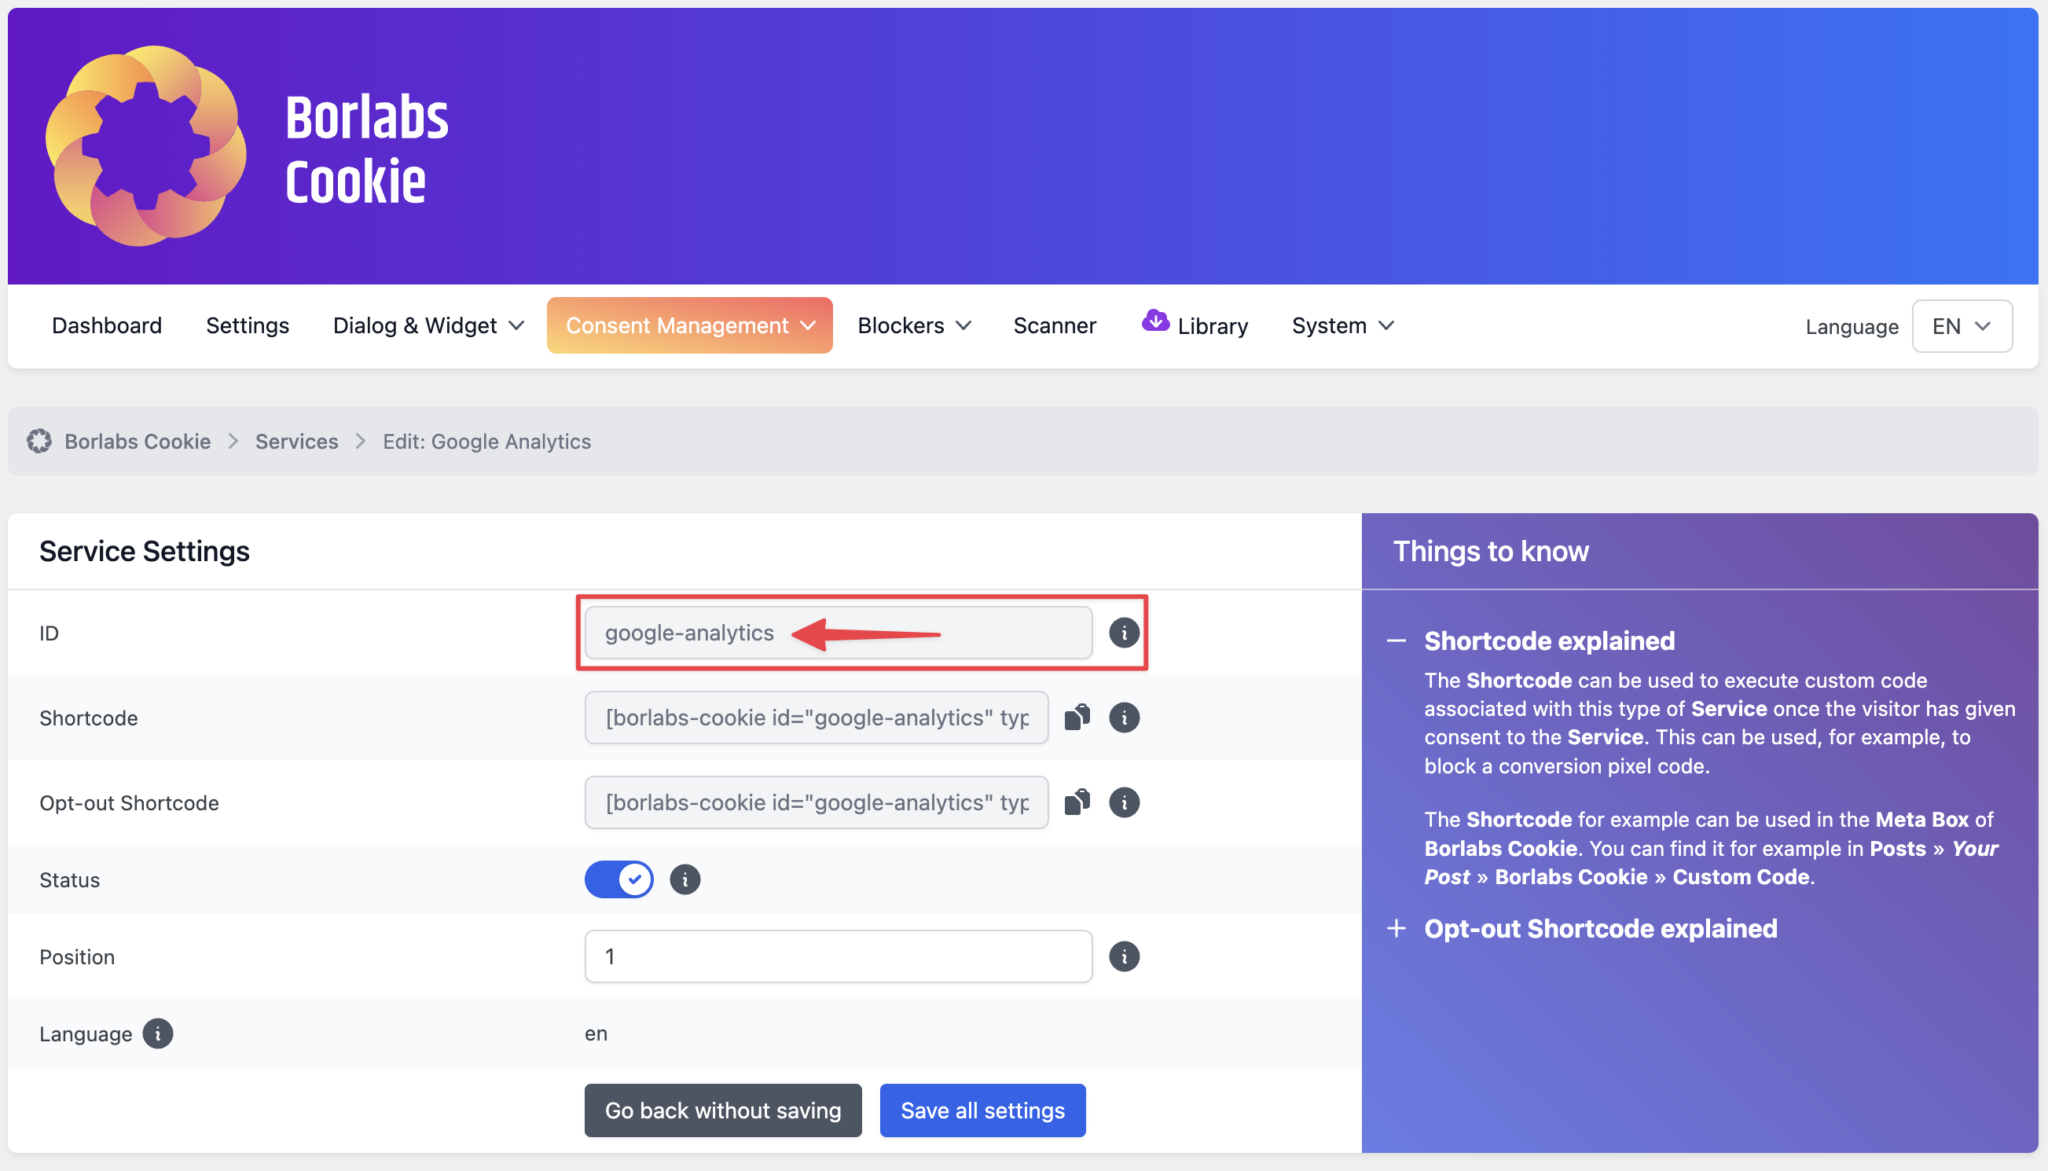
In our example, the Service ID is google-analytics.
Therefore, once consent has been granted, the event borlabs-cookie-opt-in-google-analytics will be triggered..
Our integration ensures that this event is fired at most once per page load.It is therefore not necessary to create a trigger group for the page view.
This event can therefore be used as an alternative to the standard "Page View" trigger for the tag.
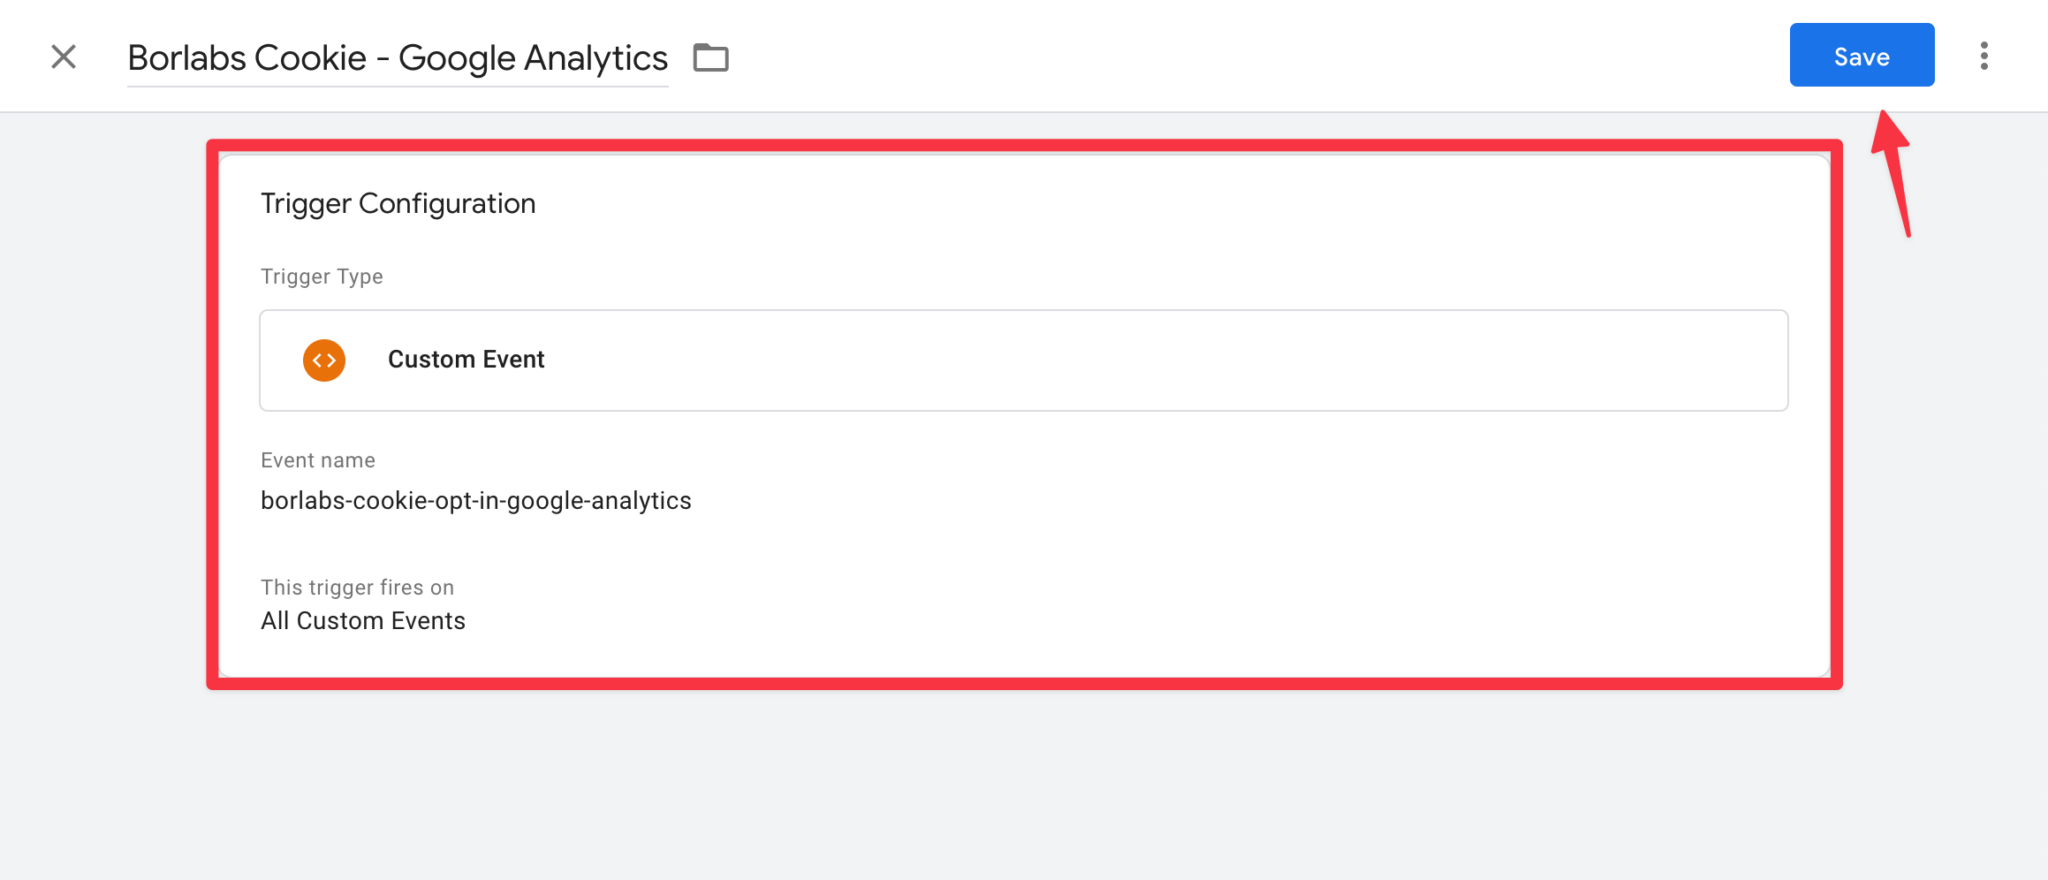
Click the "Save" button.
This completes the integration between Borlabs Cookie and Google Tag Manager.
Optional: Add Additional Triggers
Add the Variable Template
To restrict a trigger based on consent, we need a variable that stores the current consent status.
To make creating this variable as simple as possible, we have published a template in the "Google Tag Manager Template Gallery". This template must be imported before it can be used.
If you previously imported this template for a Borlabs Cookie 2 installation and GTM offers you an update, please install the update.
To do this, go to "Templates" and click on "Search in gallery".
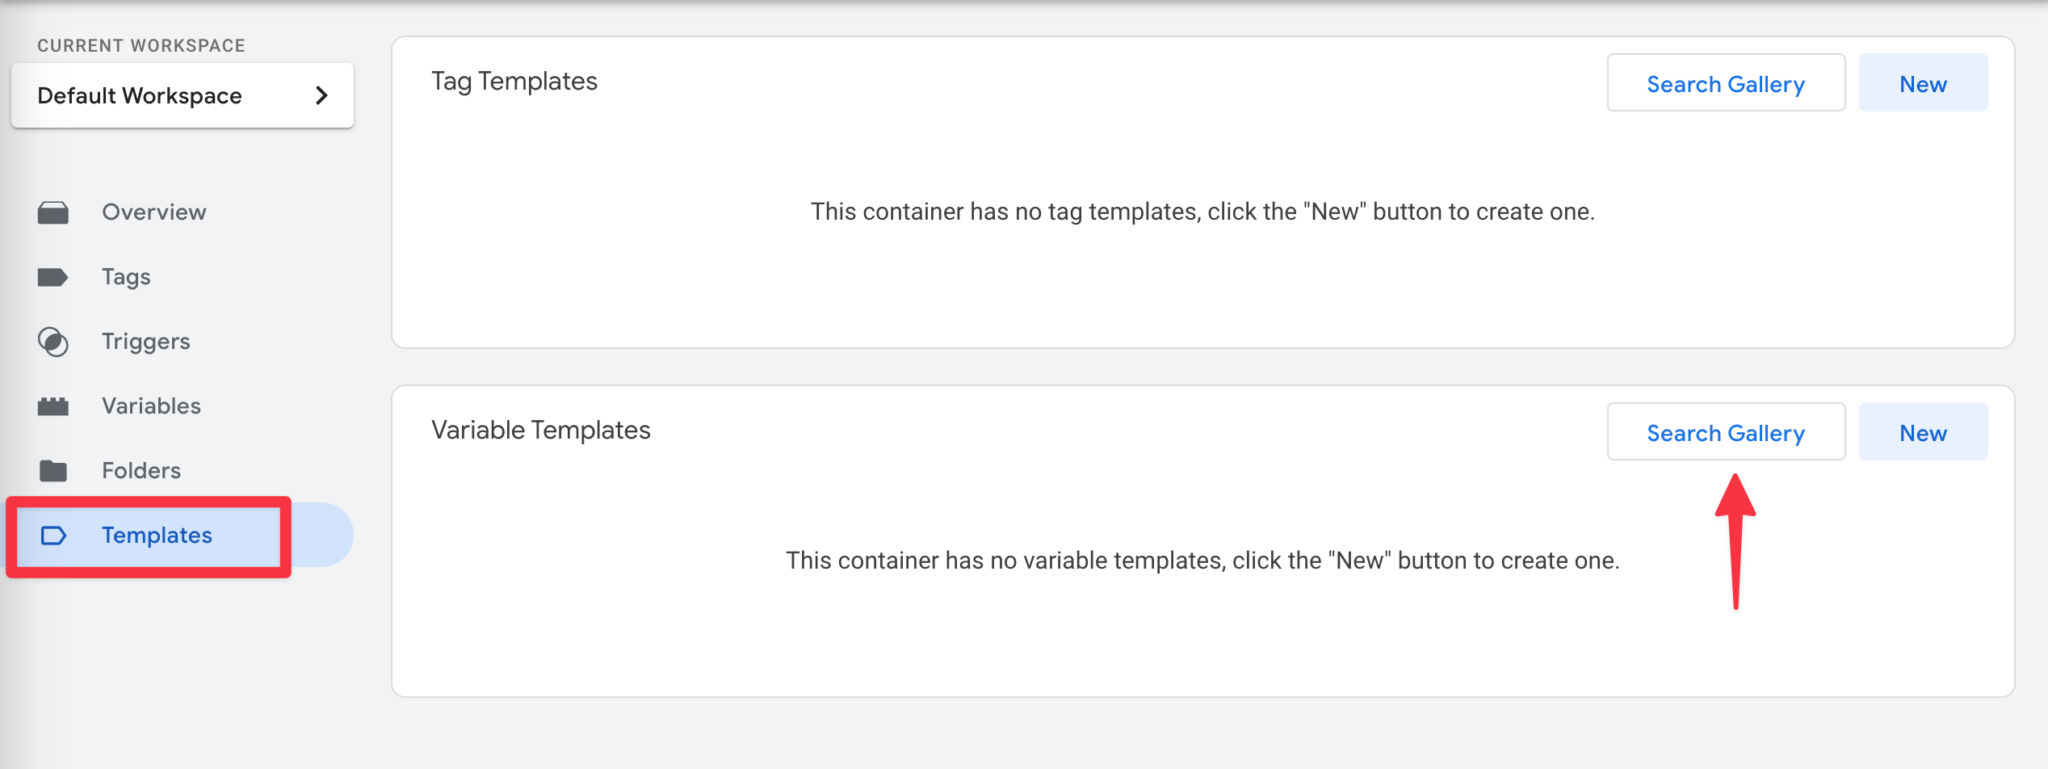
Select the template "Borlabs Cookie Consent Variable".
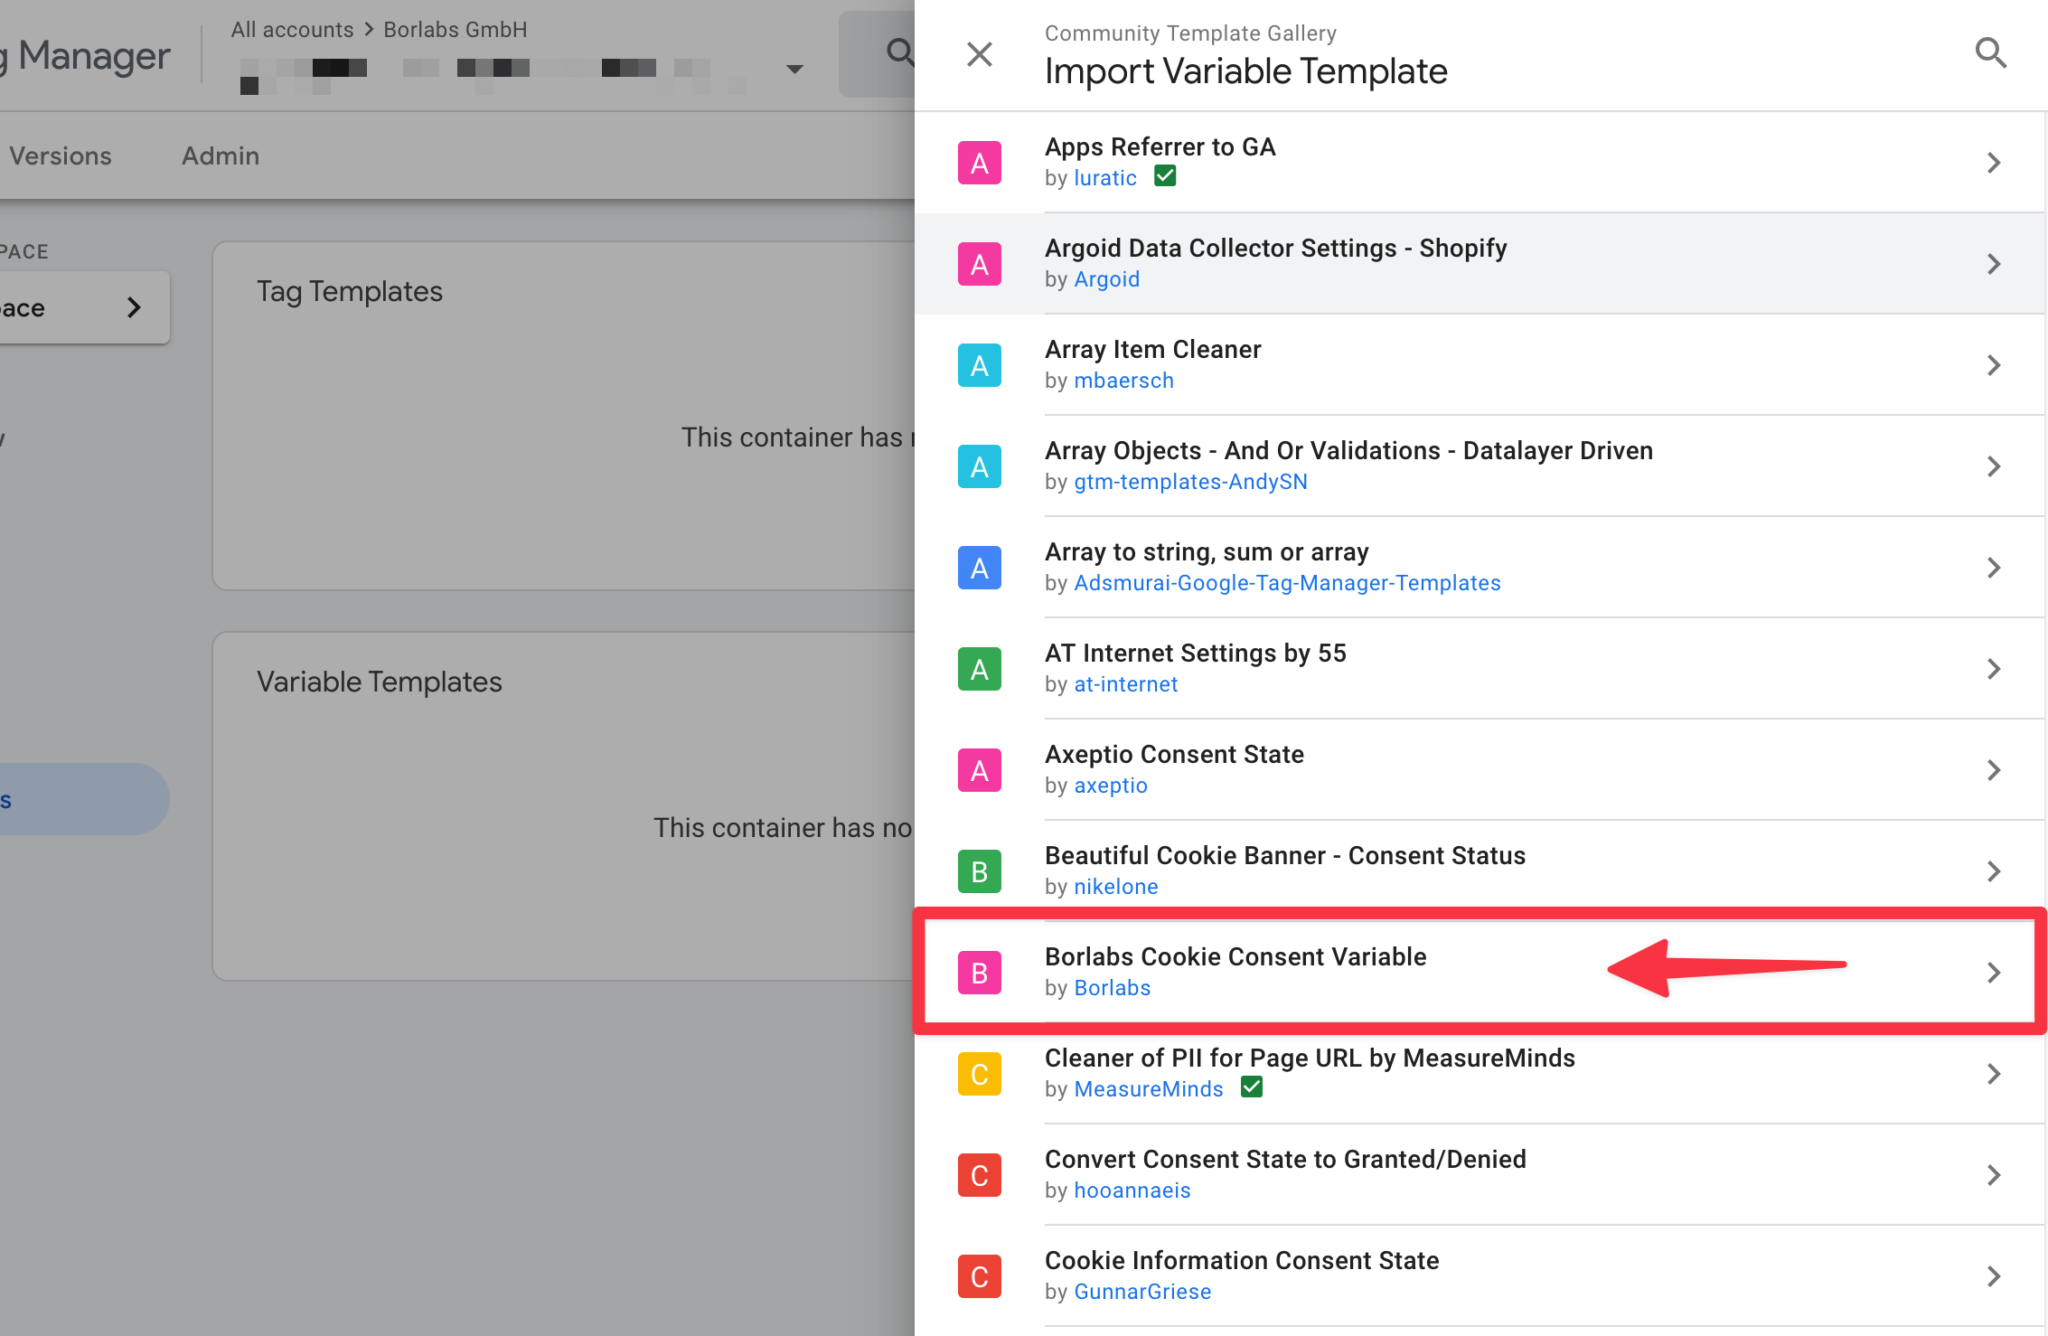
Click on "Add to workspace" in the top right hand corner.
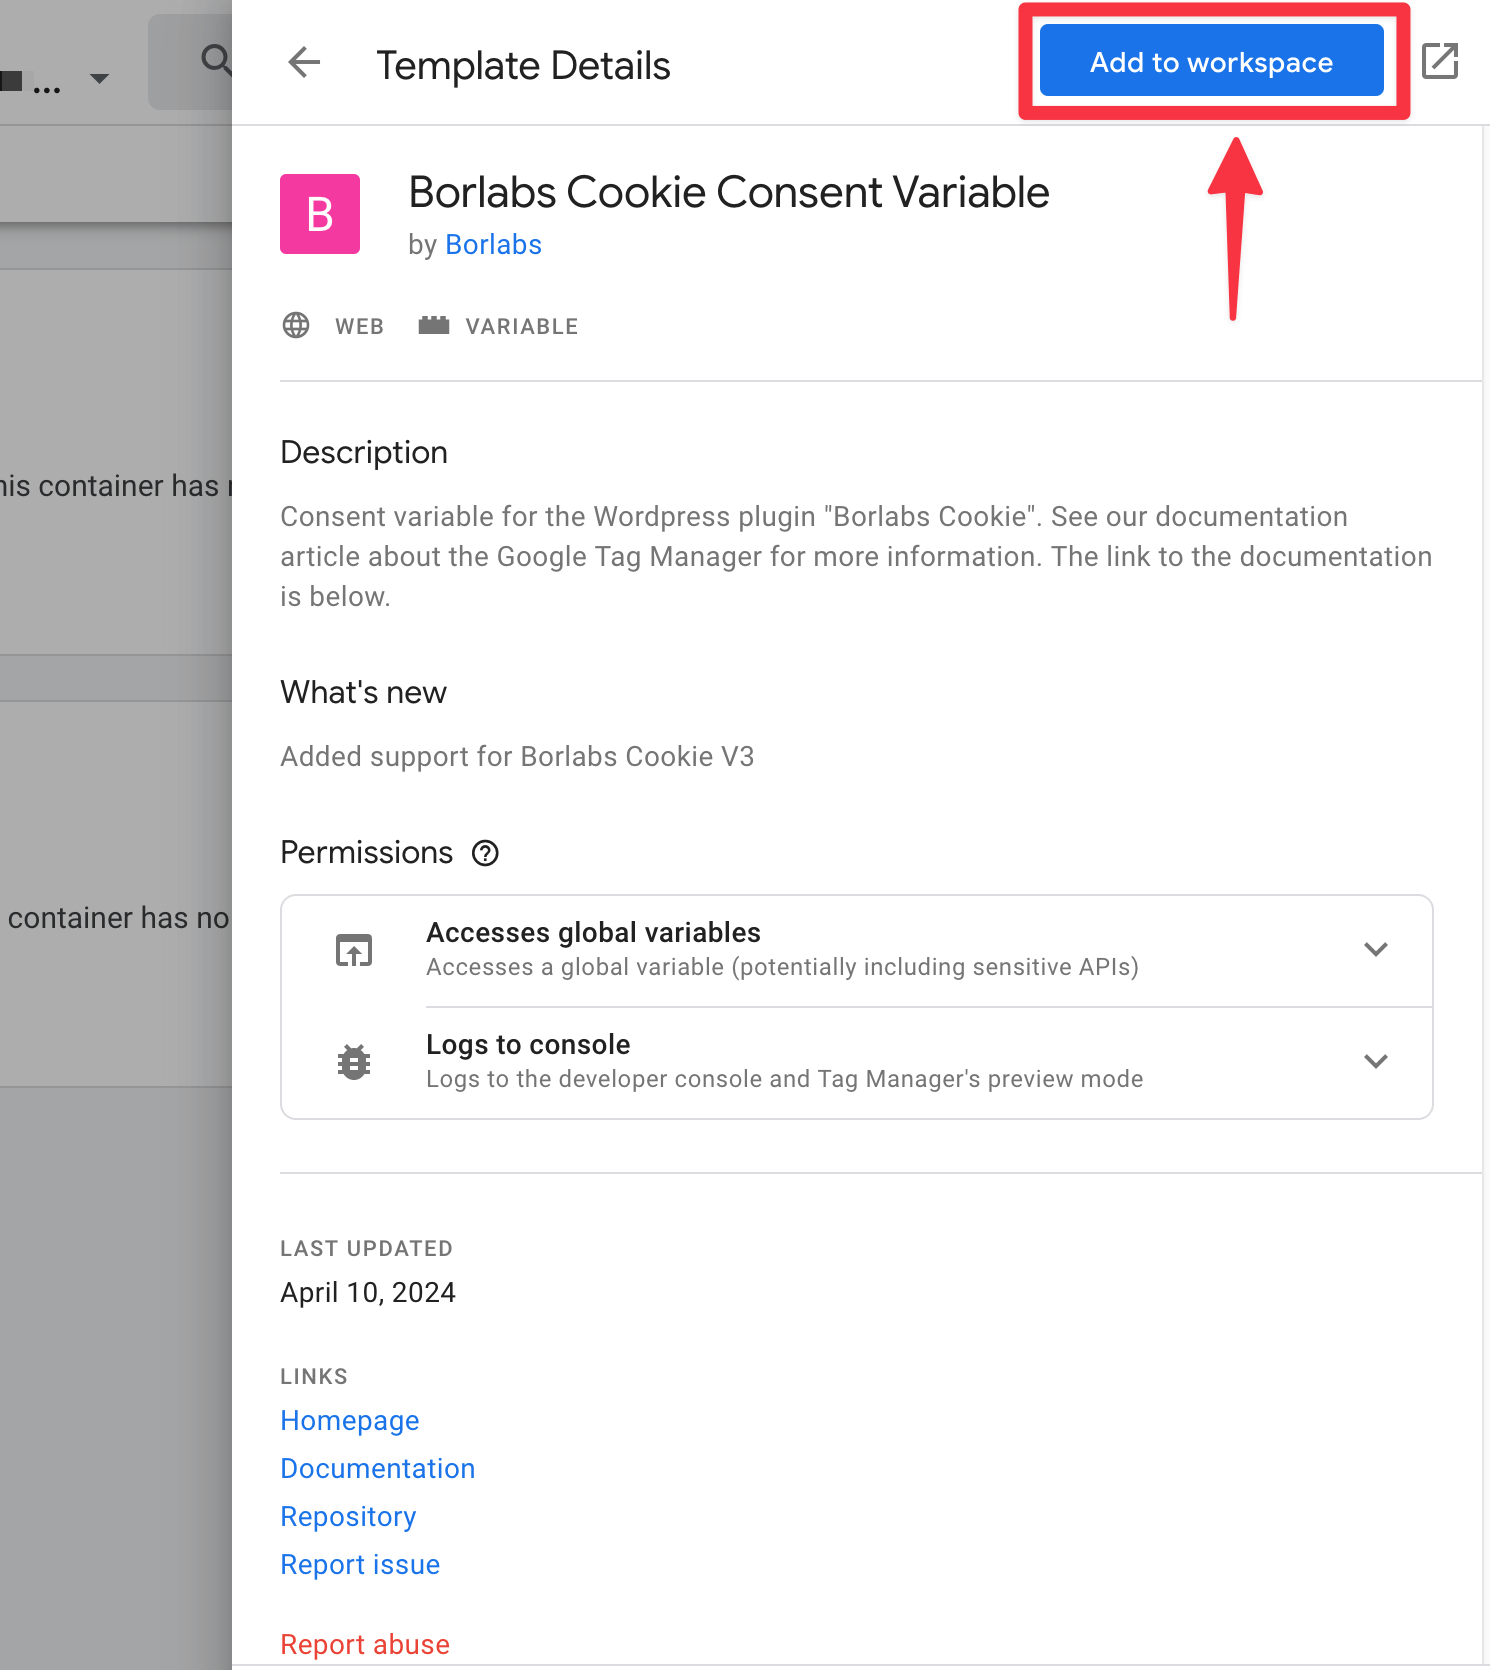
The Google Tag Manager will now ask you again for the necessary permissions.
Click on "Add" here.
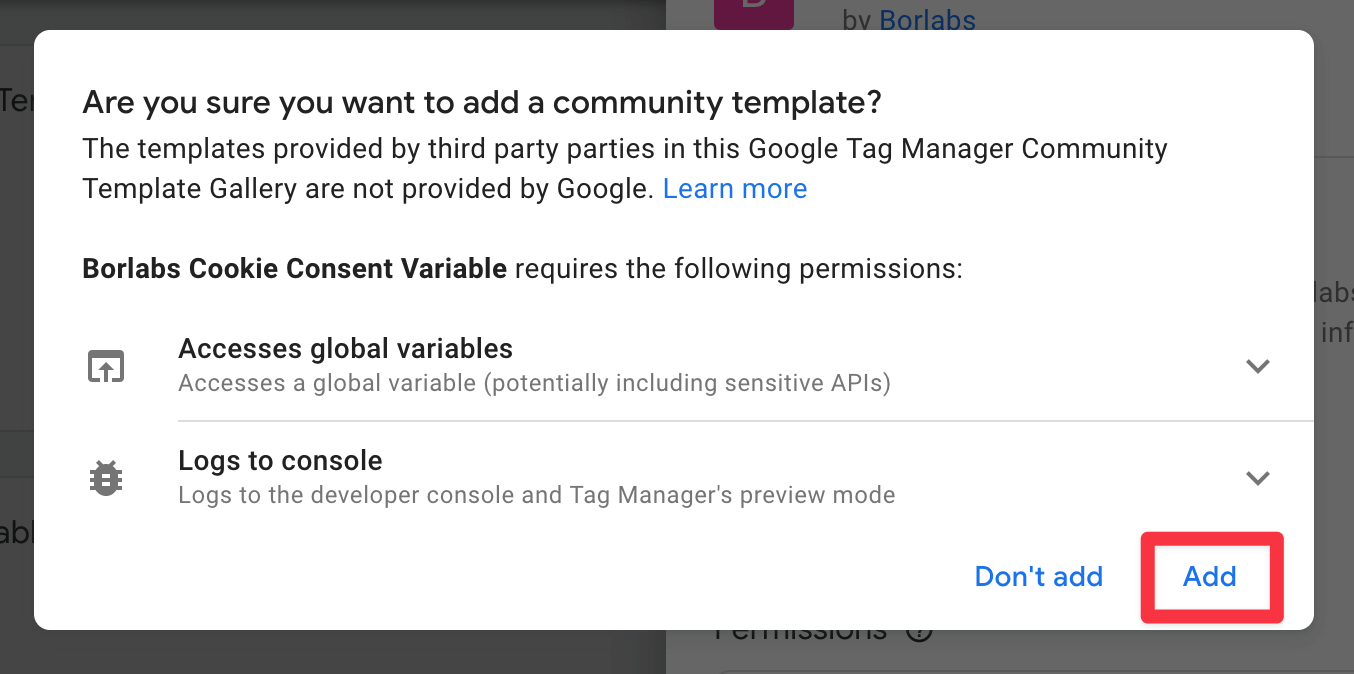
The template should now be added.
Create a Blocking Variable
To ensure that the trigger is only fired after consent for Google Analytics has been granted, we need to create a custom variable. In Google Tag Manager, navigate to "Variables" in the left-hand menu and click "New" under "User-Defined Variables".
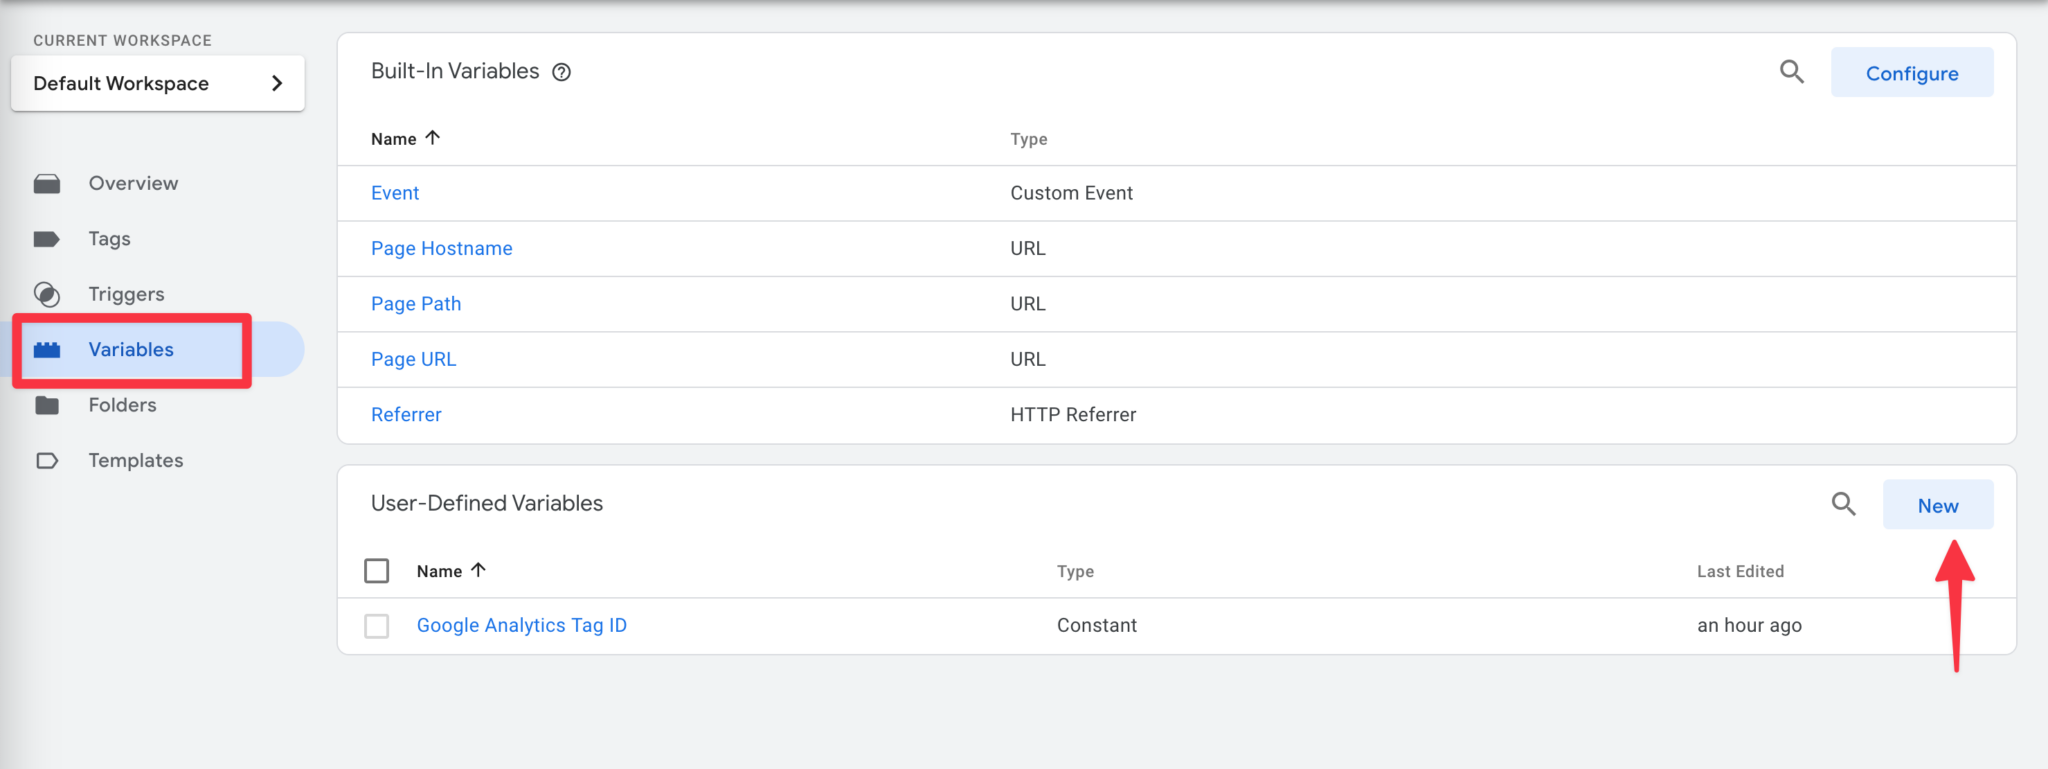
Select the "Borlabs Cookie Consent Variable" template.
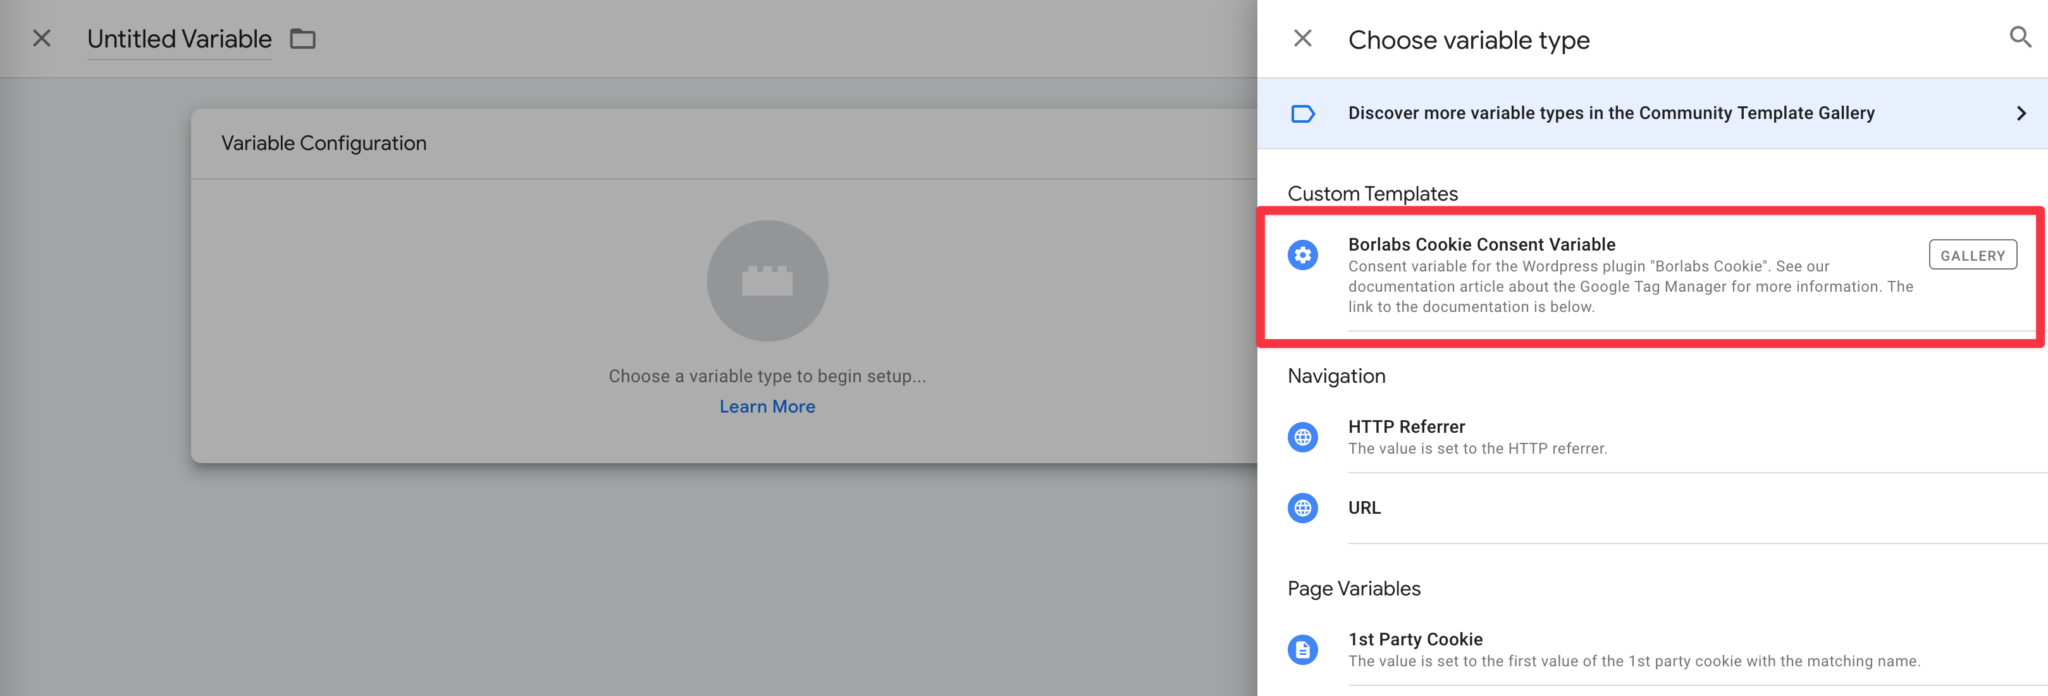
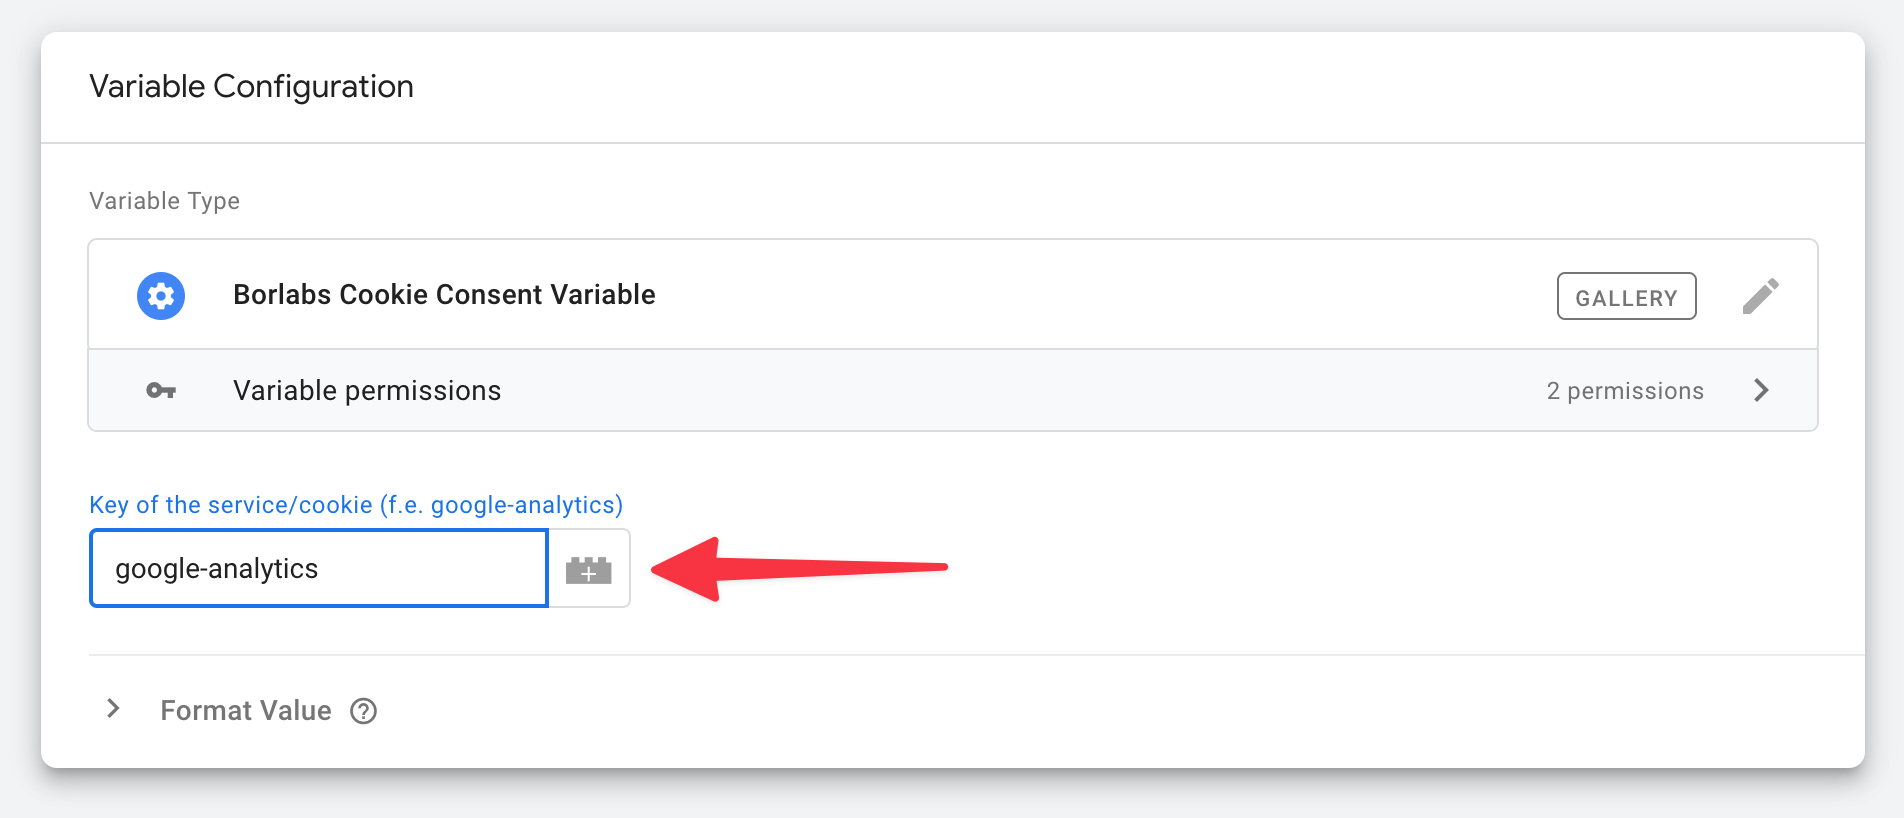
In the "Key of the service/cookie" field, enter the ID of the corresponding Service from the Borlabs Cookie plugin.
In our example, the Service ID is google-analytics.
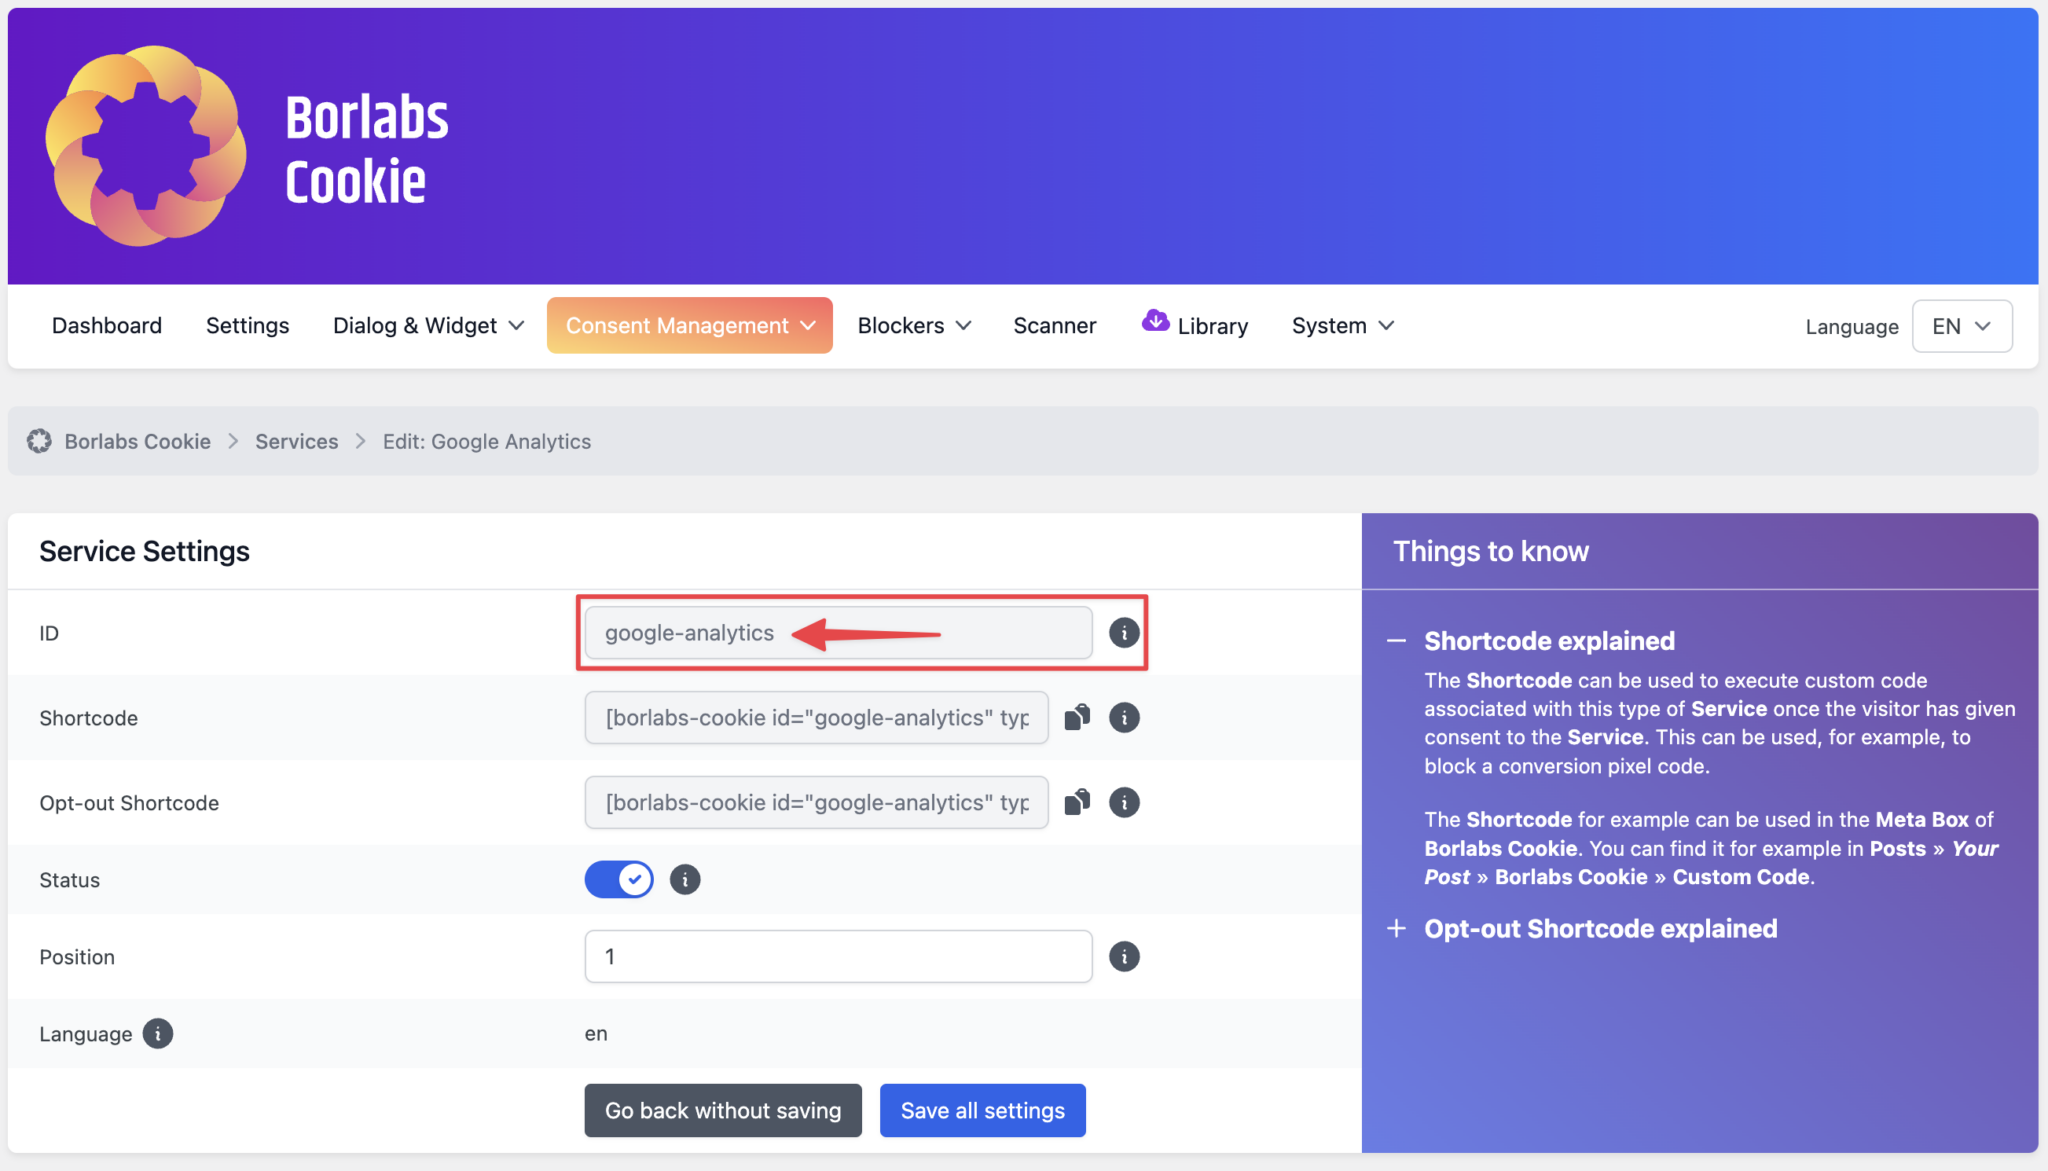
If you are unsure which value belongs in this field, you can look up and copy the Service ID from the Service settings in the Borlabs Cookie plugin.
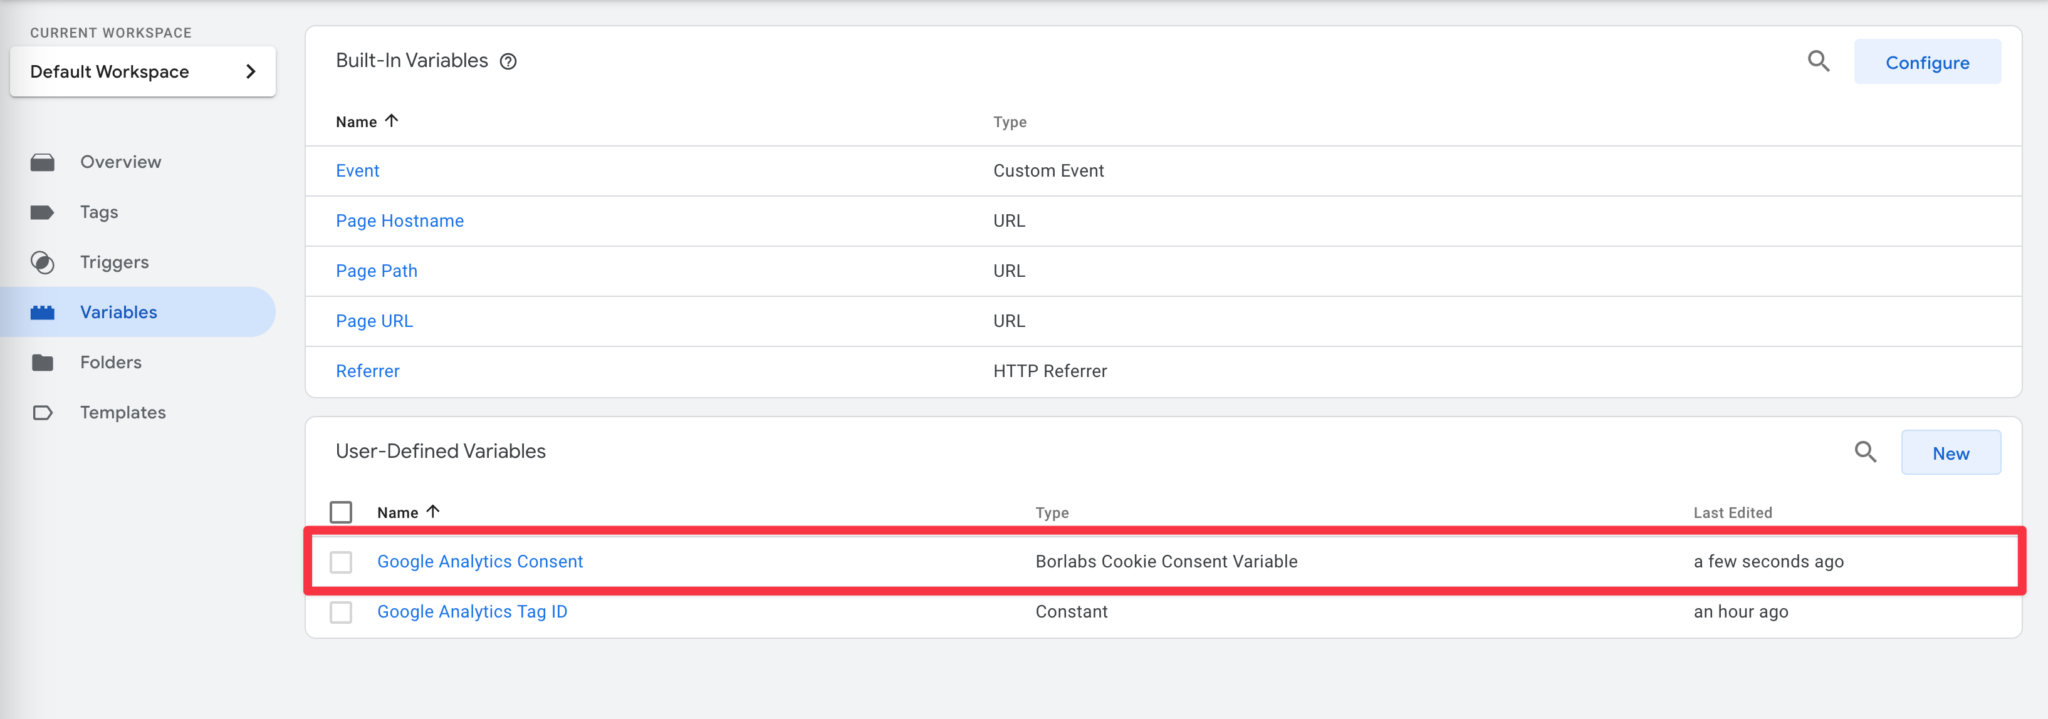
Next, give the variable a descriptive name in the header of the "Create Variable" screen, for example "Google Analytics Consent", and save it.
Example 1: Create a Tag to Track Clicks on Specific Links as an Event
In this example, we will create a trigger that sends an event to Google Analytics whenever a user clicks a link with a specific CSS class.
To do this, assign a CSS class to the link in WordPress. In this example, we will use the class sales-link.
The first step is to create a trigger.
In Google Tag Manager, navigate to "Triggers" in the left-hand menu and click "New".
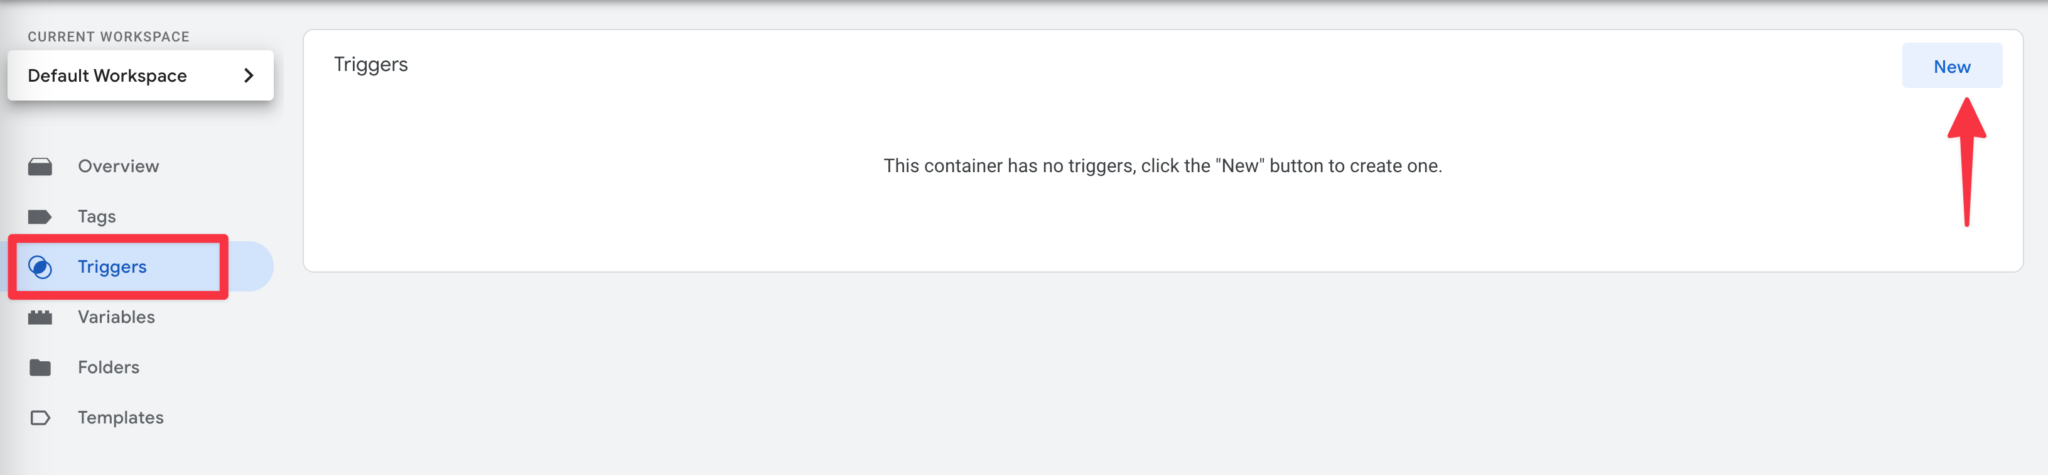
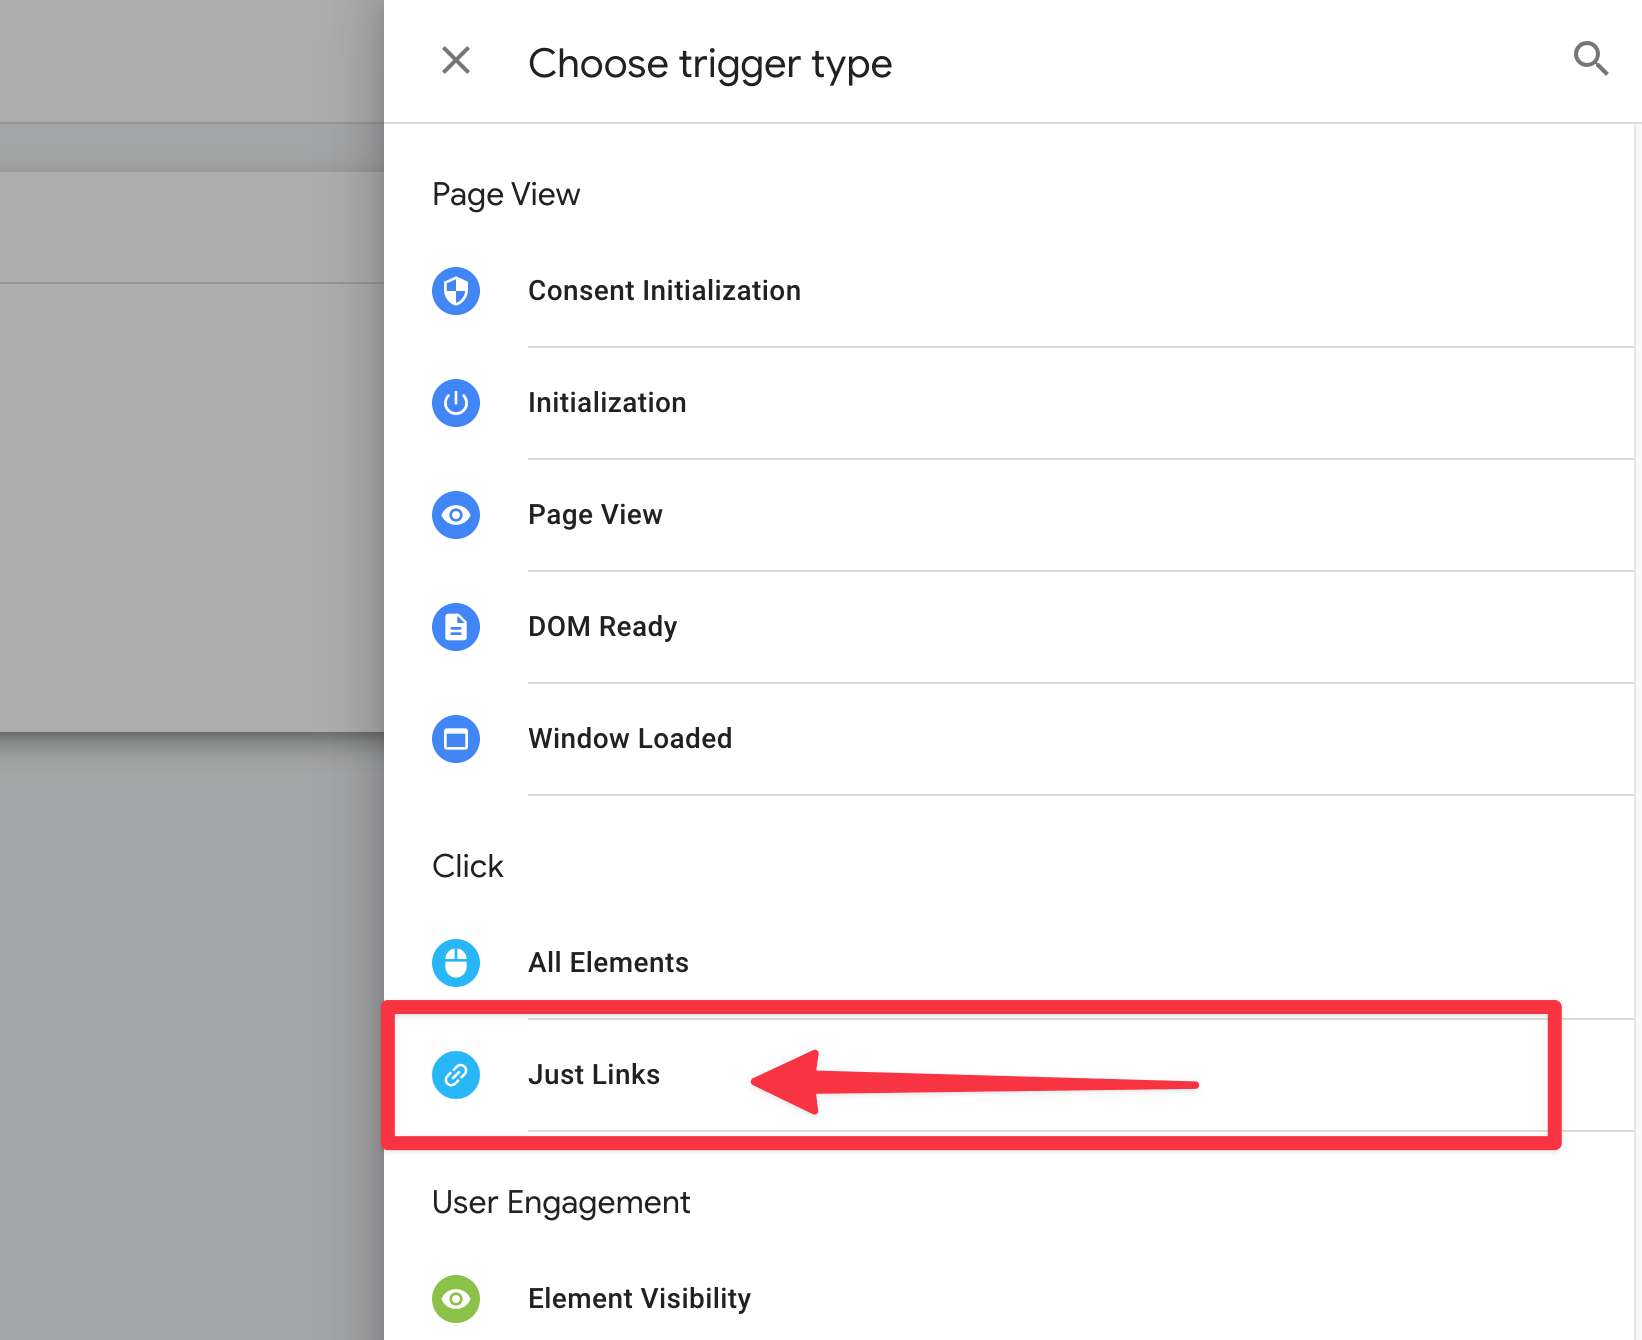
Click "Trigger Configuration" and select "Just Links" as the trigger type.
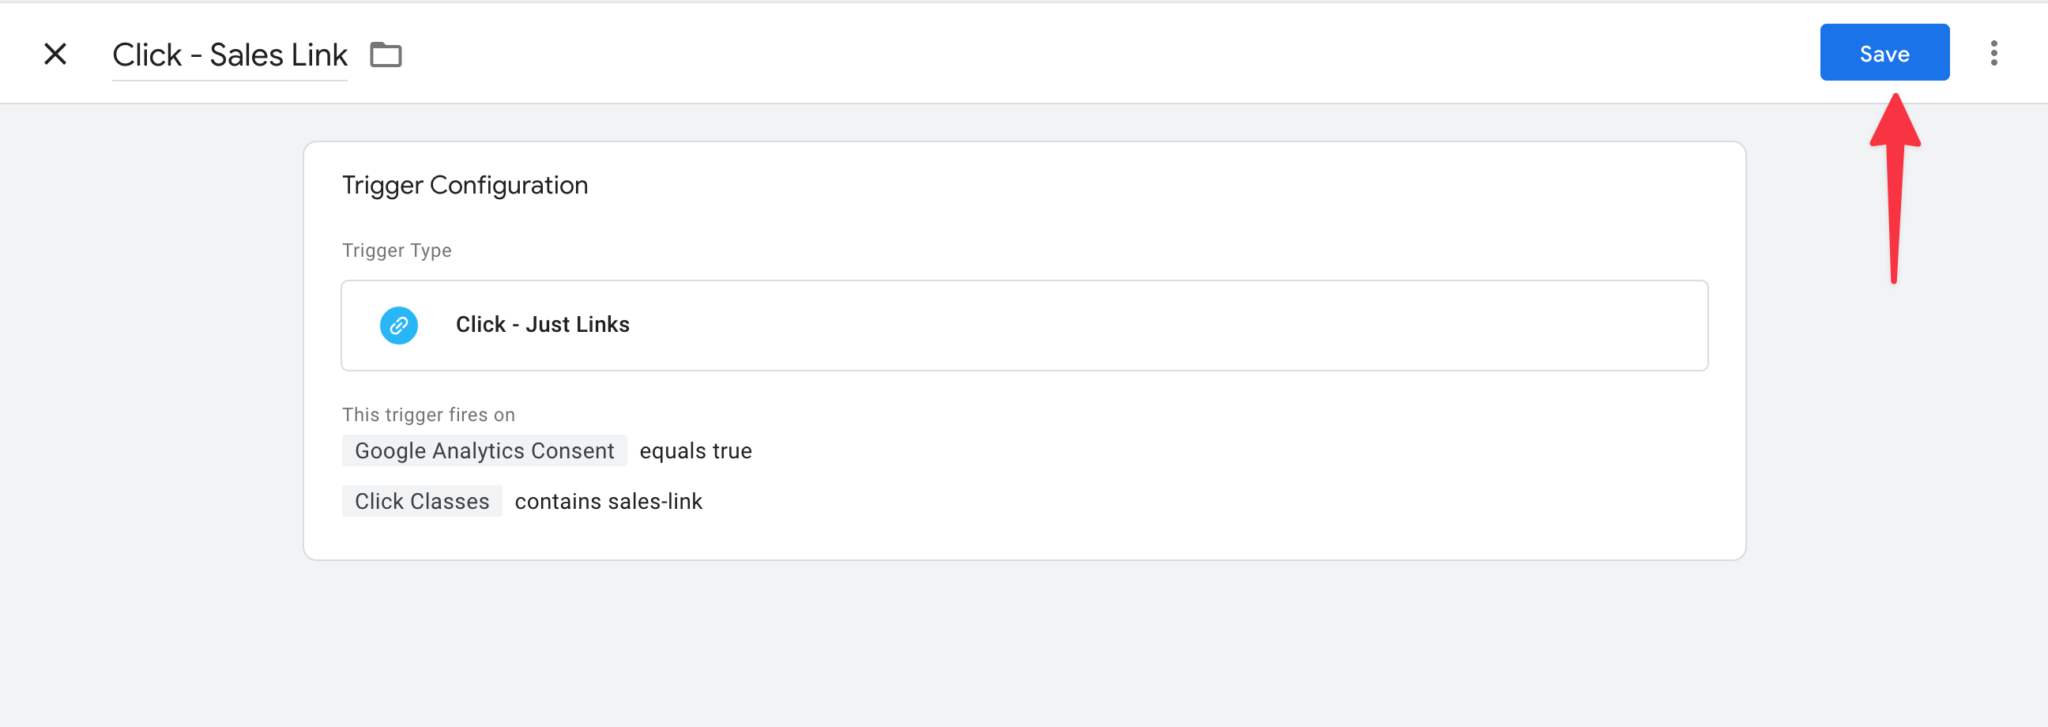
Next, choose "Some Link Clicks" and add the following conditions:
- Click Classes | contains |
sales-link - Google Analytics Consent | equals |
true
If "Click Classes" is not available in the list, click "Choose Built-In Variable" and enable "Click Classes".
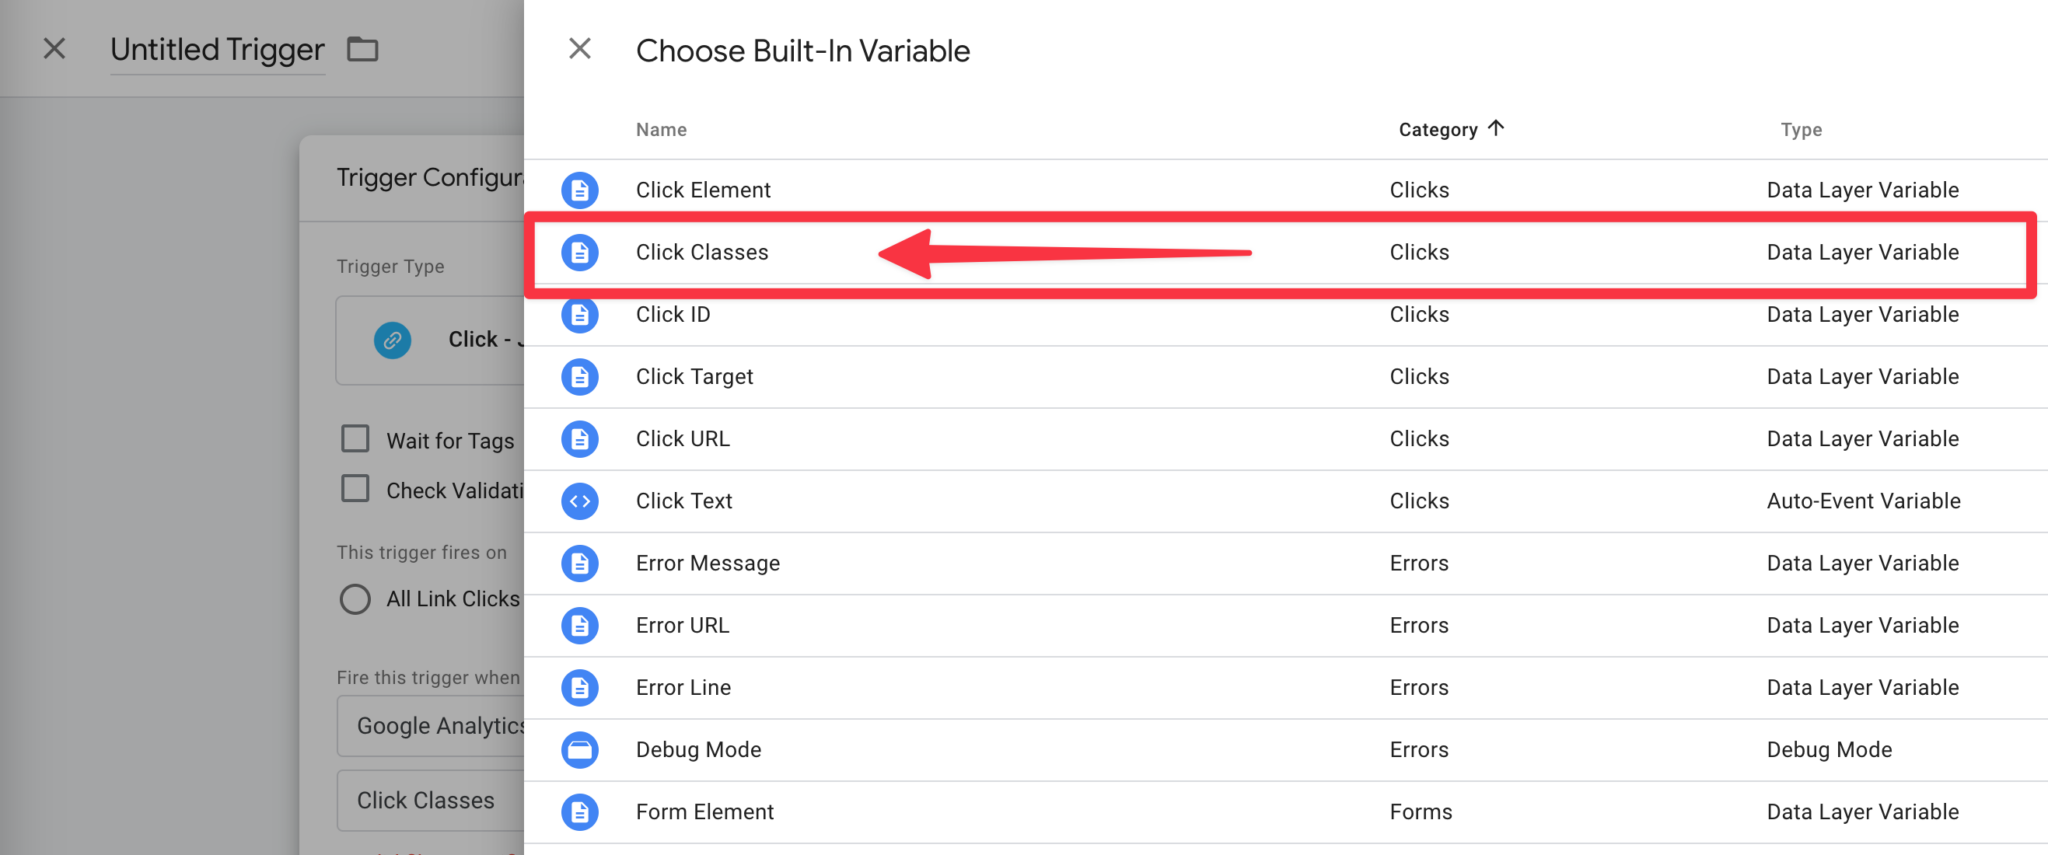
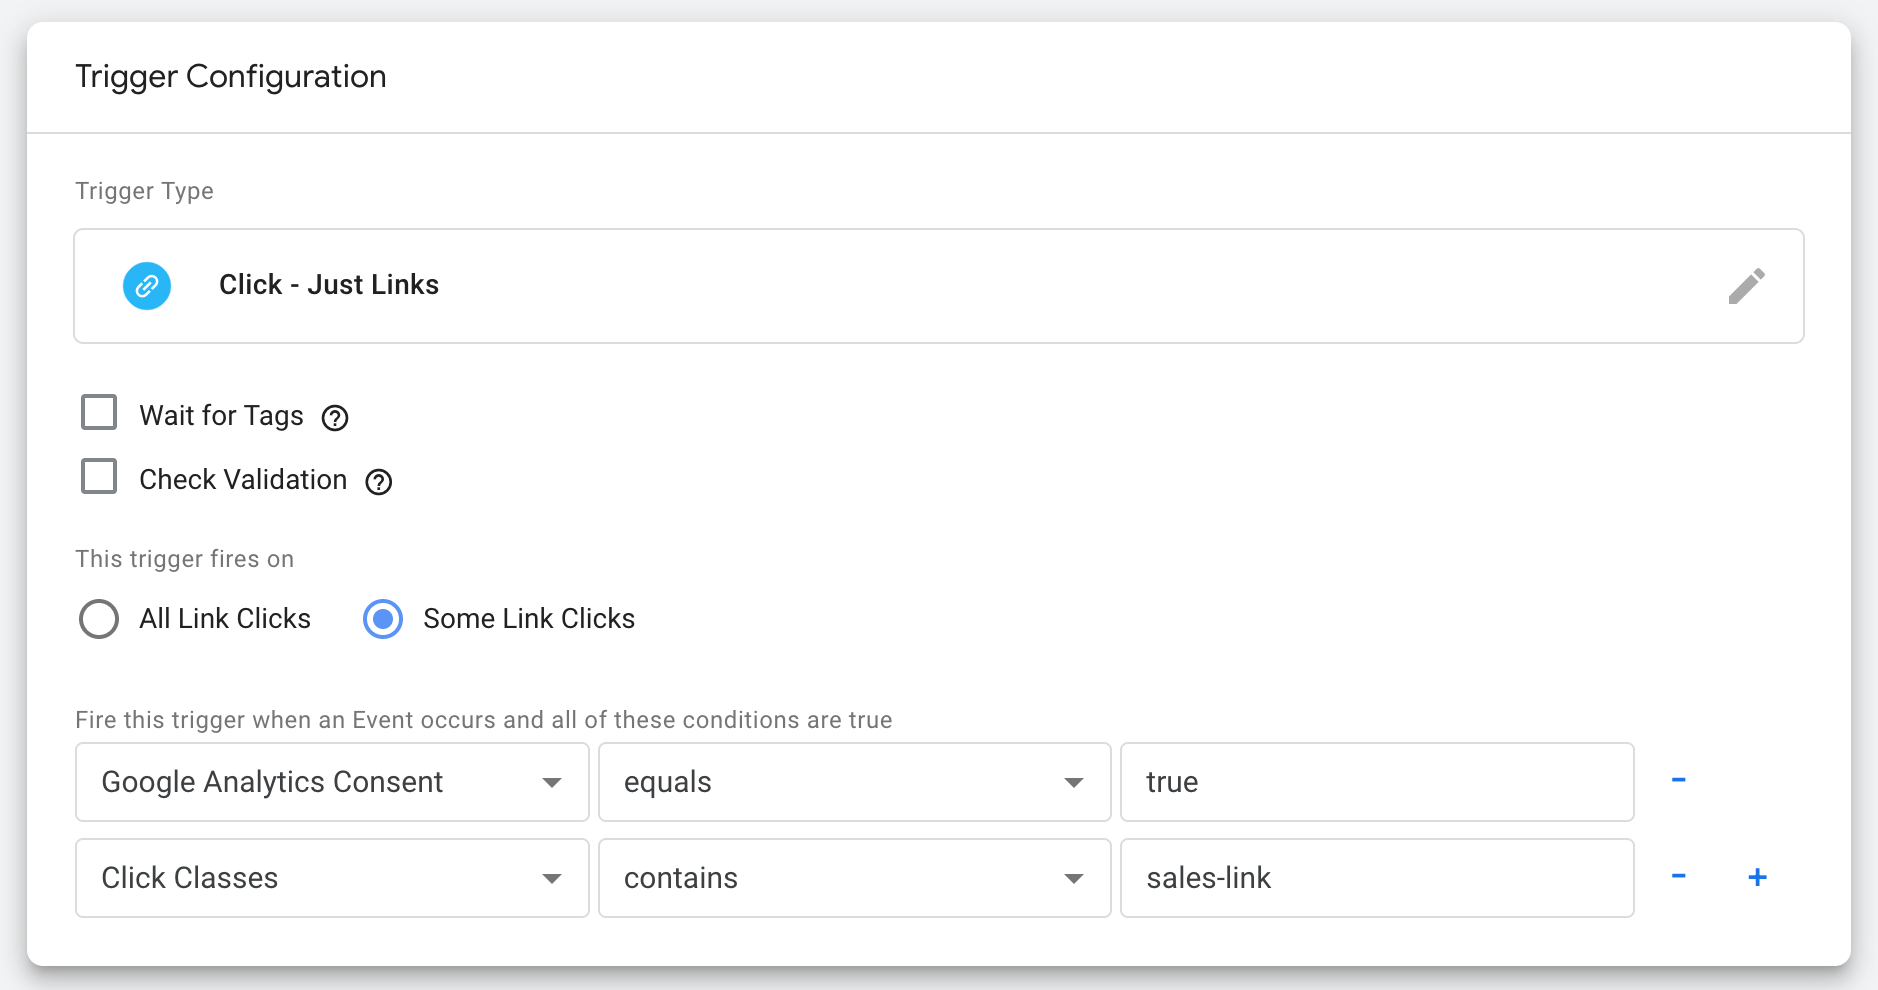
Name the trigger "Click – Sales Link" and click "Save".
Finally, we need to create a tag for the Google Analytics event.
In Google Tag Manager, navigate to "Tags" in the left-hand menu and click "New".
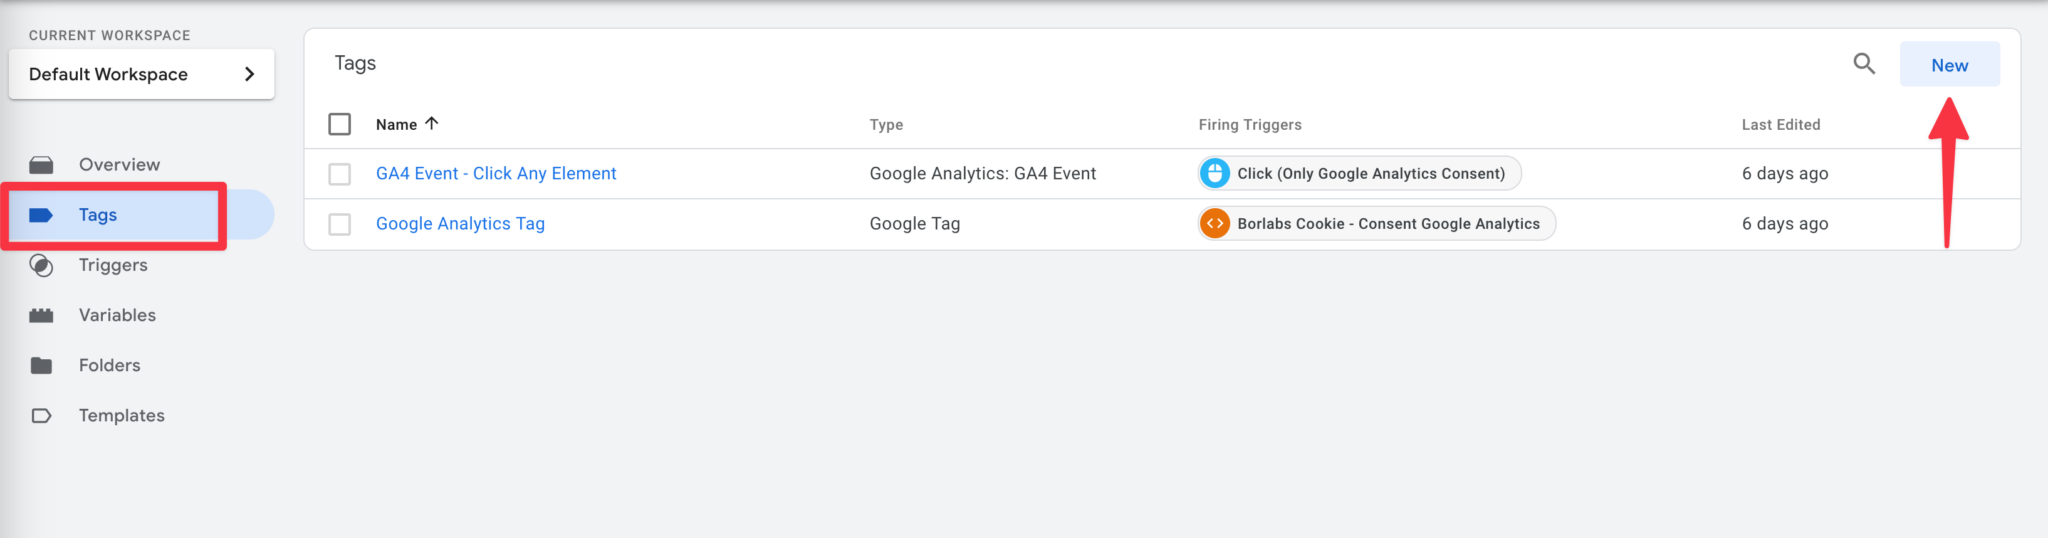
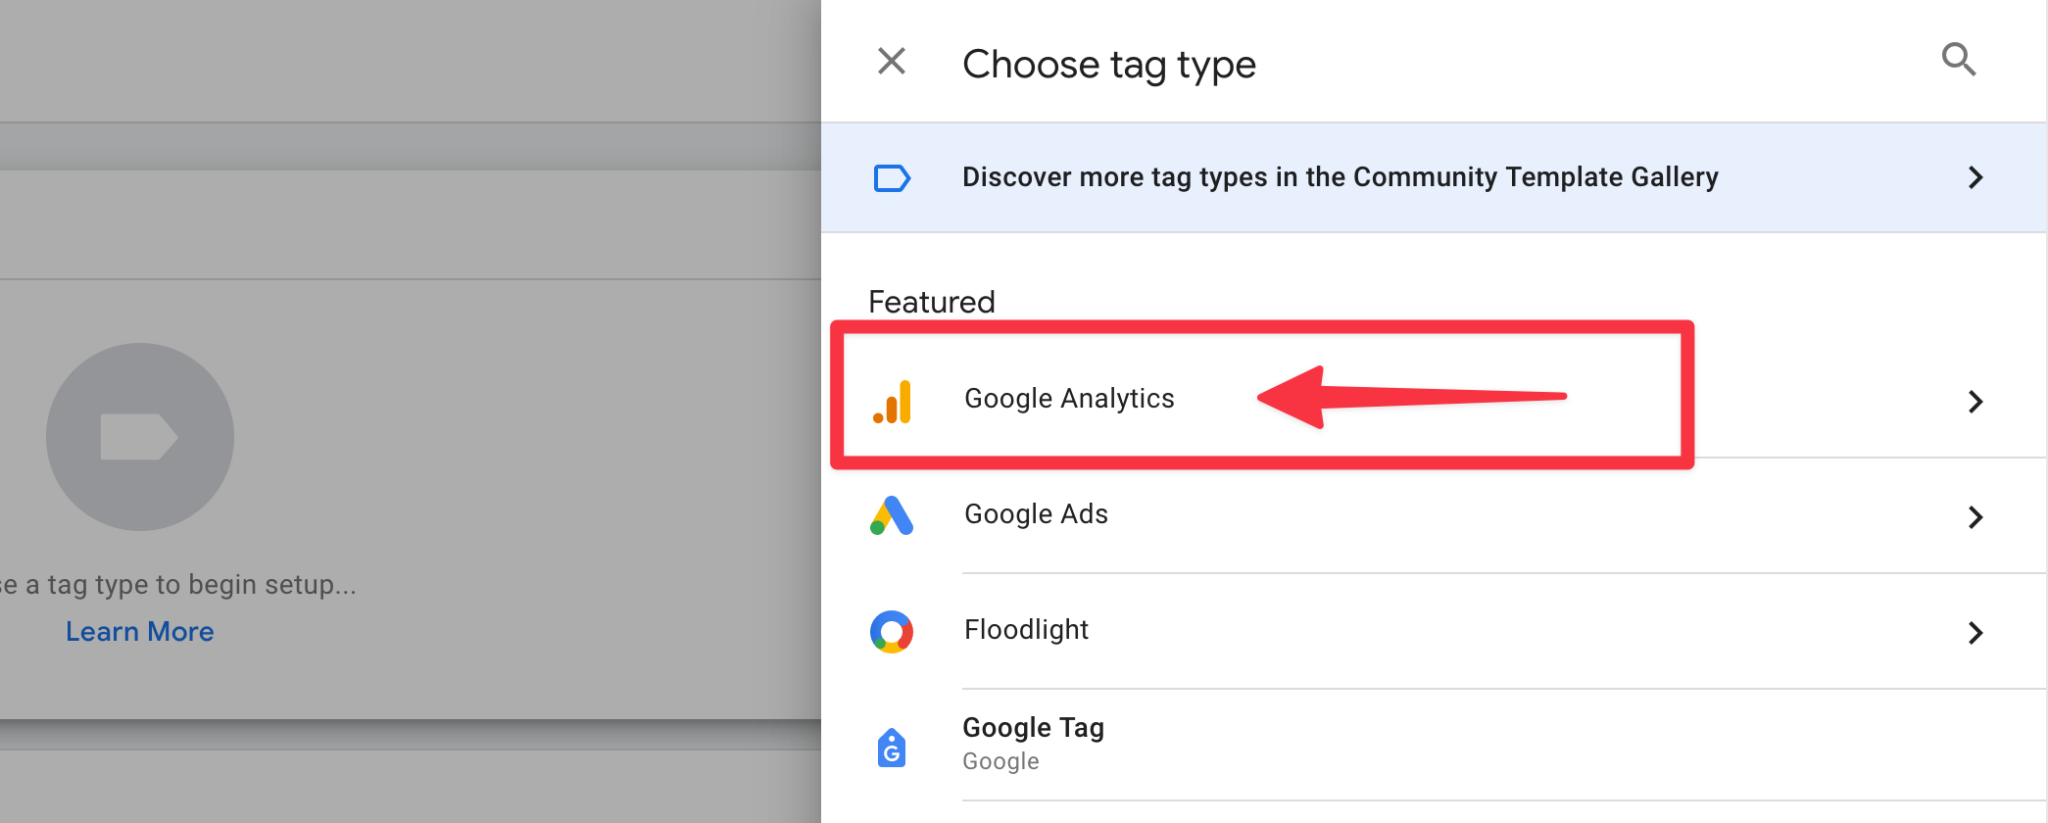
Click "Tag Configuration" and select "Google Analytics" as the tag type.
Under "Tag Configuration", select the "Google Analytics: GA4 Event" tag.
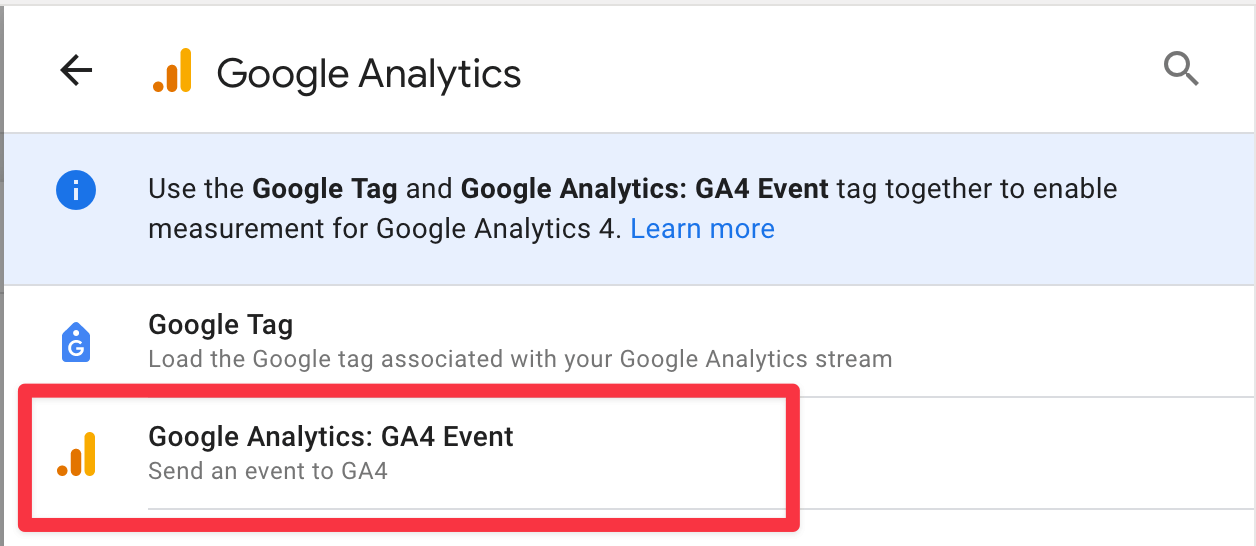
For this example, use sales-link-clicked as the event name. You may choose a different name if desired.
To associate the tag with the trigger created earlier, click "Triggering" and select the "Click – Sales Link" trigger from the list of available triggers.
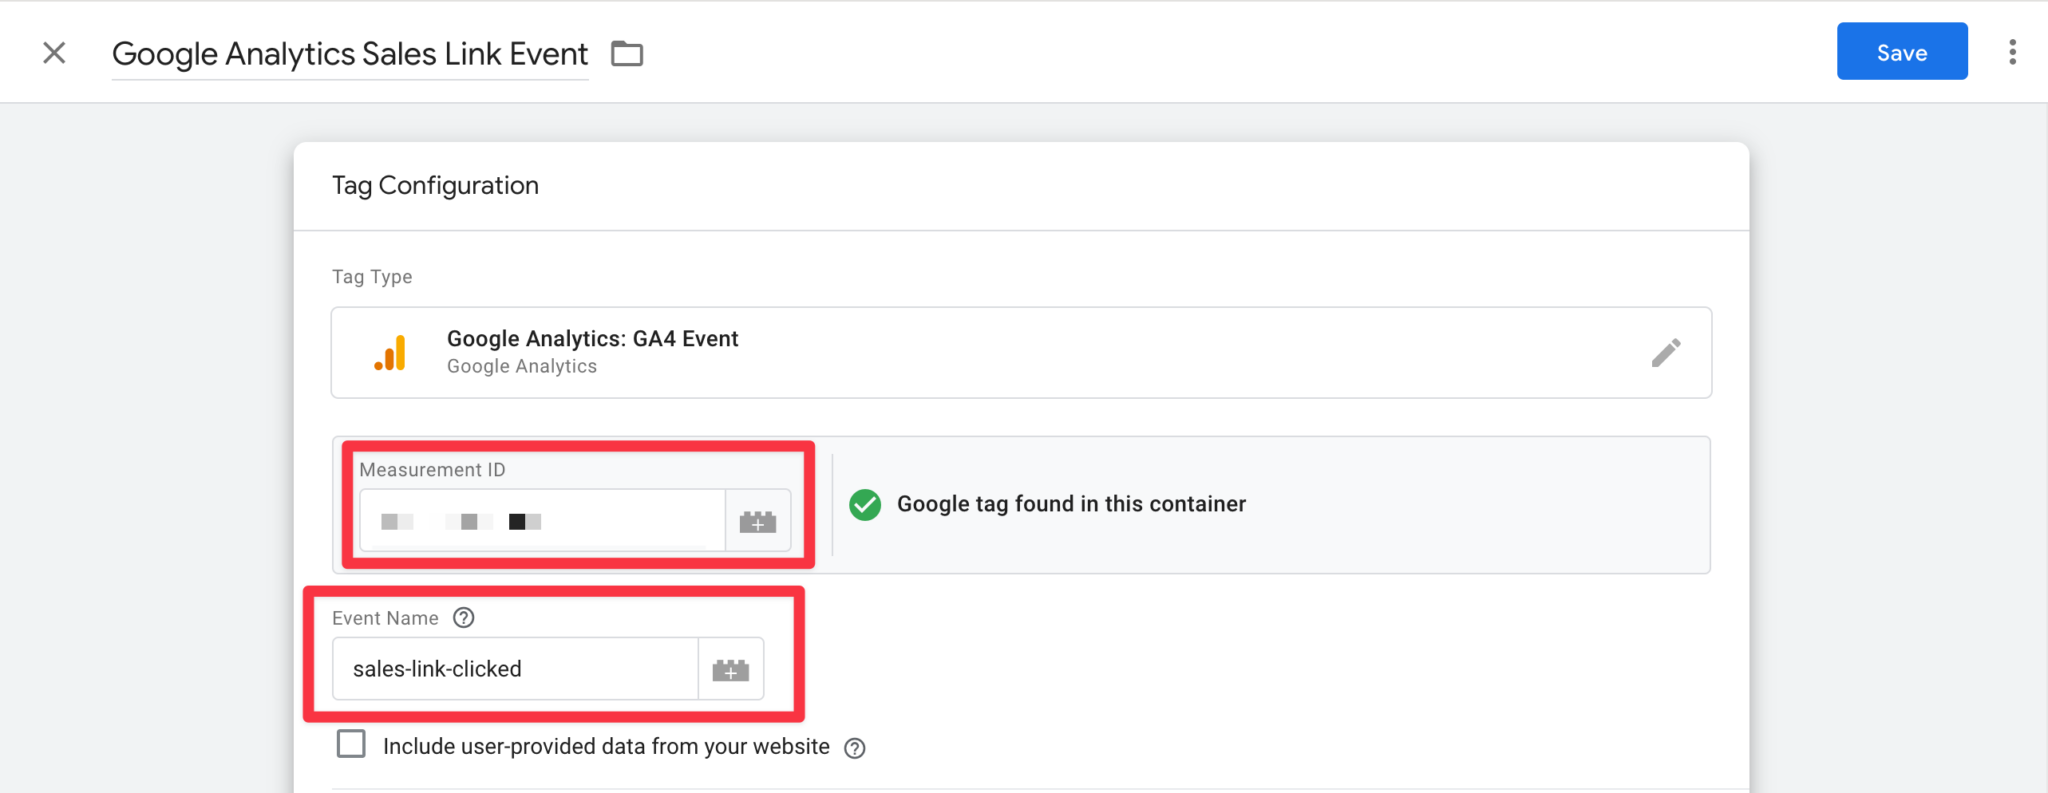
Save the tag using any name you prefer. In this example, we use "Google Analytics Sales Link Event".
Example 2: Enhanced Ecommerce Tracking with the Google Tag Manager Plugin
Follow the guide below to configure Google Tag Manager for Enhanced Ecommerce Tracking: https://gtm4wp.com/google-tag-manager-for-woocommerce/how-to-setup-enhanced-ecommerce-tracking-google-analytics-4-ga4-version.
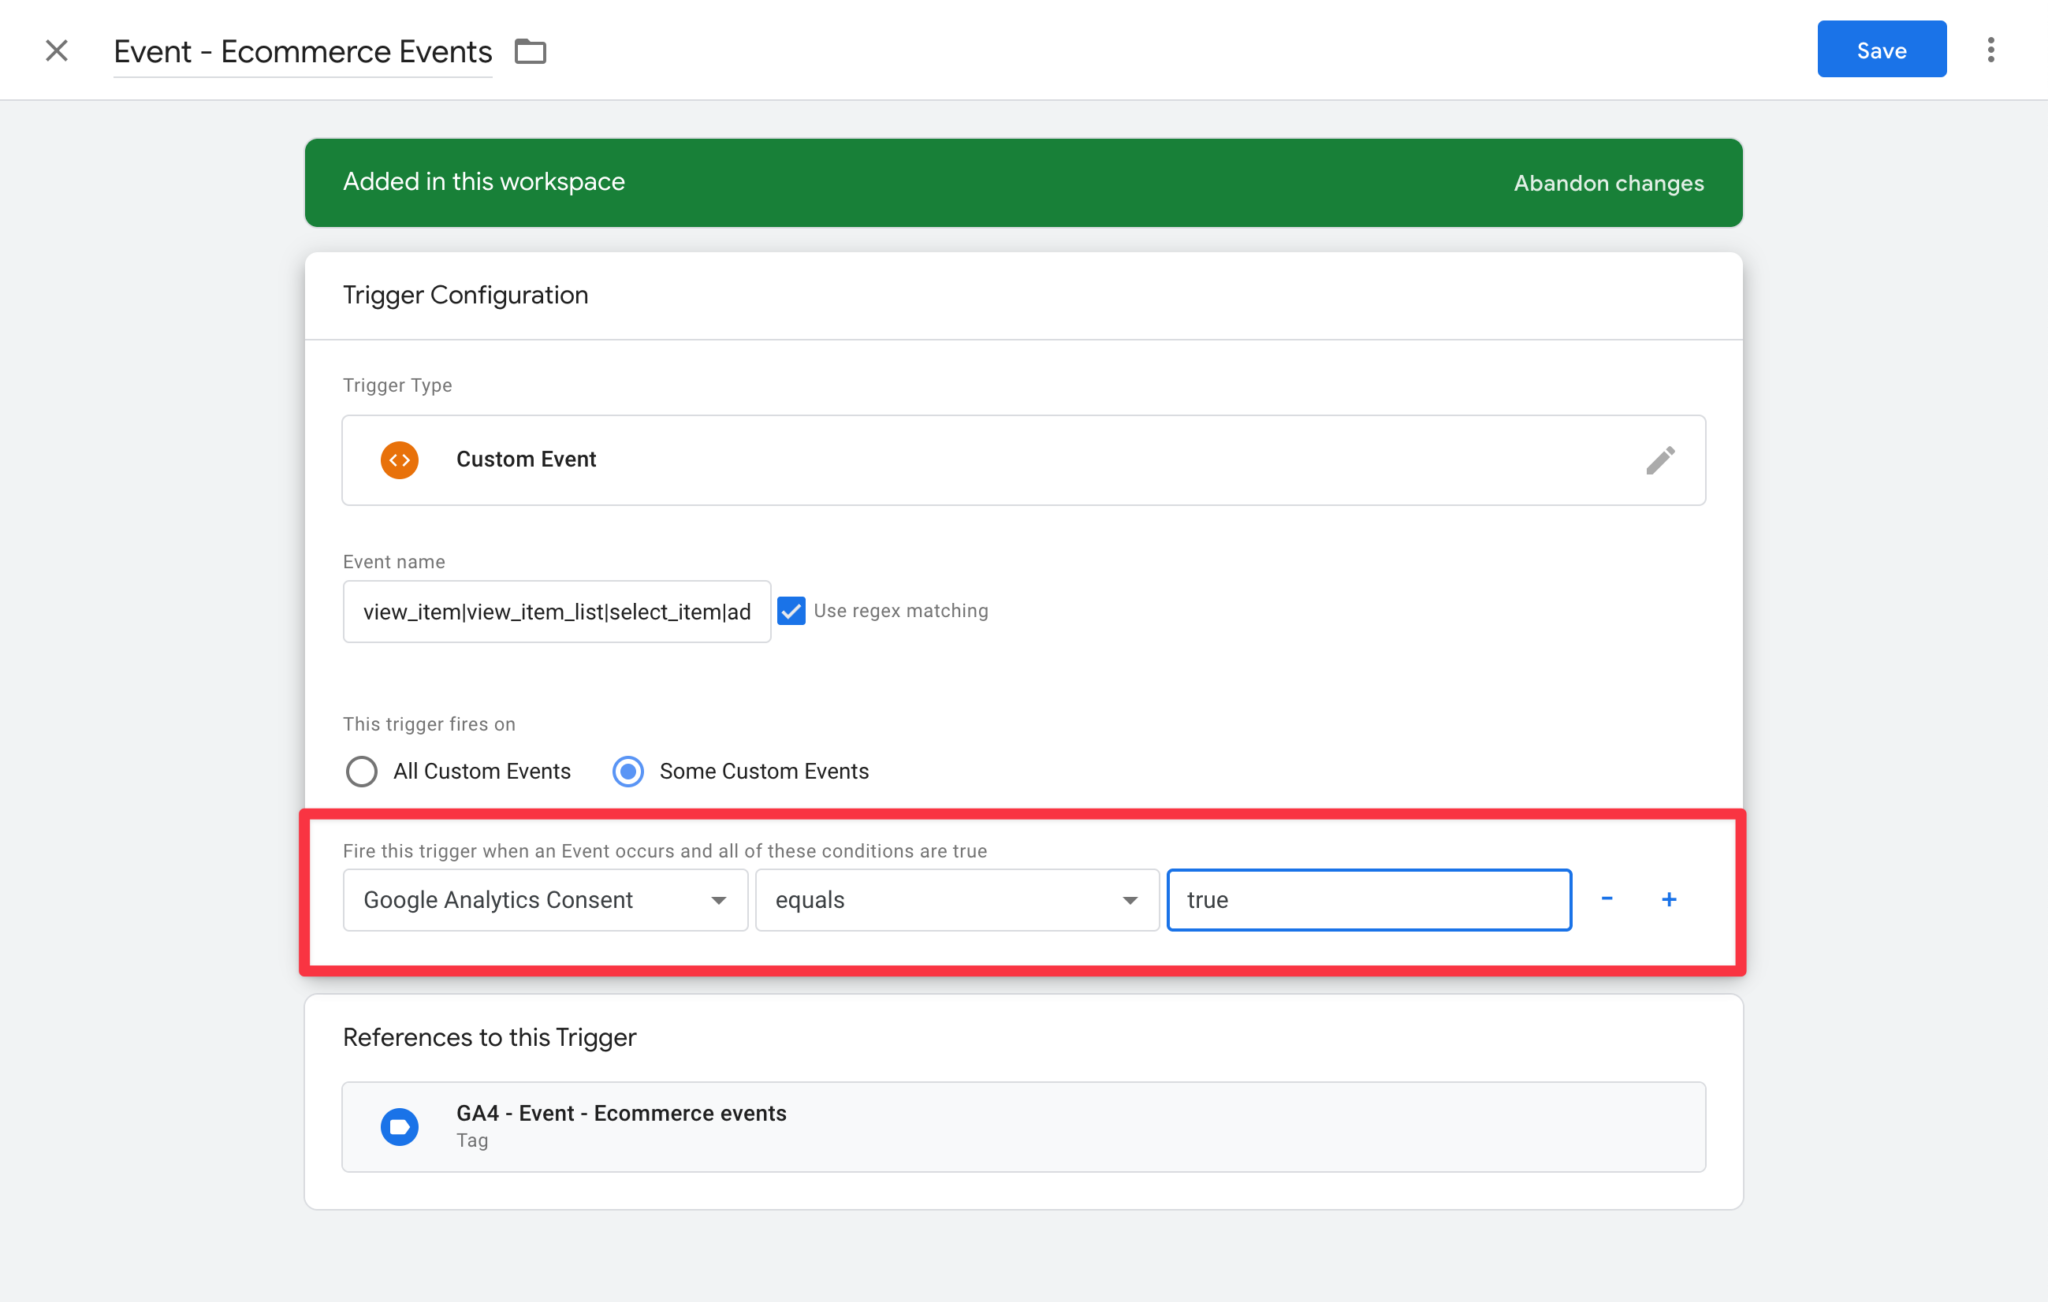
When creating a trigger, make sure to add the following condition: Google Analytics Consent | equals | true
The following example is taken from the guide:
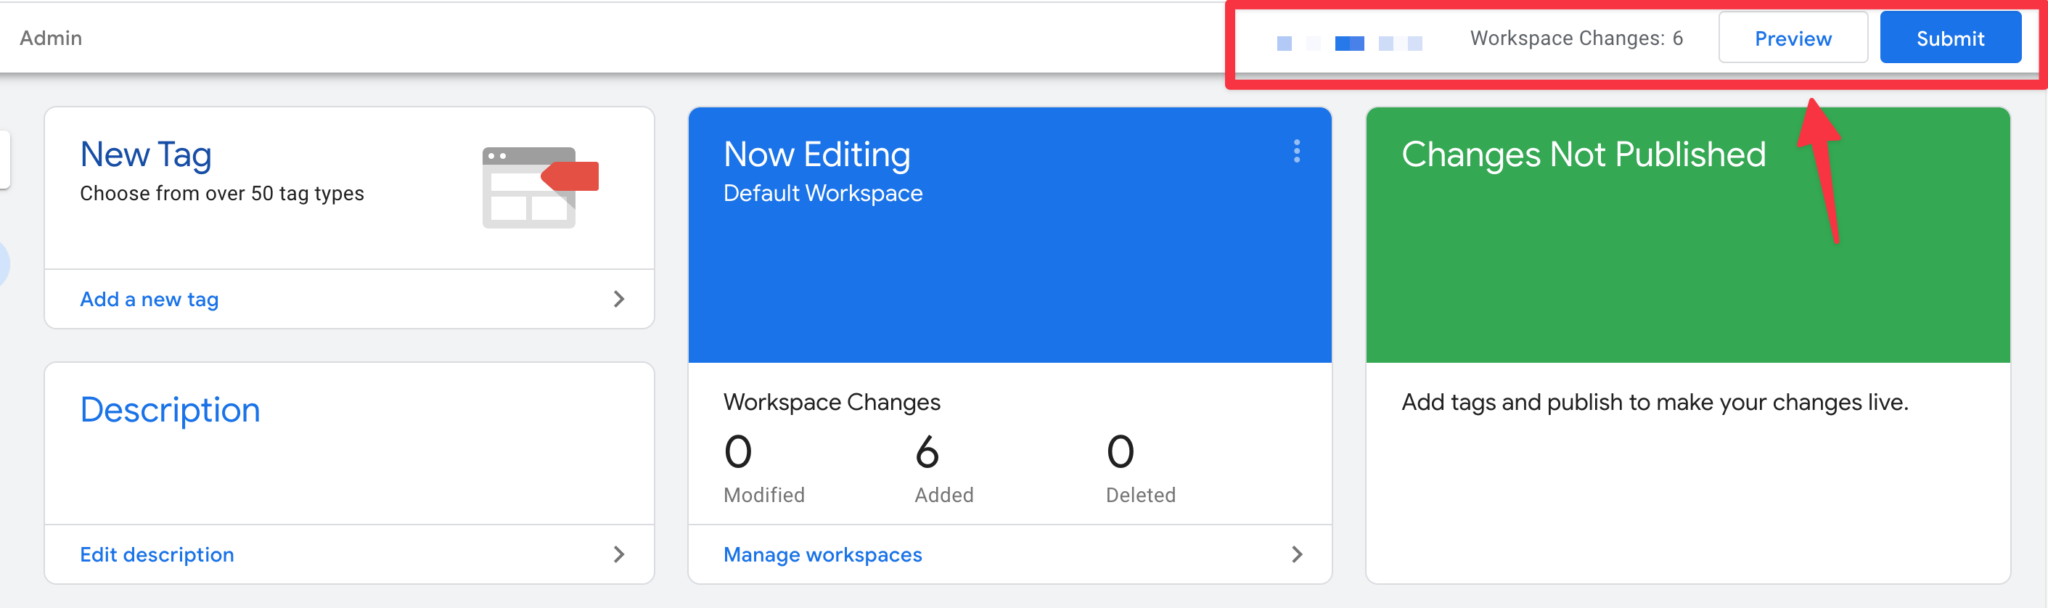
Finally, save your changes by clicking the "Submit" button in the upper-right corner of the navigation.
Tags configured to use Consent Mode can detect whether consent for a storage type such as "Analytics Storage" has been granted. Until consent is given, data is sent to Google Analytics only in an anonymized form and no cookies are set.
b) Advanced Consent Mode
The approach described below is legally controversial because data is sent to Google before consent has been obtained. If you prefer the legally safer option, use "Basic Consent Mode" instead. See "Difference Between Basic Consent Mode and Advanced Consent Mode" for more information.
With "Advanced Consent Mode", the tag can be triggered using a standard "Page View" trigger.
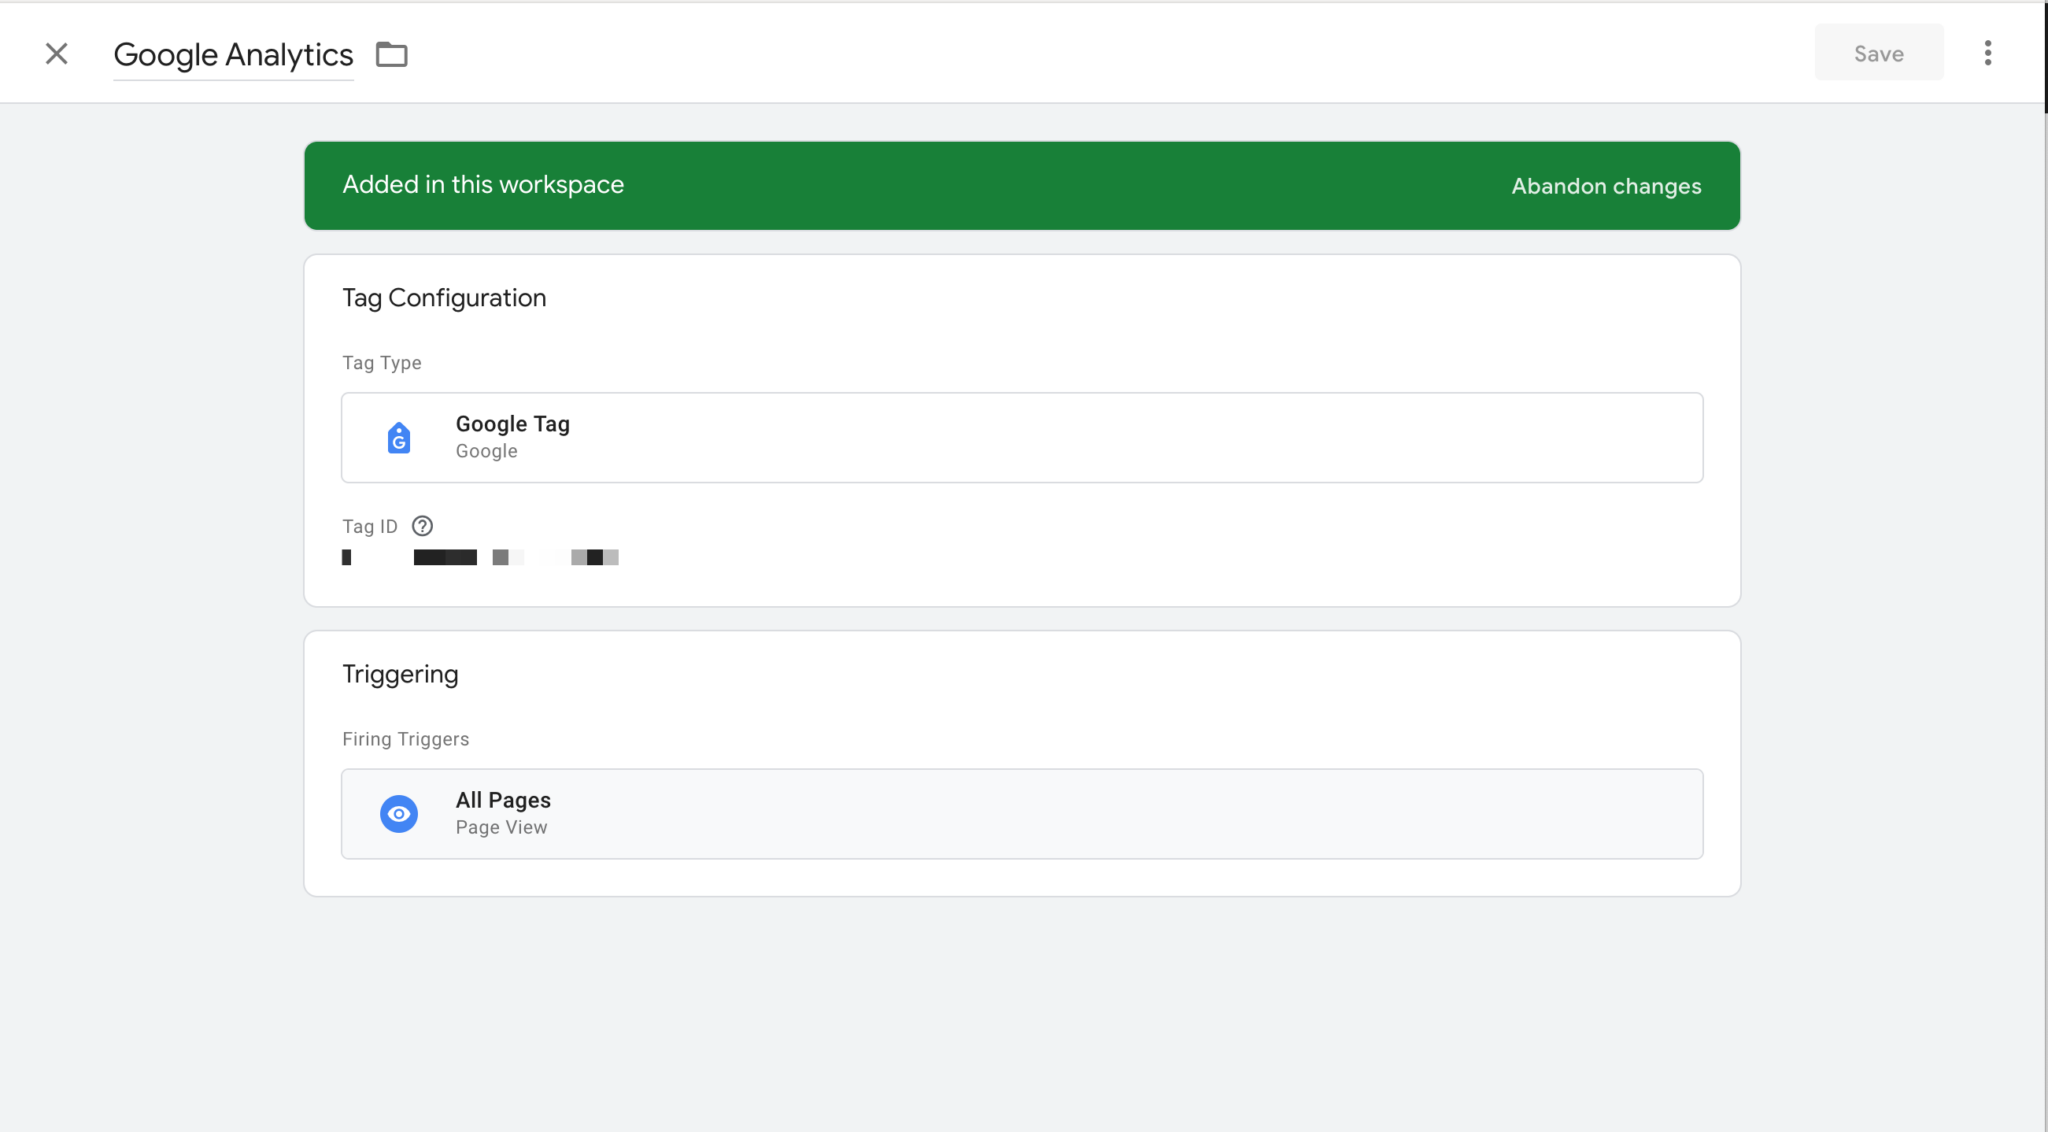
Additional triggers, such as those that send an event to Google Analytics when a button is clicked, do not need to be blocked manually. This also applies when using Enhanced Ecommerce Tracking with the "GTM4WP – A Google Tag Manager (GTM) plugin for WordPress by Thomas Geiger".
Testing with Google Tag Assistant
If you want to verify that your setup is working correctly, you can use Google Tag Assistant to test both your triggers and the execution of your tags.
To do so, click "Preview" at the top of Google Tag Manager to launch Google Tag Assistant.
Enter your website URL into the corresponding field and click the "Connect" button.
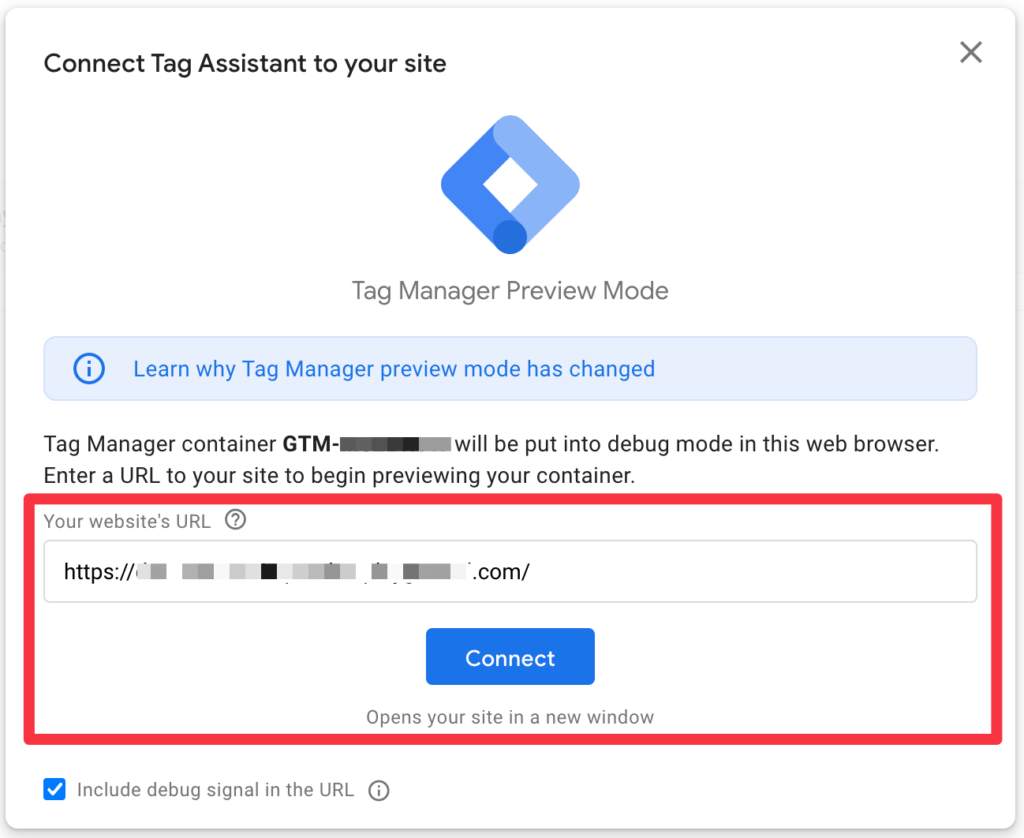
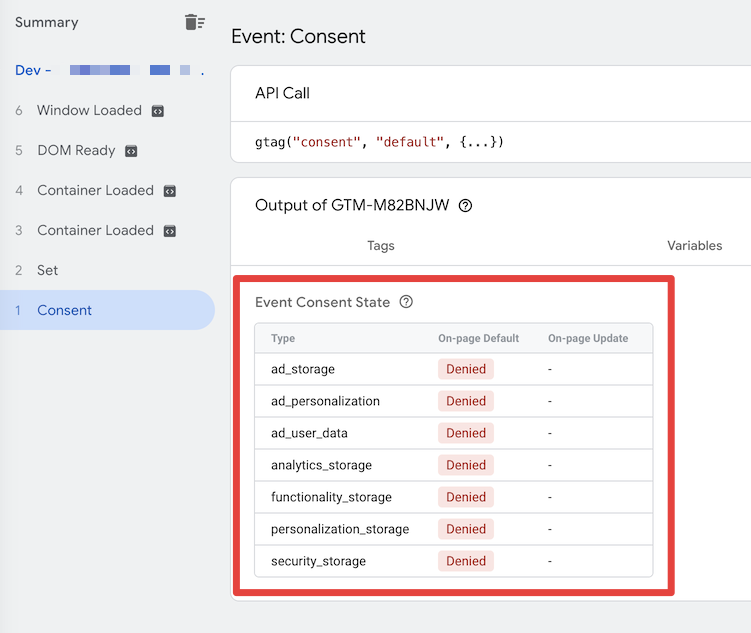
When Consent Mode is enabled, all consent types are set to "Denied" by default until the GTM container has been loaded.
Figure 1 (Consent Mode "Denied")
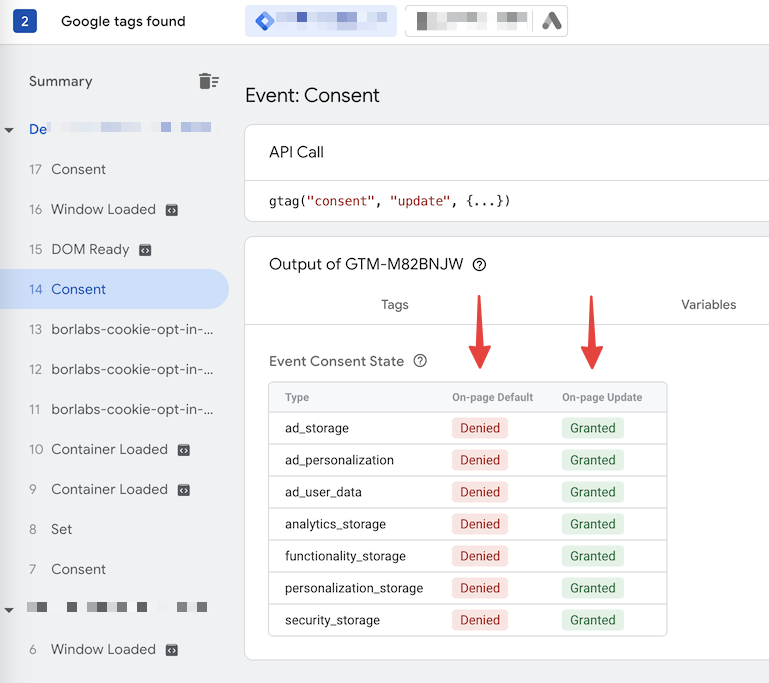
Once consent has been granted through Borlabs Cookie, the consent states will be changed to "Granted" according to your configuration. In the following example, all Service Groups have been accepted.
Figure 2 (Consent Mode "Granted")
Regardless of whether Consent Mode is enabled, you can also view the custom events generated by Borlabs Cookie in Google Tag Assistant.
Each Service has its own custom event, which is only pushed when the corresponding Service has been accepted.
Once everything has been configured correctly, save your settings and publish your Google Tag Manager container by clicking the "Submit" button.